Watch the walkthrough
Store one vial
Captions are available in the player and start turned off so they do not cover the app. The written transcript is below the video.
Read the video transcript
Store cells opens from the dashboard. One vial is selected for this example; a batch of identical vials is the other option.
Scan or type the barcode. A vial with no label can be marked as having none, rather than given a made-up one.
Origin is required. Choose Another vial and pick the parent from those recently taken out.
Choosing a parent fixes the cell line to match it, and moves the passage on by one. A daughter cannot sit at an earlier passage than the vial it came from.
CryoIndex suggests the first free position beside the same line, and the grid shows what the box already holds.
Name the person doing the work, then store the vial.
The grid advances to the next free position, and the dashboard count rises from three vials to four.
Narration uses an AI-generated voice.
The storage rule
Confirm the position as the vial is physically placed.
A suggested or next-free position is an aid, not evidence of where a vial went. The operator must keep the on-screen position and the physical box aligned.
From the dashboard
Open Store cells and choose the right mode.
Use when entering a single vial or when the next vial has different biological details.
Use when the cell type, passage, freeze date, optional details, destination box, and operator are shared.
Do not use a batch merely because several vials are nearby. If a shared value is different, store that vial separately or start a new batch.
One vial · Identity
Record what identifies this vial.
- Scan or type the barcode. If the vial genuinely has no barcode, select This vial has no barcode.
- Answer Origin. Choose Another vial and pick the parent when these cells were frozen down from something already recorded; New to the lab for purchased stock, a gift, or a primary isolation; Not recorded when nobody knows. It cannot be left blank, because no later test can identify the exact vial these cells came from.
- Choose the cell type. A new type can be added from the same menu when needed. Choosing a parent above fixes this to match it.
- Confirm the passage number and date frozen. Change the prefilled date if the vial was not frozen today.
- Open More about this vial only for details the lab actually tracks, such as lot, source, donor, viability, freeze medium, or a configured custom field.
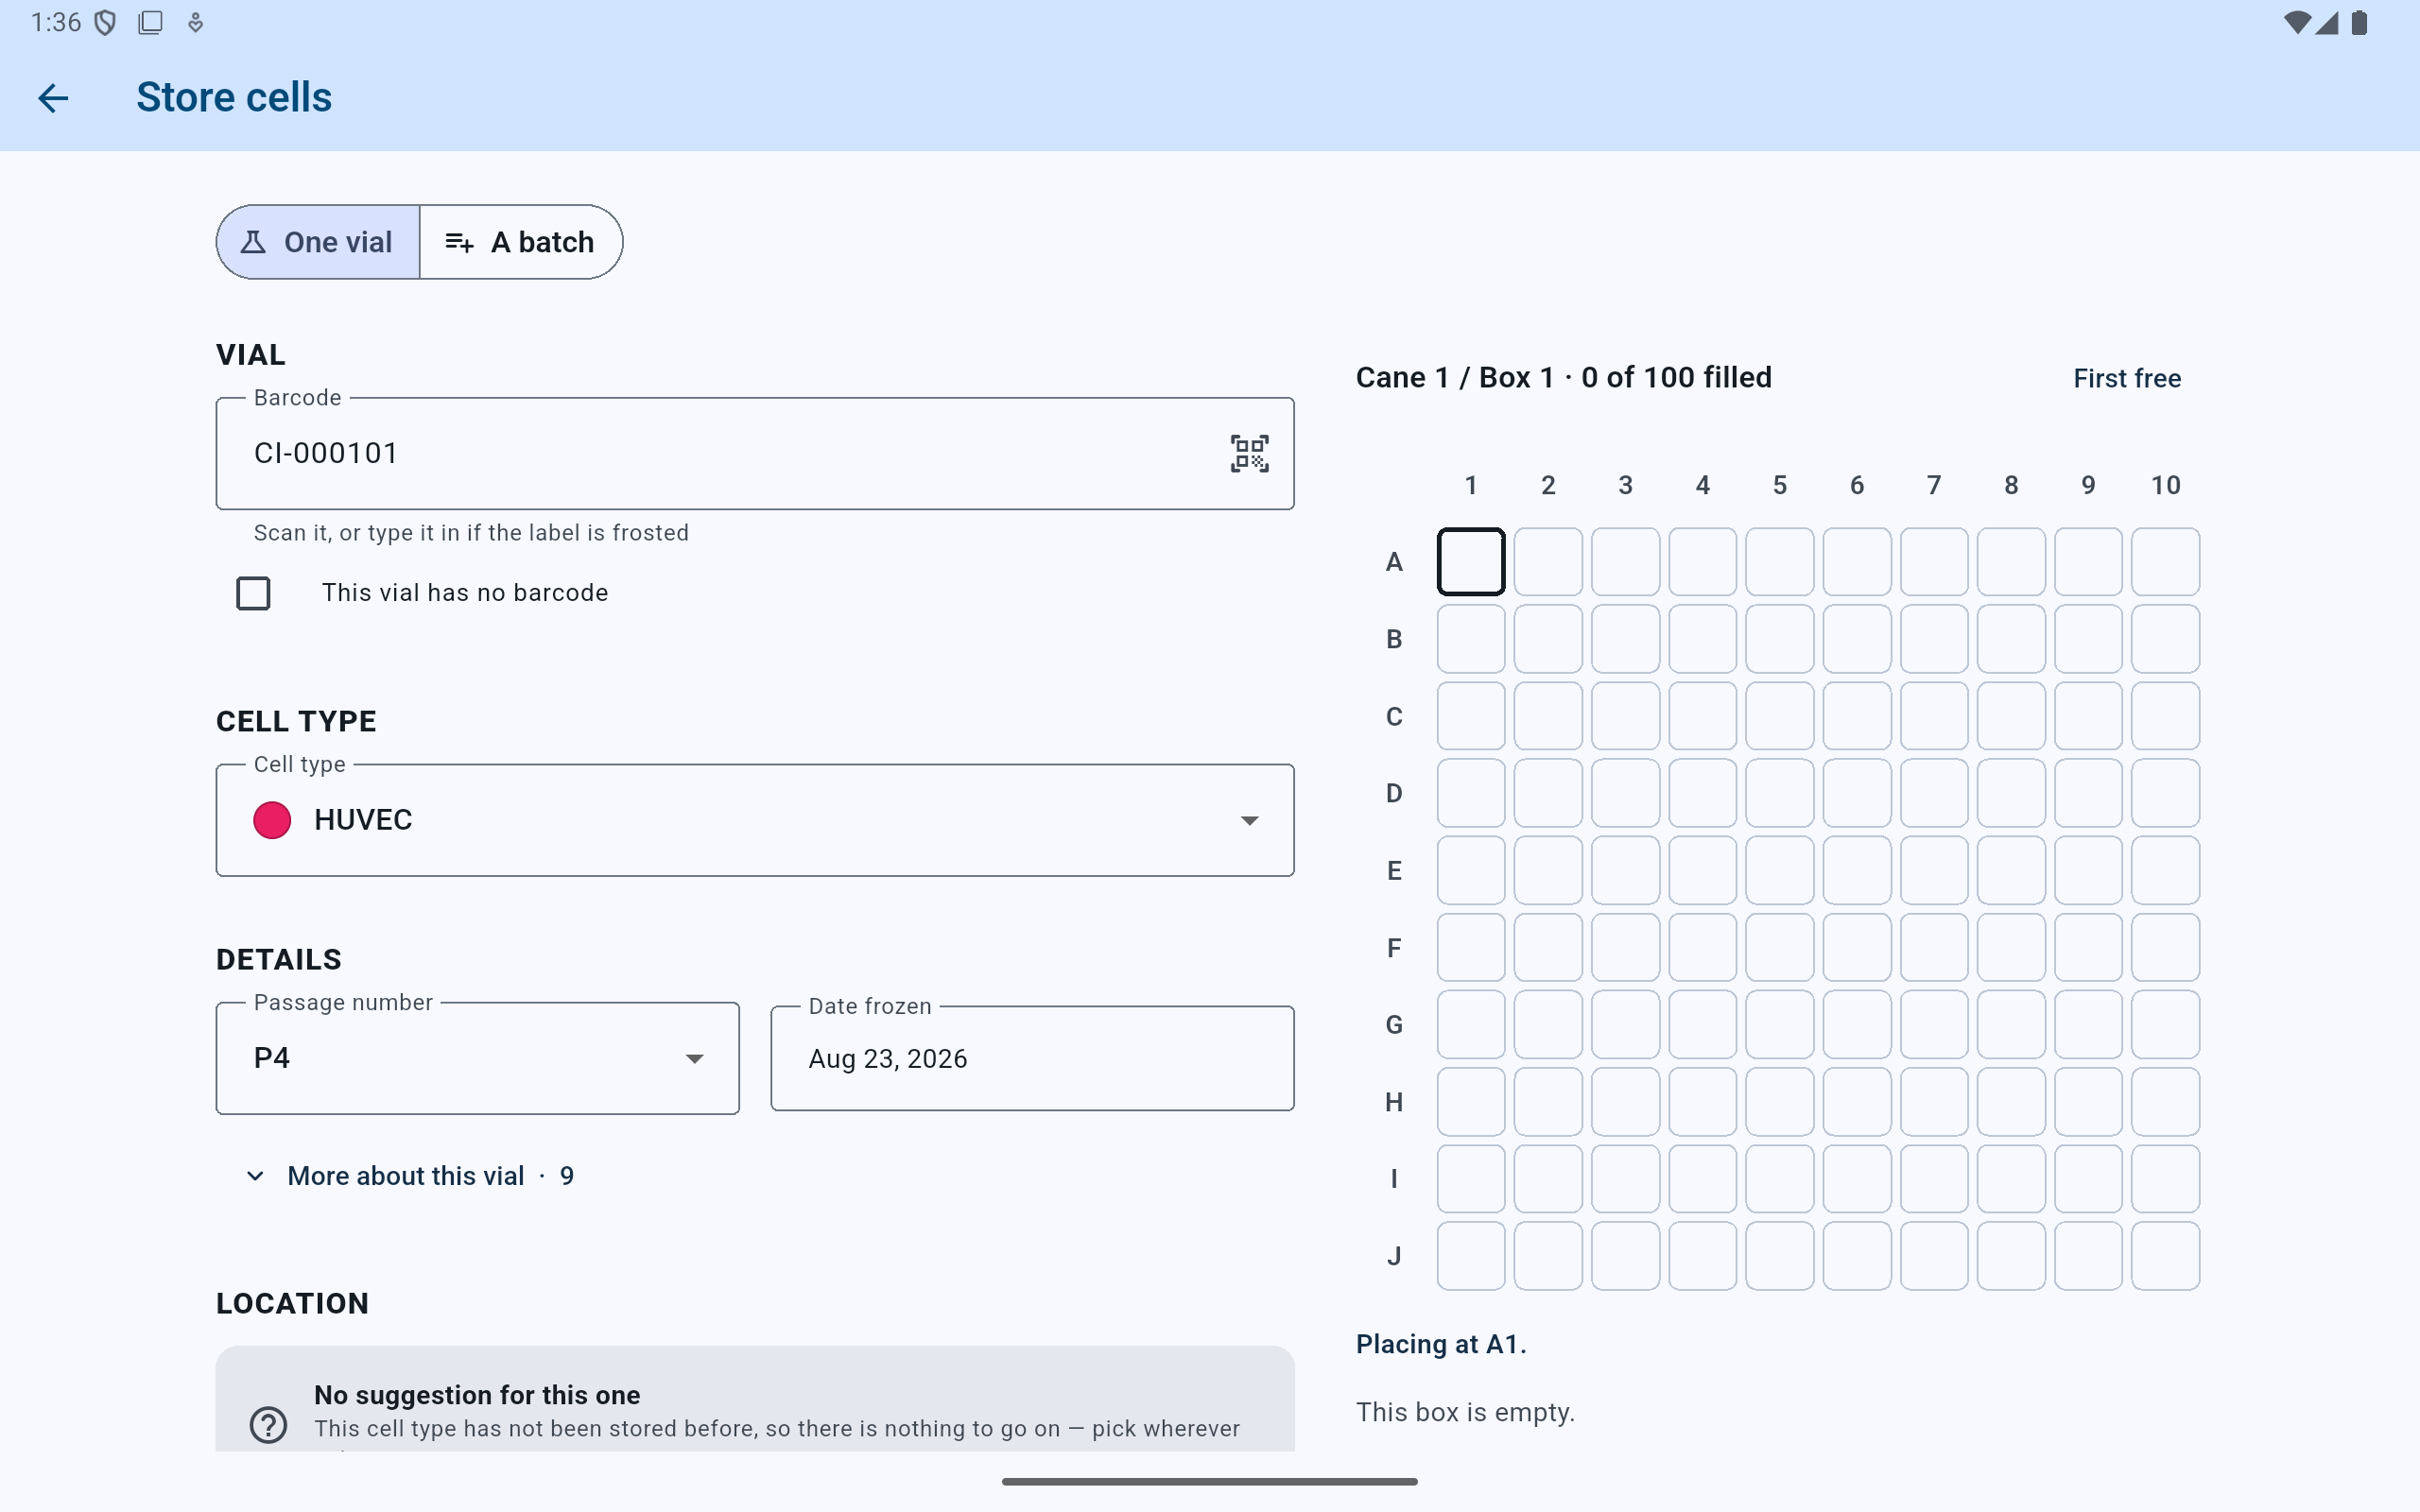
The position grid remains visible while the identifying details are entered.
- Scan or type the barcode, or explicitly mark the vial as unbarcoded.
- Say where the cells came from. Origin comes before the biological details and cannot be left blank.
- Choose the cell type and confirm the passage and freeze date.
- A dark outline shows the position currently selected for this vial.
One vial · Location and attribution
Choose the physical position, then name the operator.
- Choose the correct cane and box.
- Select a free grid position. CryoIndex will refuse a position already occupied in the record.
- Choose Performed by to preserve who carried out the storage action.
- Read the complete address again before selecting Store this vial.
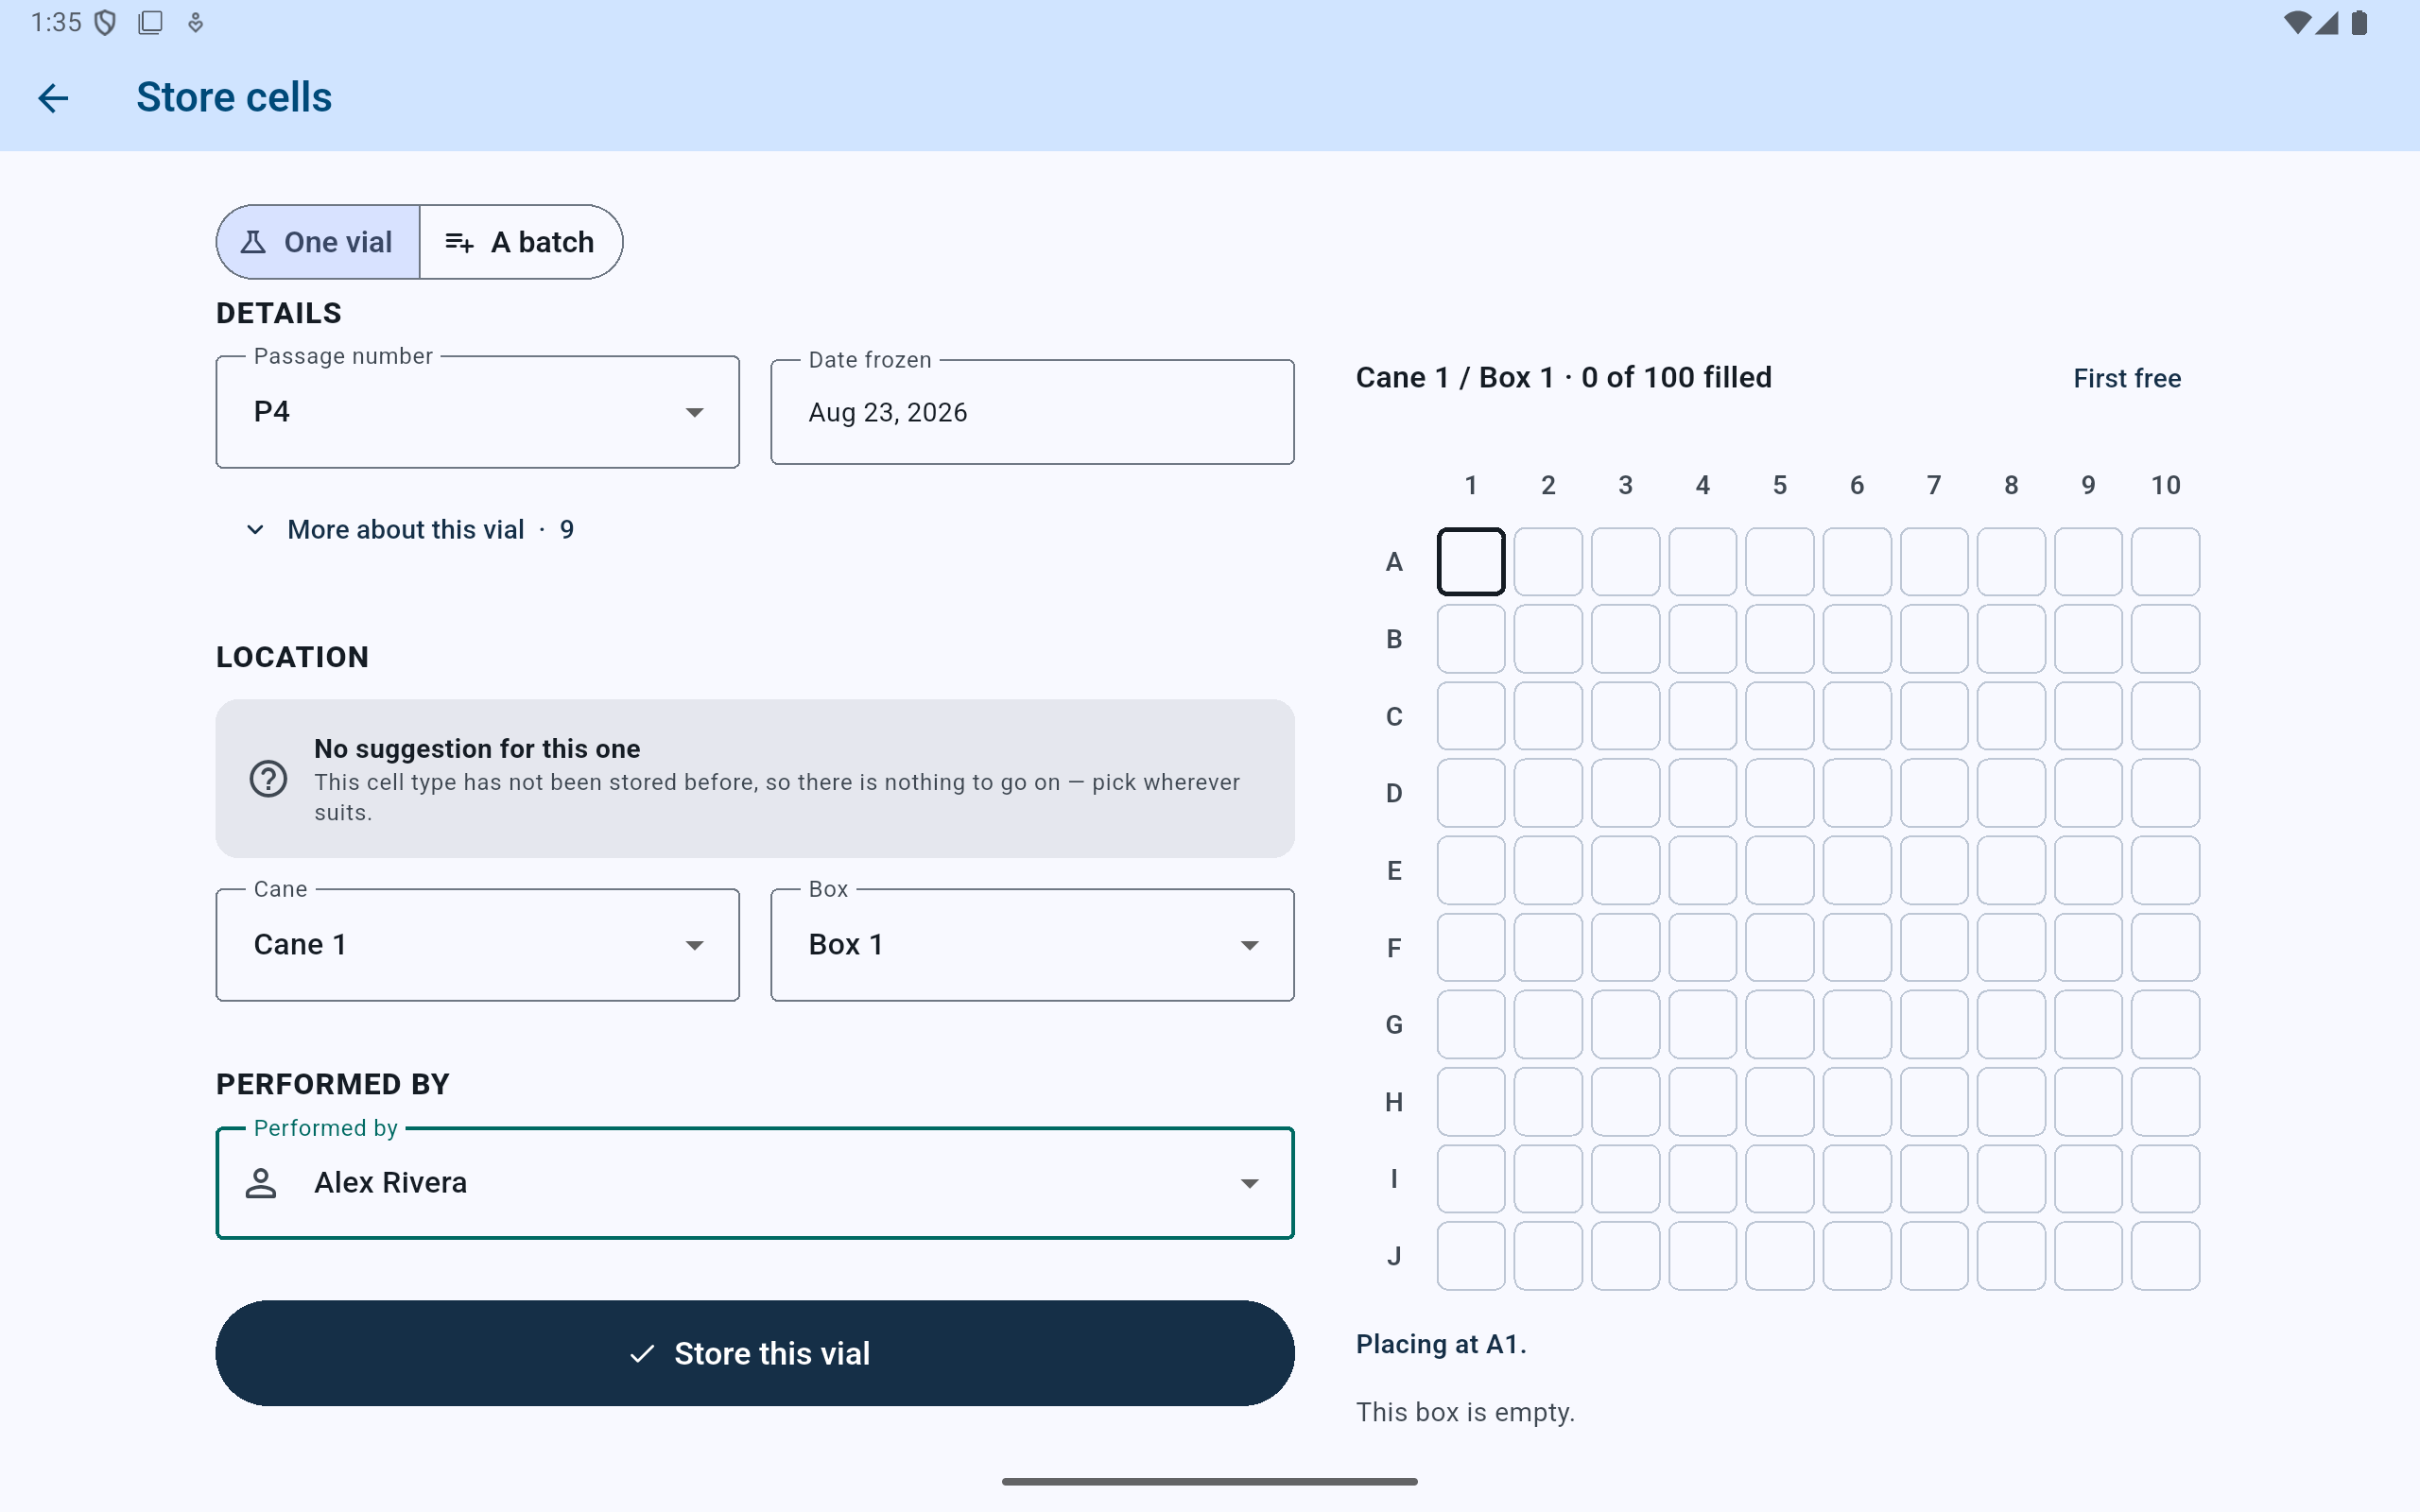
The example will be stored at Cane 1, Box 1, position A1 by Maya Chen.
- Choose the cane and box that are physically in use.
- Choose the person who performed the action.
- Save only after the physical vial and on-screen position agree.
After saving
Read the confirmation and verify the box changed.
The green confirmation names the barcode and position that were stored. The occupied position appears in the cell-type color, and CryoIndex prepares the form for another vial. When it has enough history, it may suggest a nearby position for the same cell type.
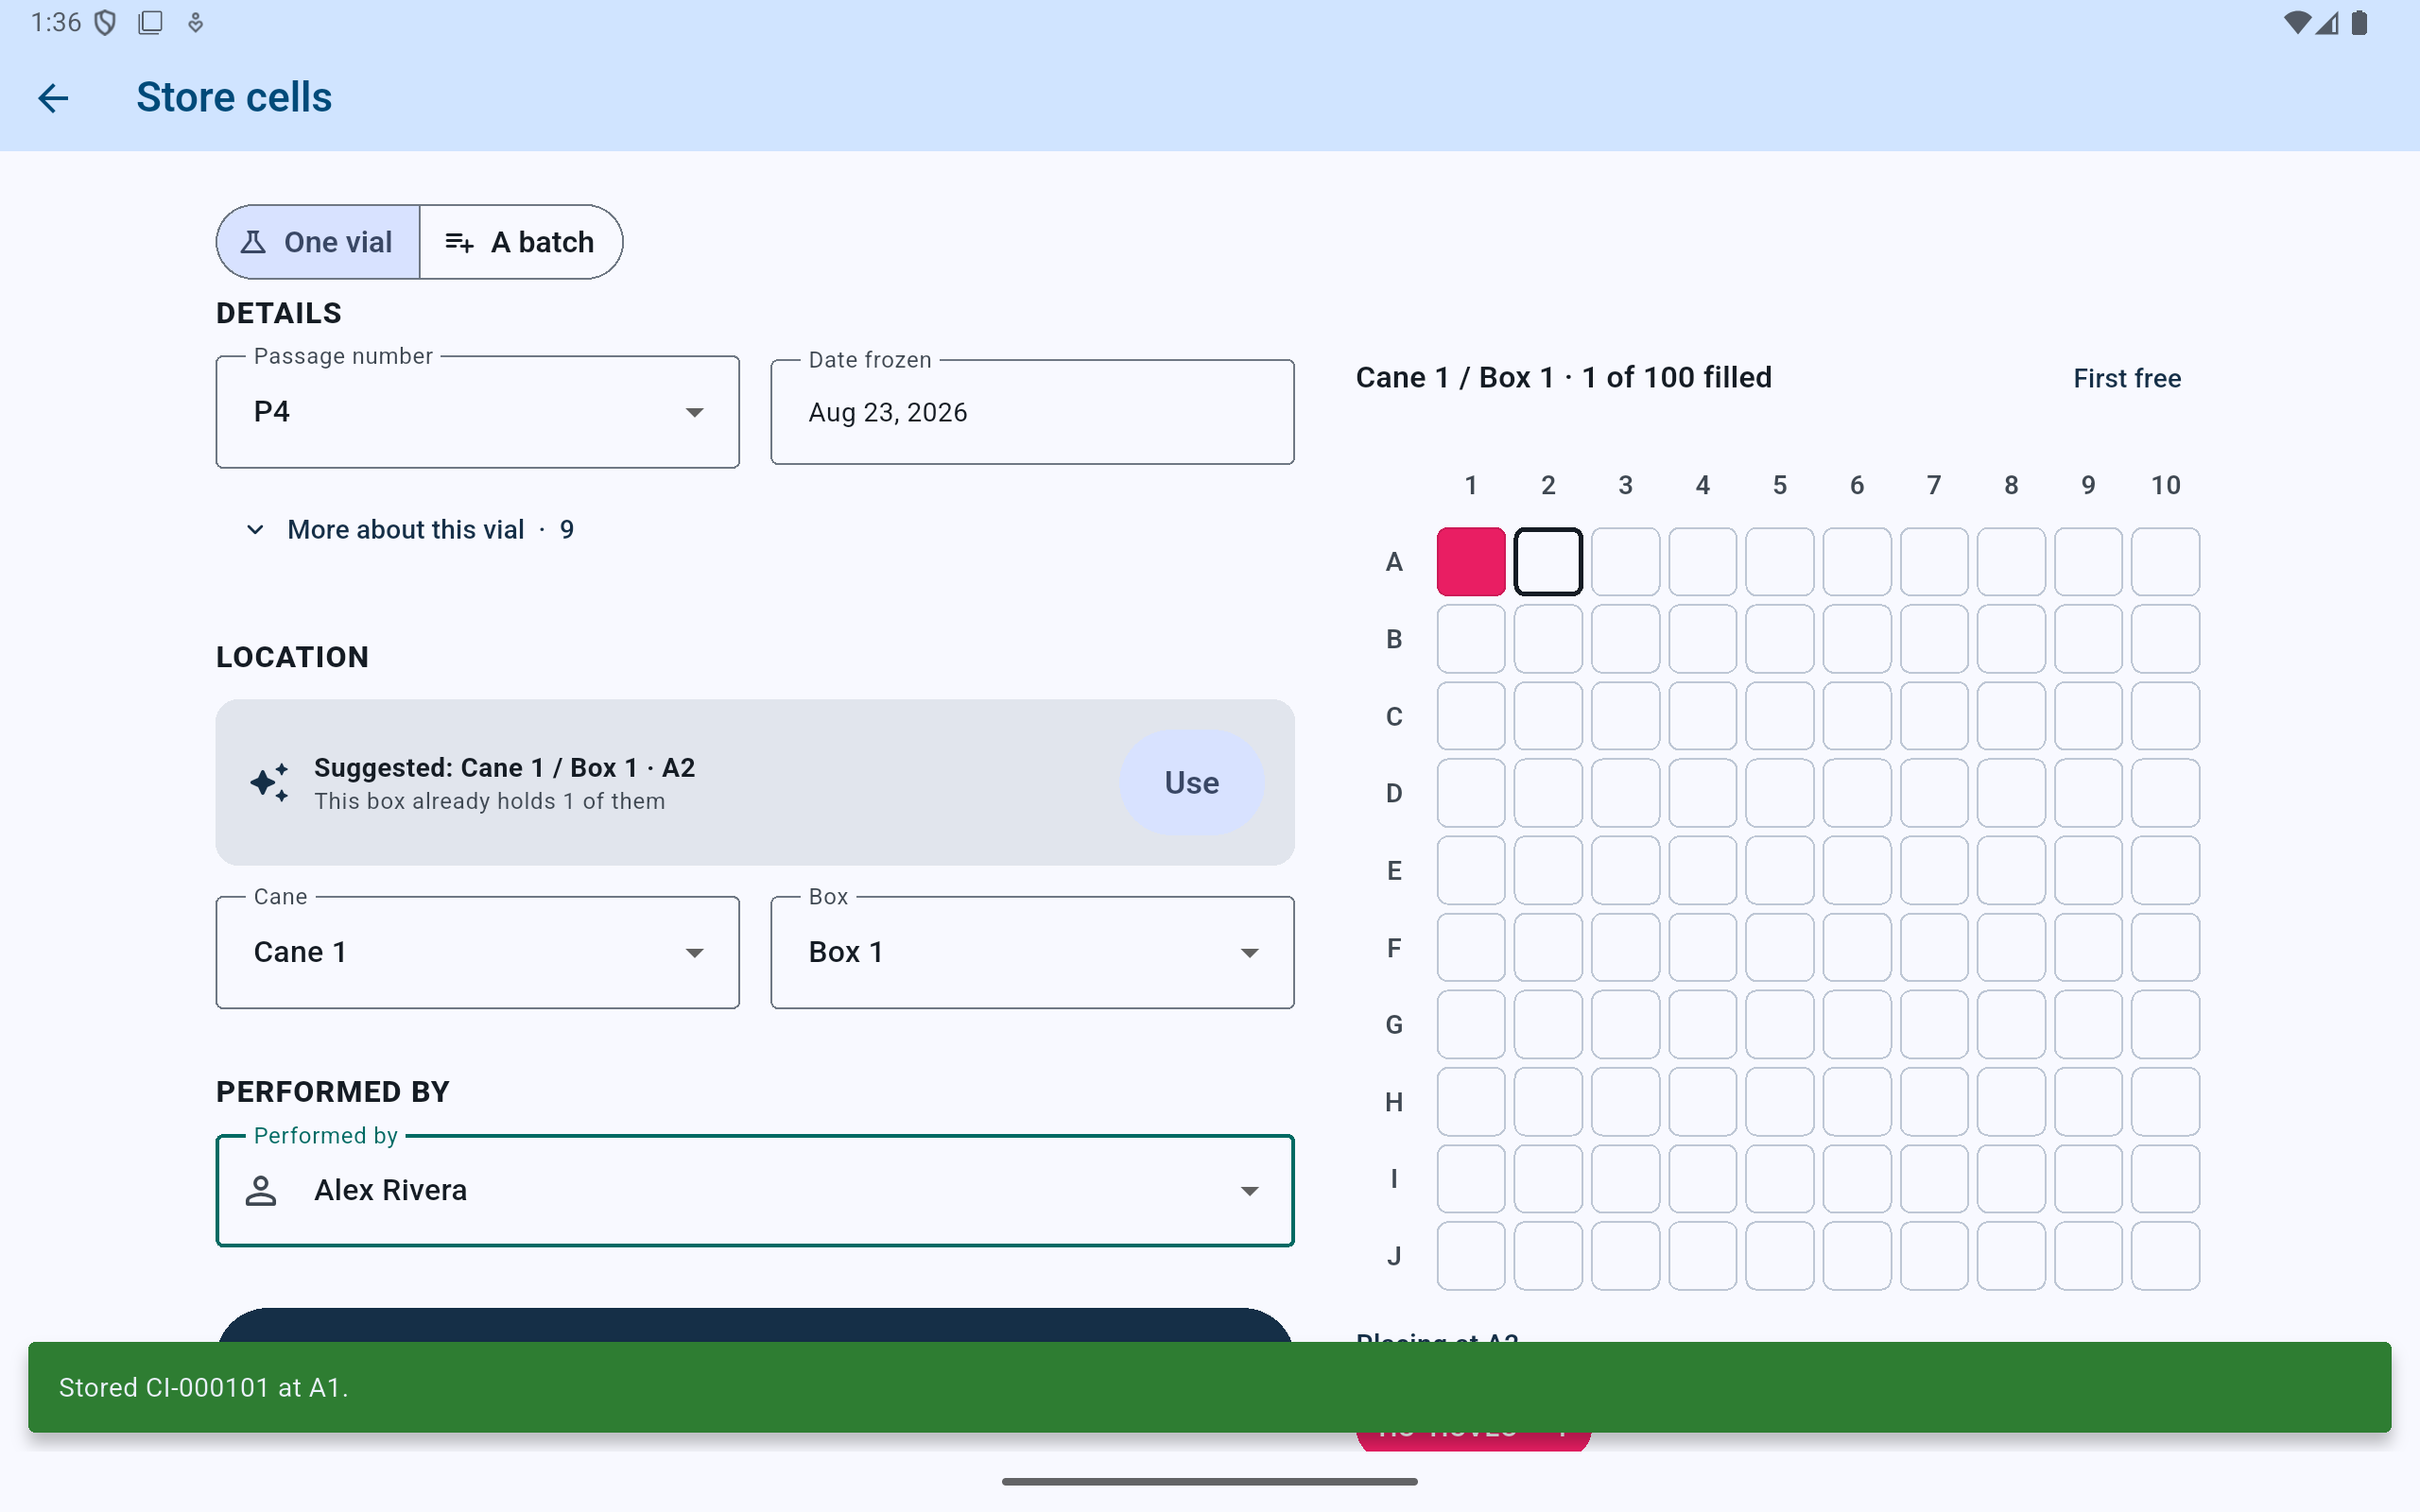
A1 is now occupied. A2 is only the proposed position for a possible next vial.
- Confirm the barcode and position in the green message.
- The filled square is now part of the recorded box contents.
- Use a suggestion only if that is where the next physical vial will go.
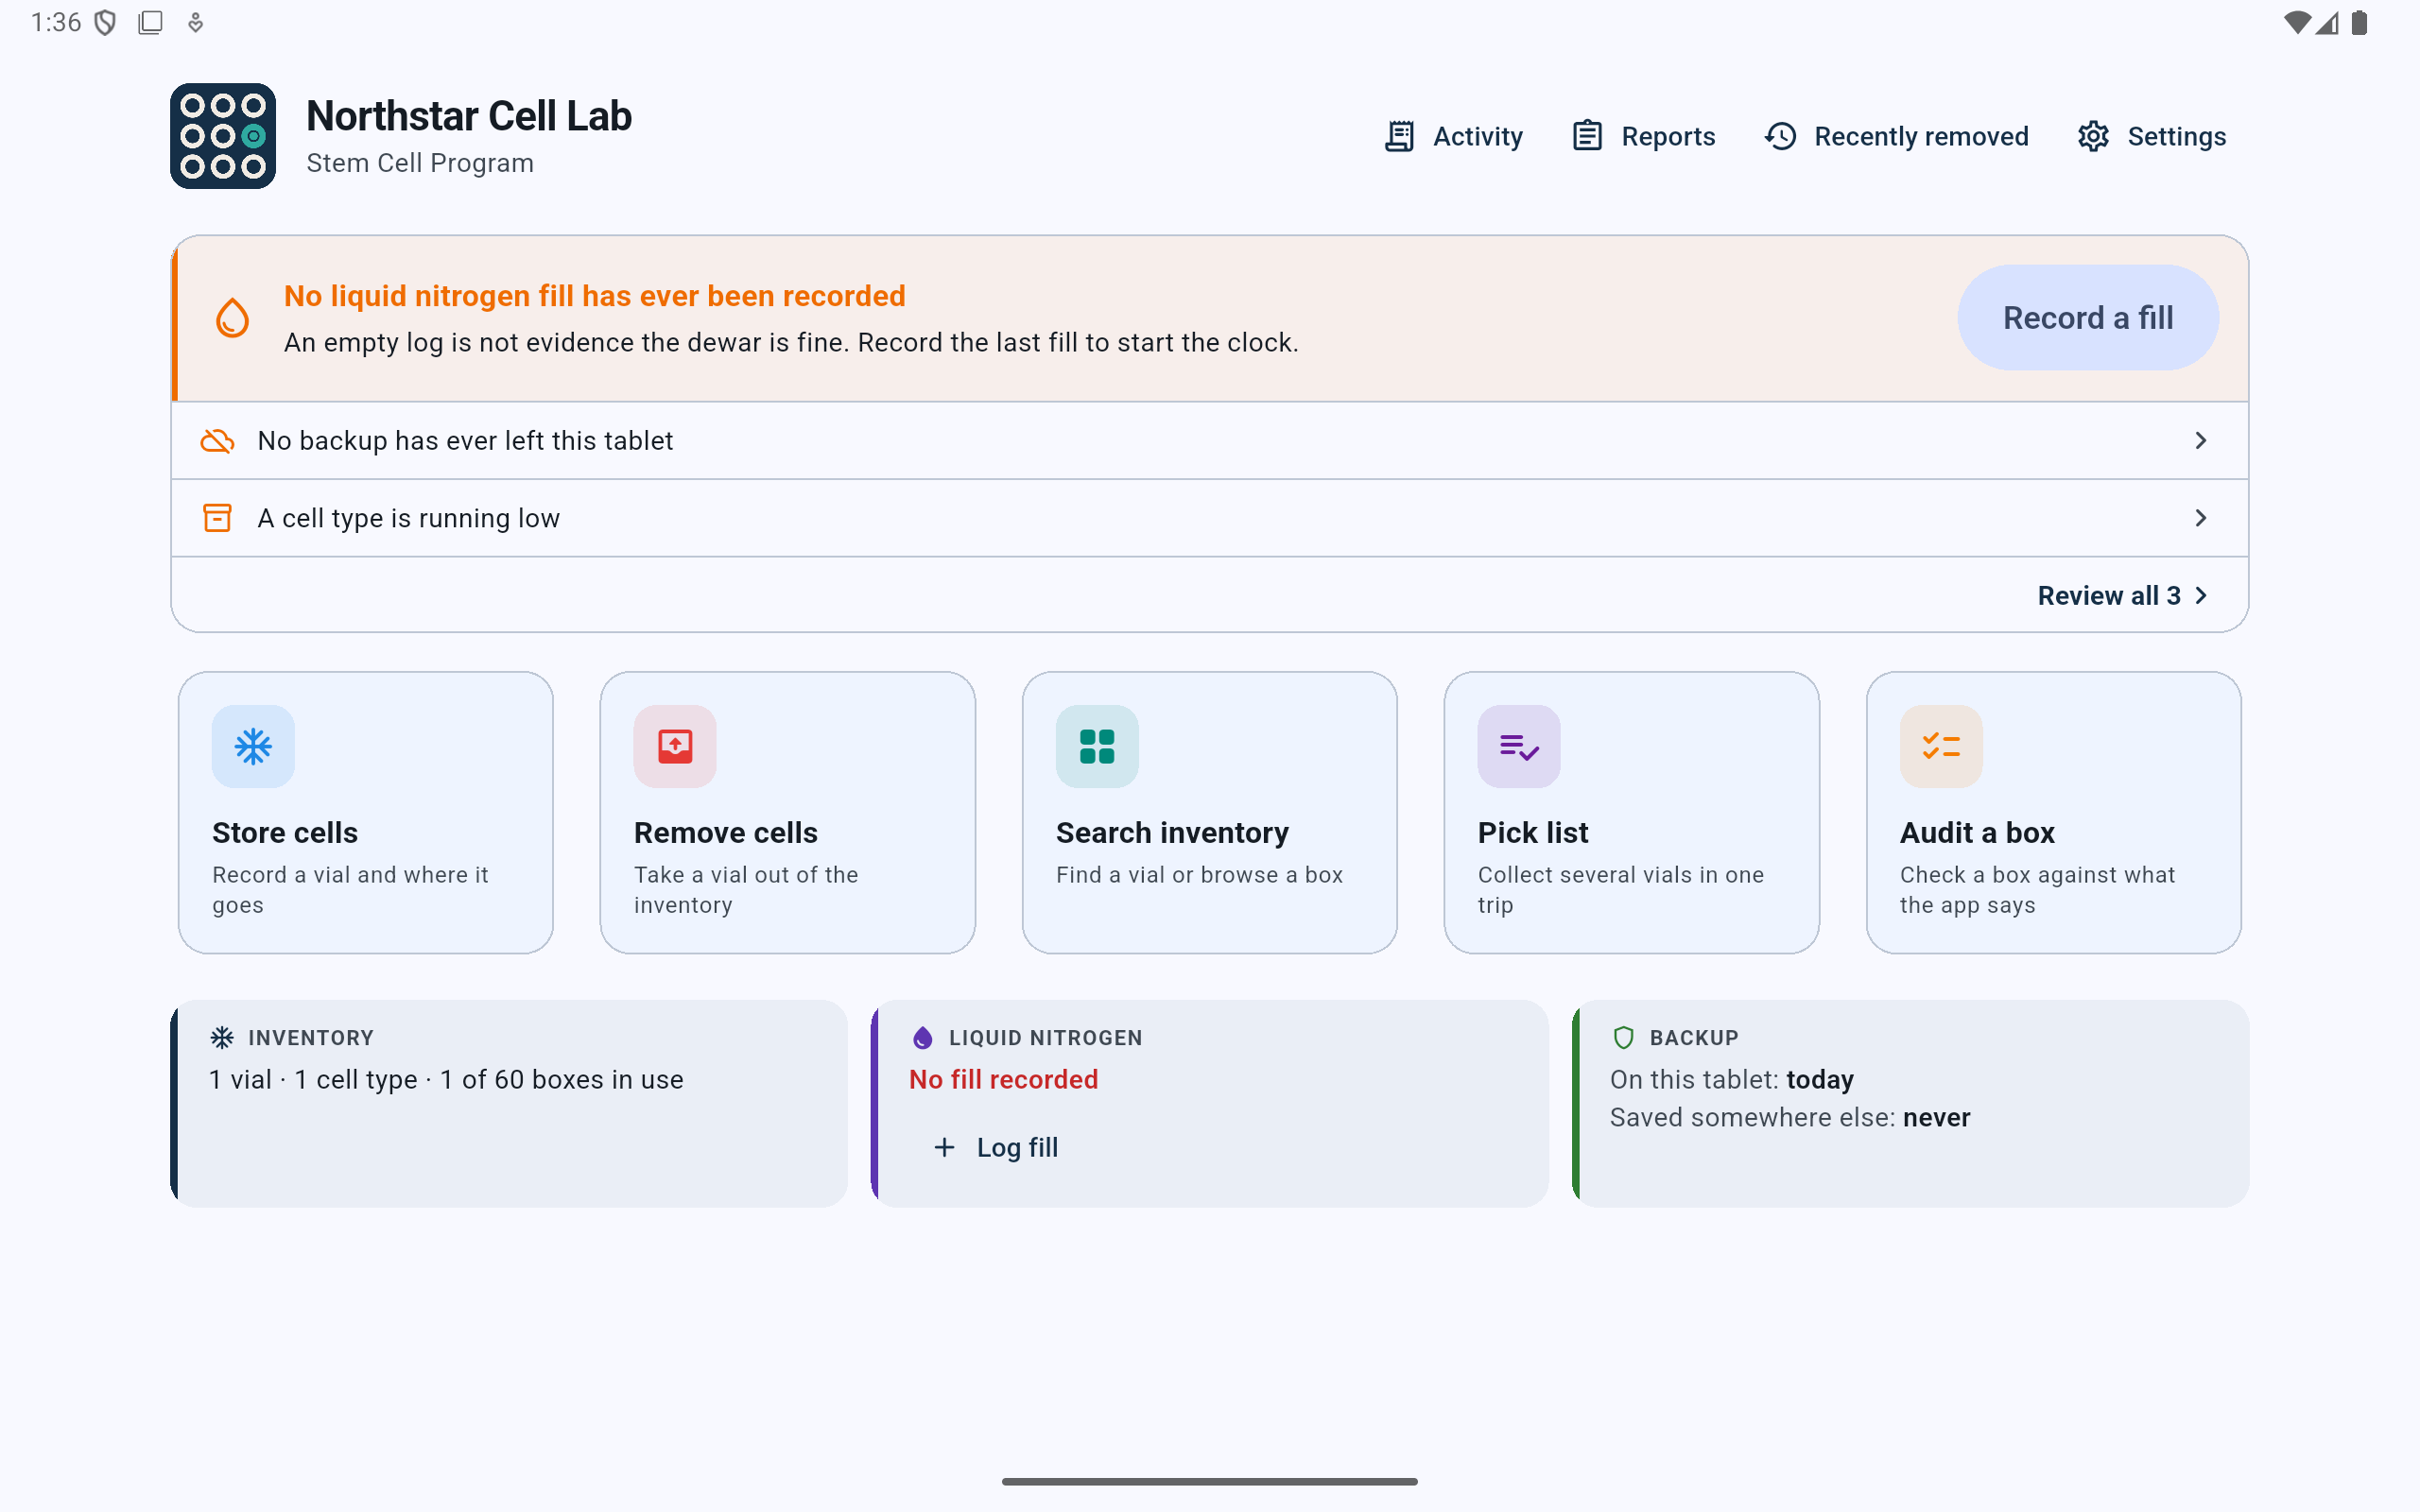
Returning to the dashboard updates the inventory summary immediately.
- The summary now reports one vial, one cell type, and one box in use.
- Independent nitrogen and external-backup alerts remain visible until addressed.
A batch · Shared information
Enter common details once and choose where filling begins.
- Select A batch, then answer Origin once. It is recorded against every vial in the batch, because they came out of one freeze-down.
- Enter the cell type, passage, freeze date, and any optional details shared by every vial.
- Choose the cane and box. Confirm the stated starting position and the direction in which the app will fill.
- Choose the person performing the batch.
- Select These vials have no barcodes only when the entire batch is genuinely unbarcoded.
- Select Start adding vials.
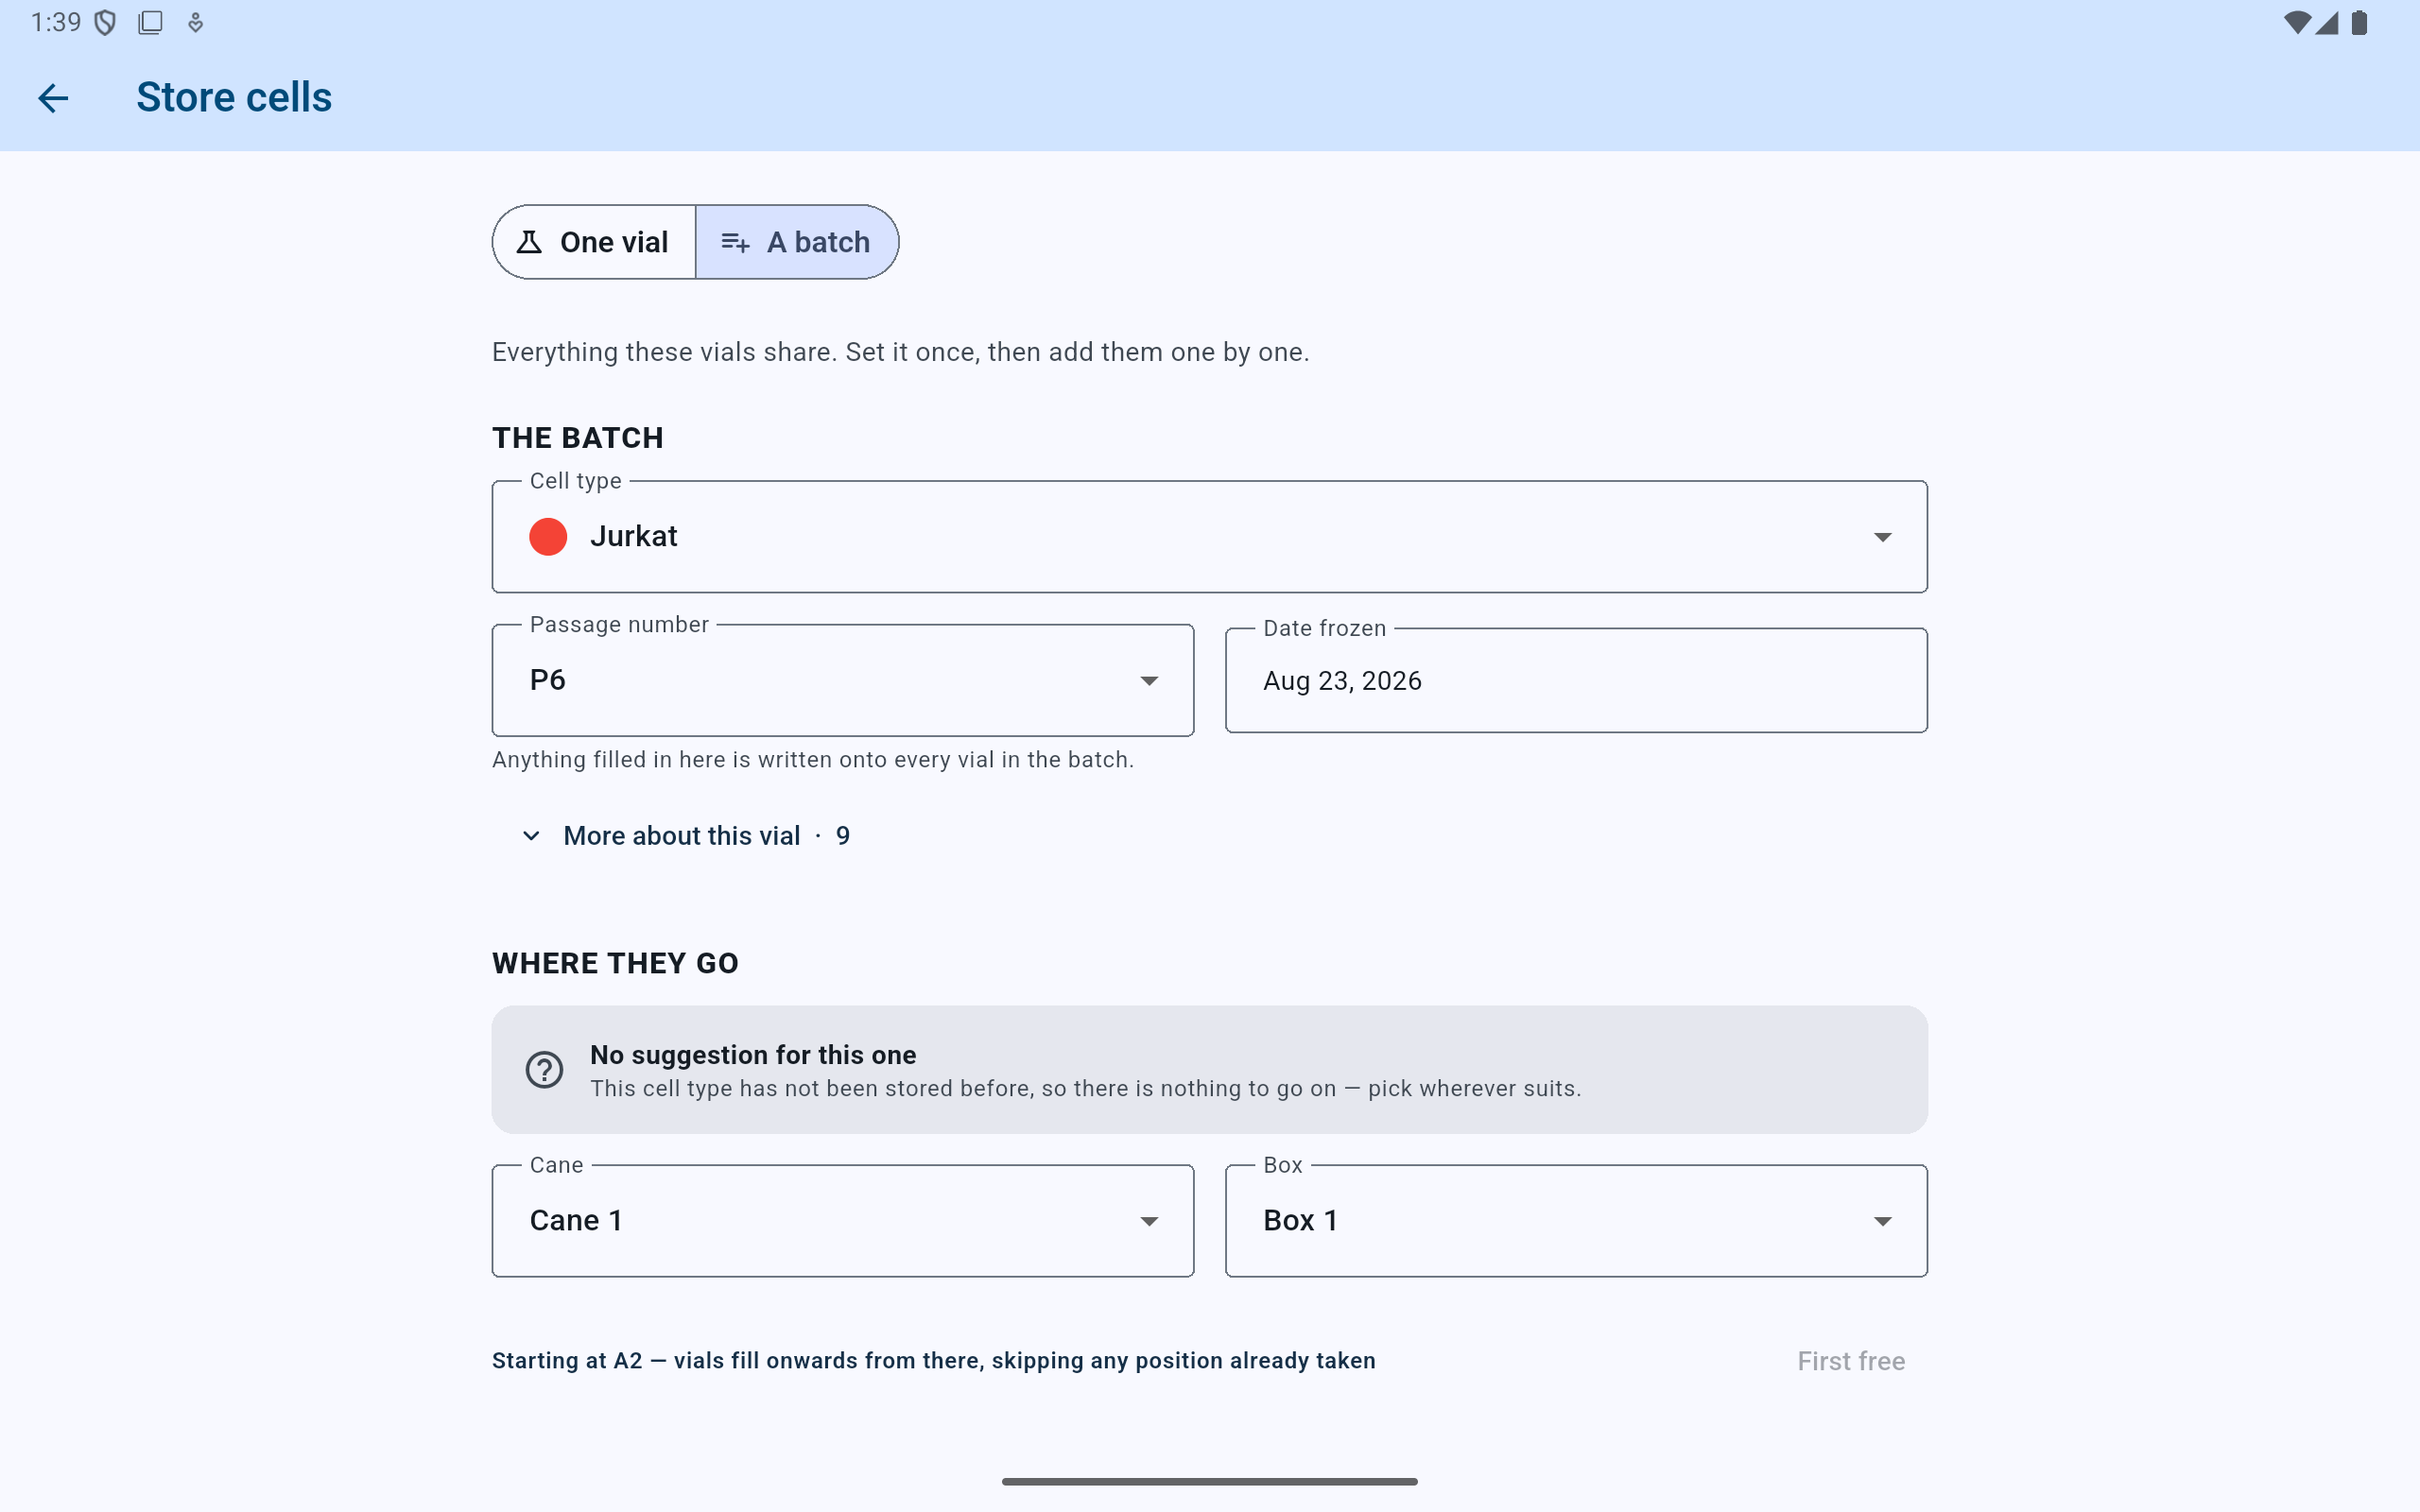
Origin is set once for the whole batch, and everything under The batch is written to every vial added in the next step.
- One origin covers the batch, because the vials came out of a single freeze-down.
- Confirm every shared biological value before the first vial is added.
- Anything entered here is written onto every vial in the batch.
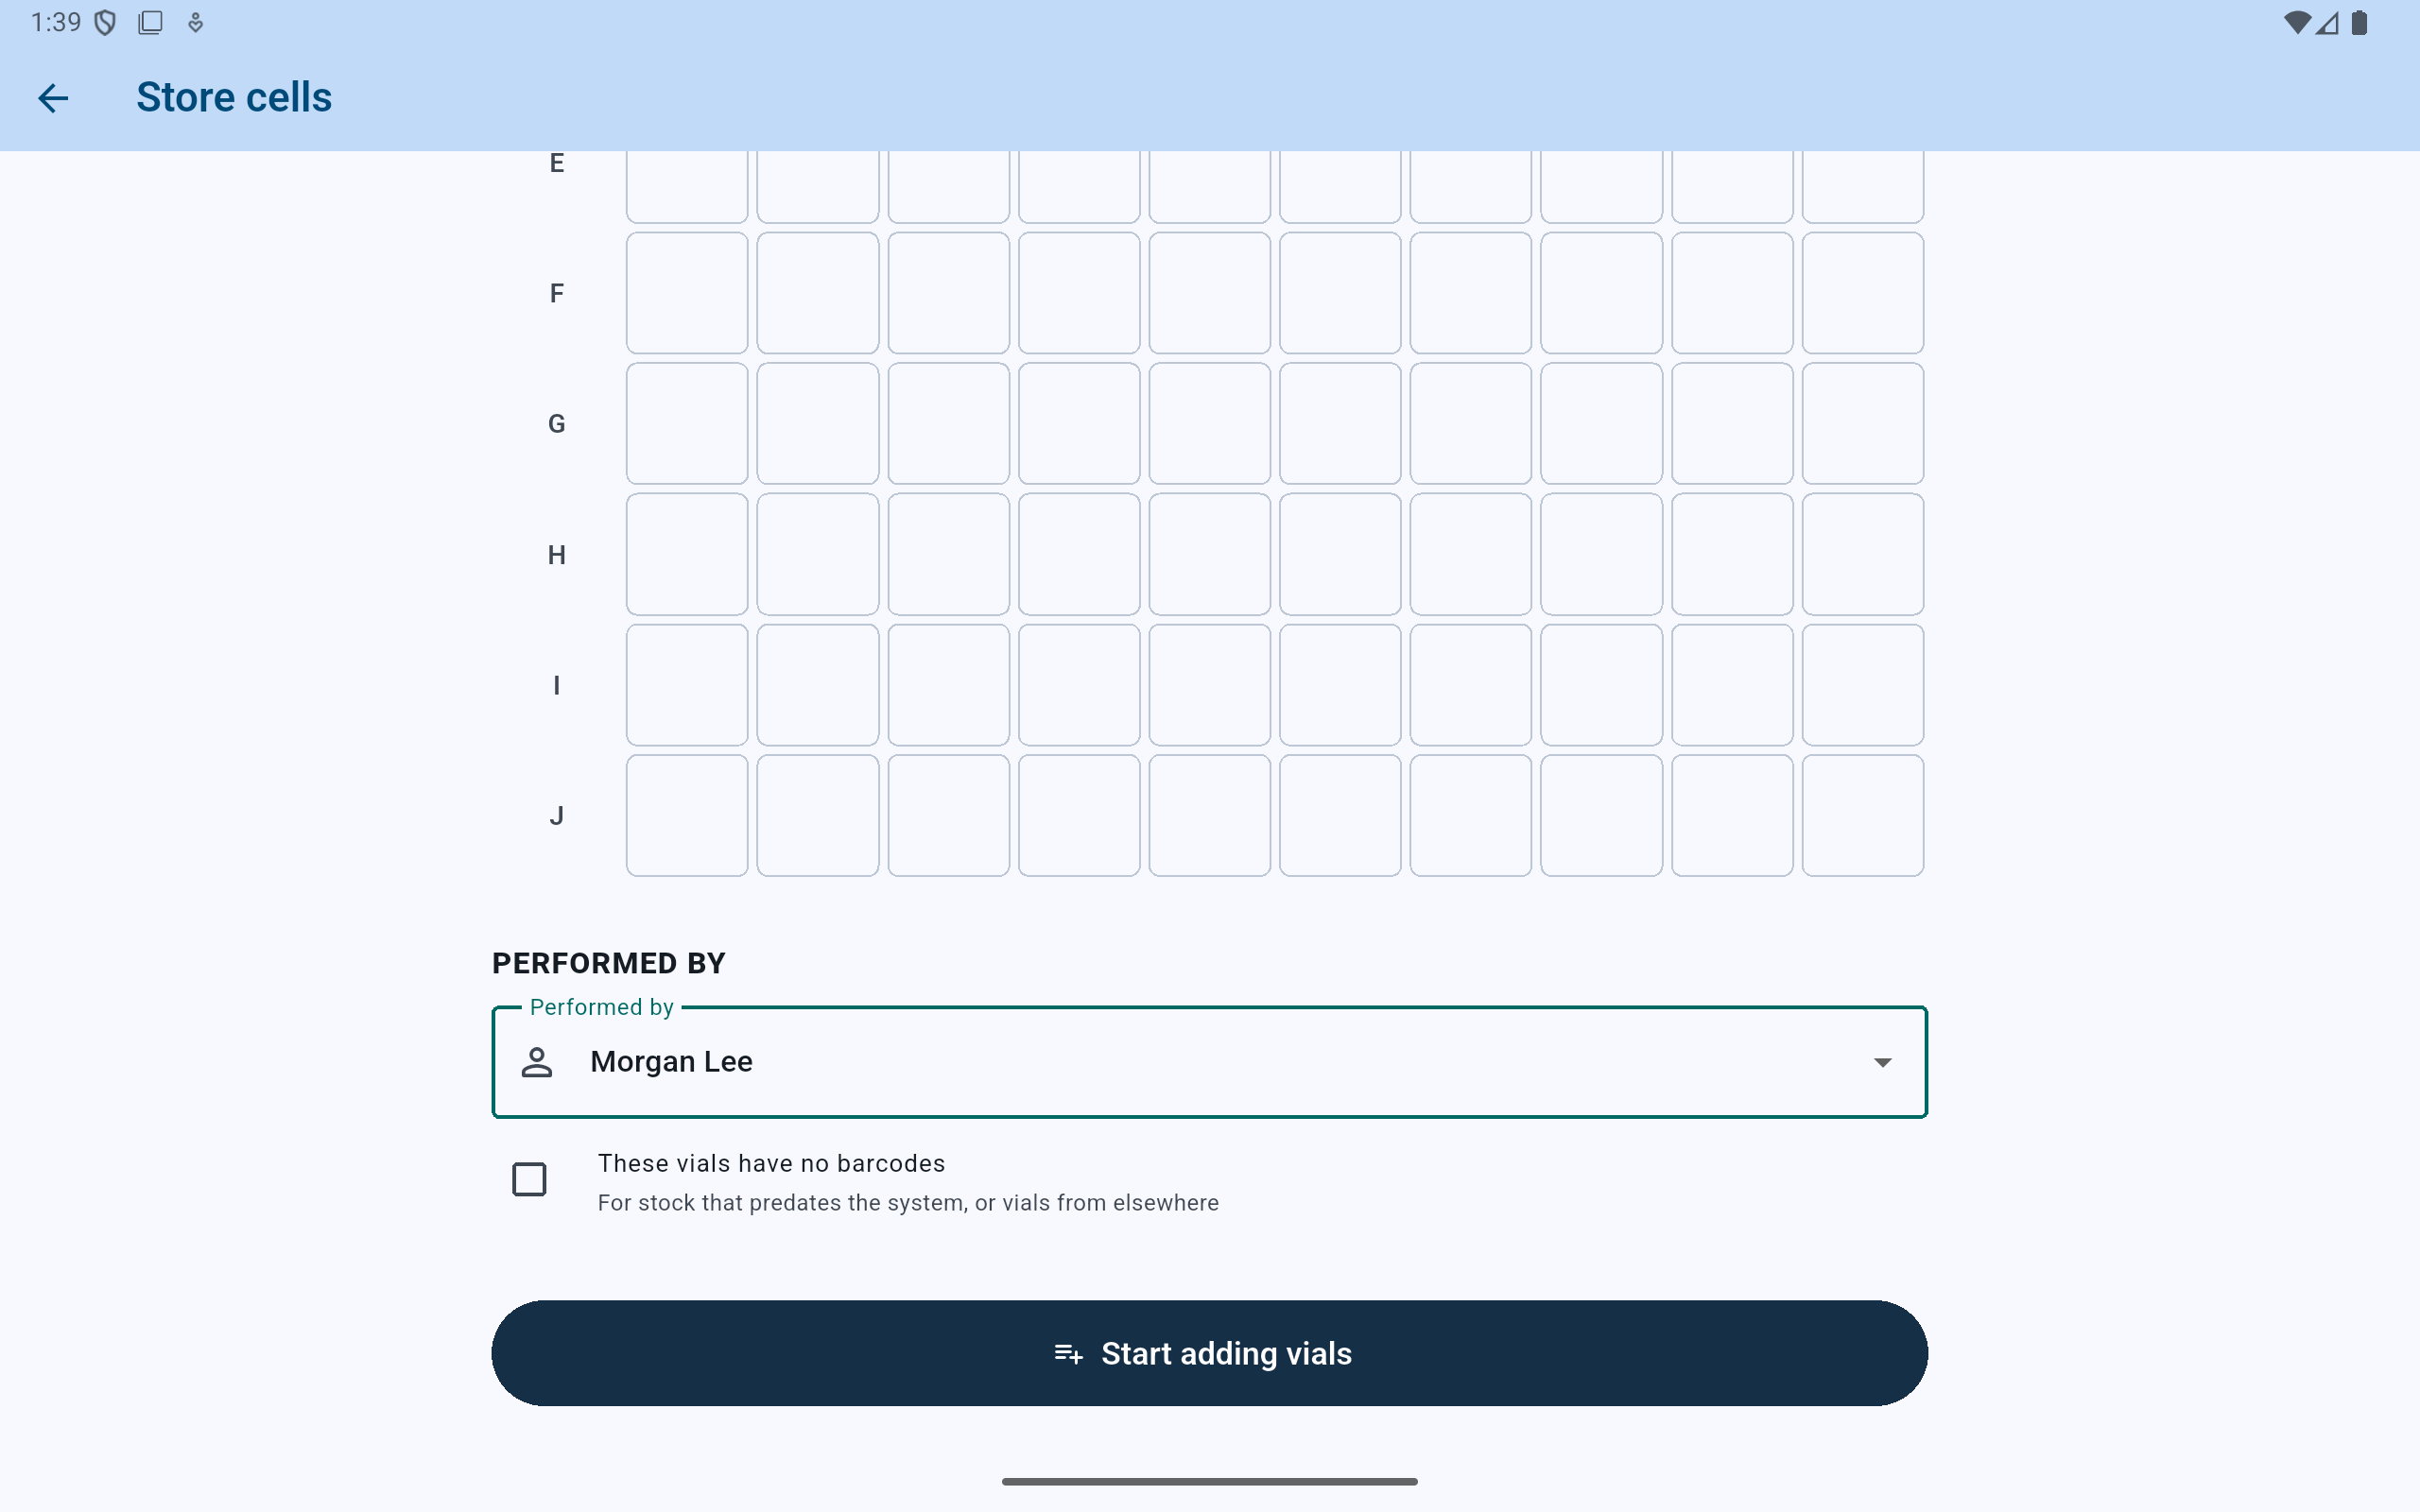
Operator attribution and barcode status apply to the whole batch.
- Choose who is physically adding this batch.
- Leave the no-barcode option off when the vials have identifiers.
- Start only after the shared fields, start position, and operator are correct.
A batch · One vial at a time
Scan, place, and verify each vial before moving on.
- Read Next vial goes to… and physically use that position.
- Scan or type the barcode. A scanner configured to send Enter can submit it without another tap.
- Confirm the new colored square and the barcode-position pair in the added list.
- If the most recent entry was a mistake, use Undo last immediately and correct the physical placement too.
- Continue until the physical batch is complete, review the list, and select Done.
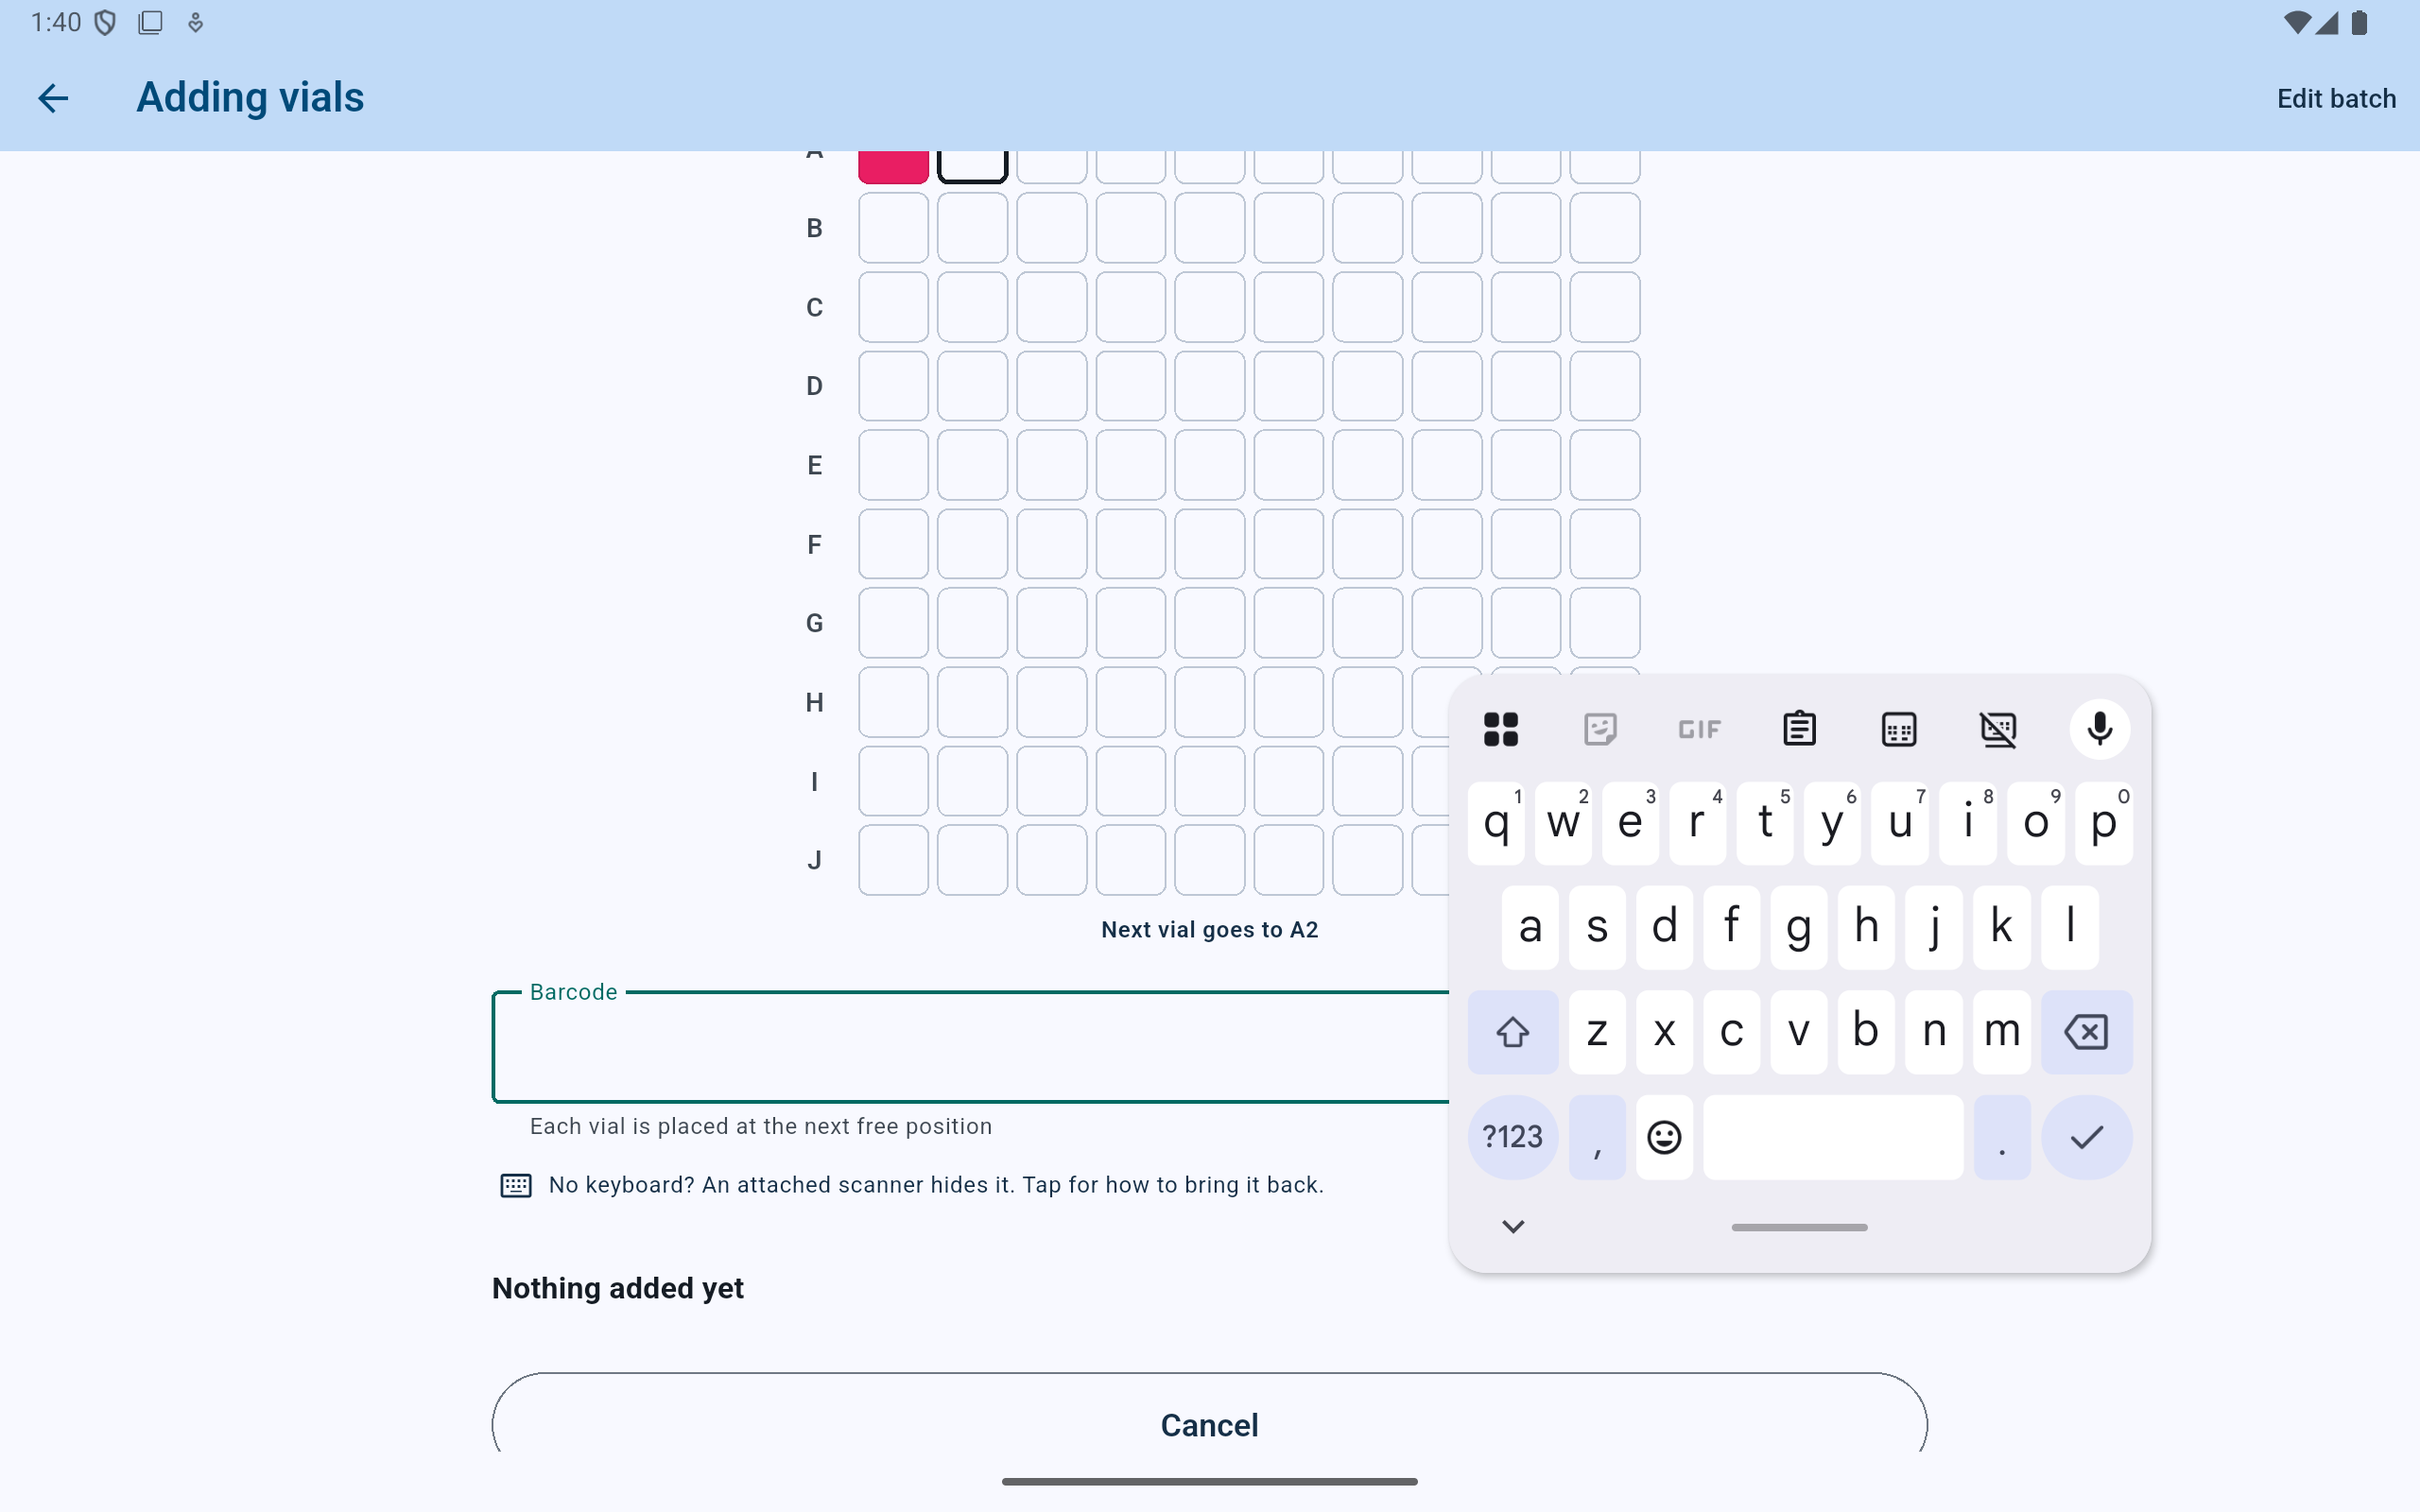
The barcode field stays ready for the next scan, and each vial is placed at the next free position.
- Read the next position before placing the physical vial.
- Scan or type one barcode, then verify the app accepted it.
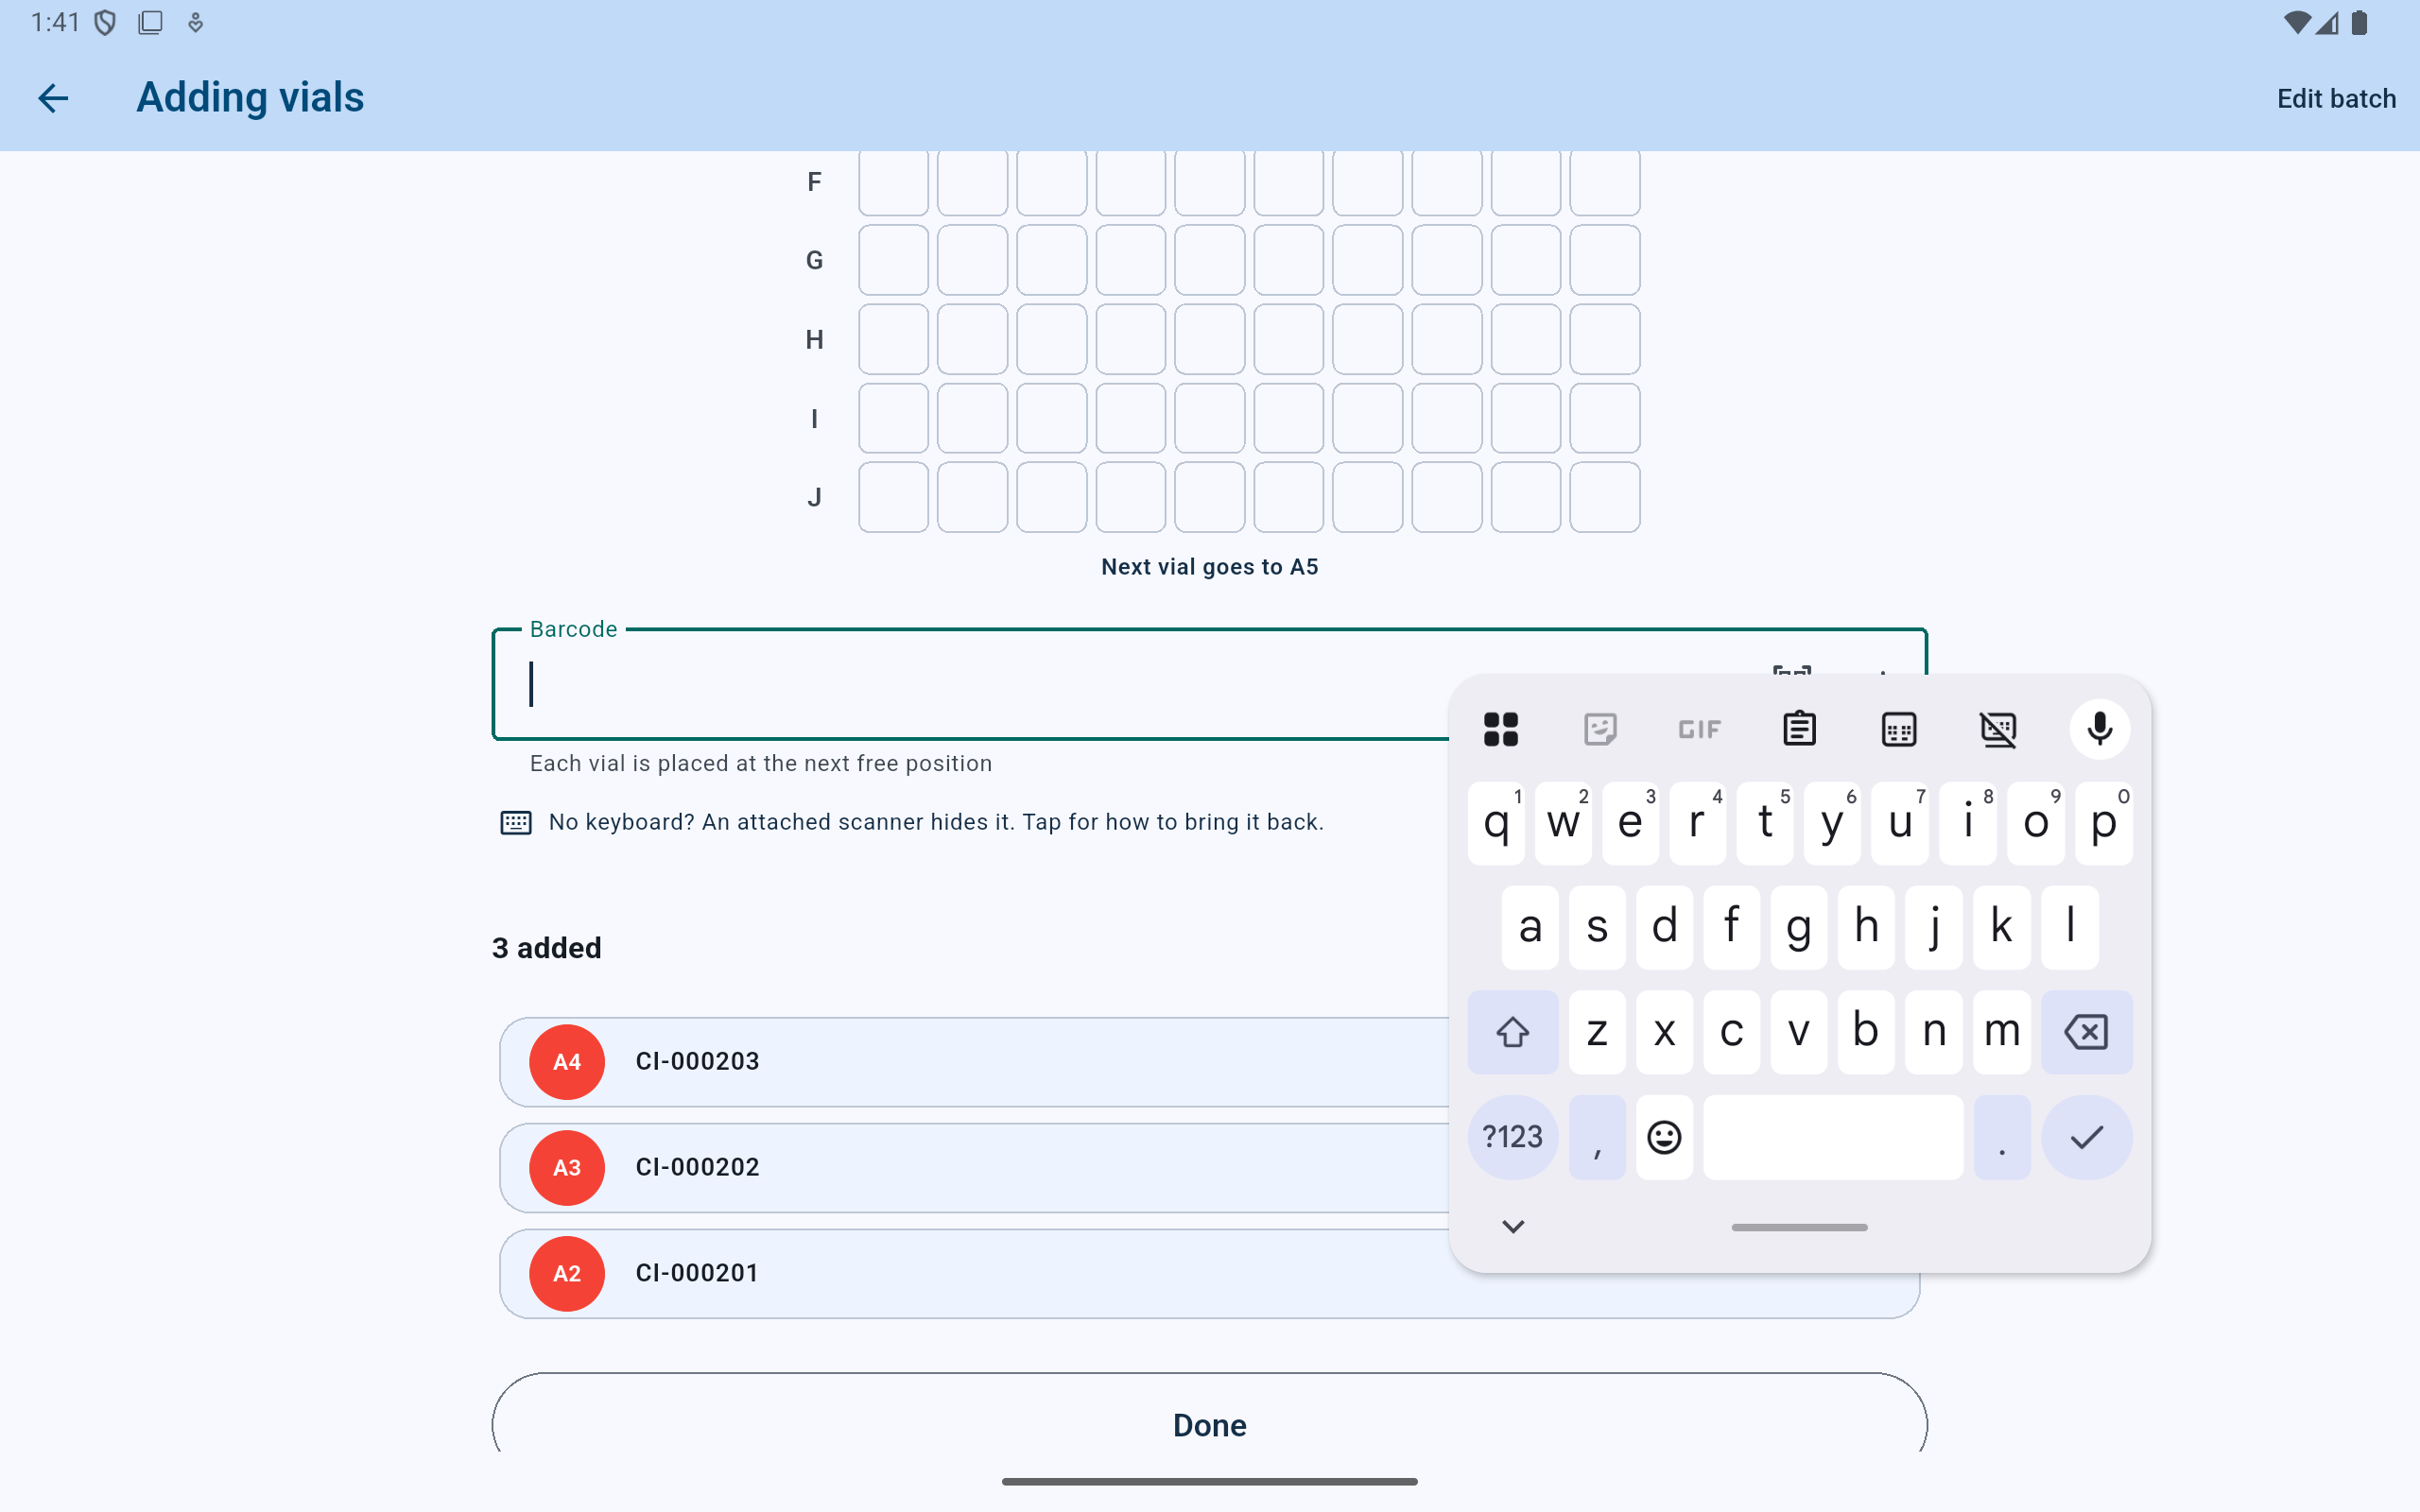
The newest vial appears first. Review the full barcode-position list before leaving the workflow.
- The app now proposes A5 because A2 through A4 were added.
- Verify every barcode beside its assigned position.
- Select Done after the recorded list and physical box agree.
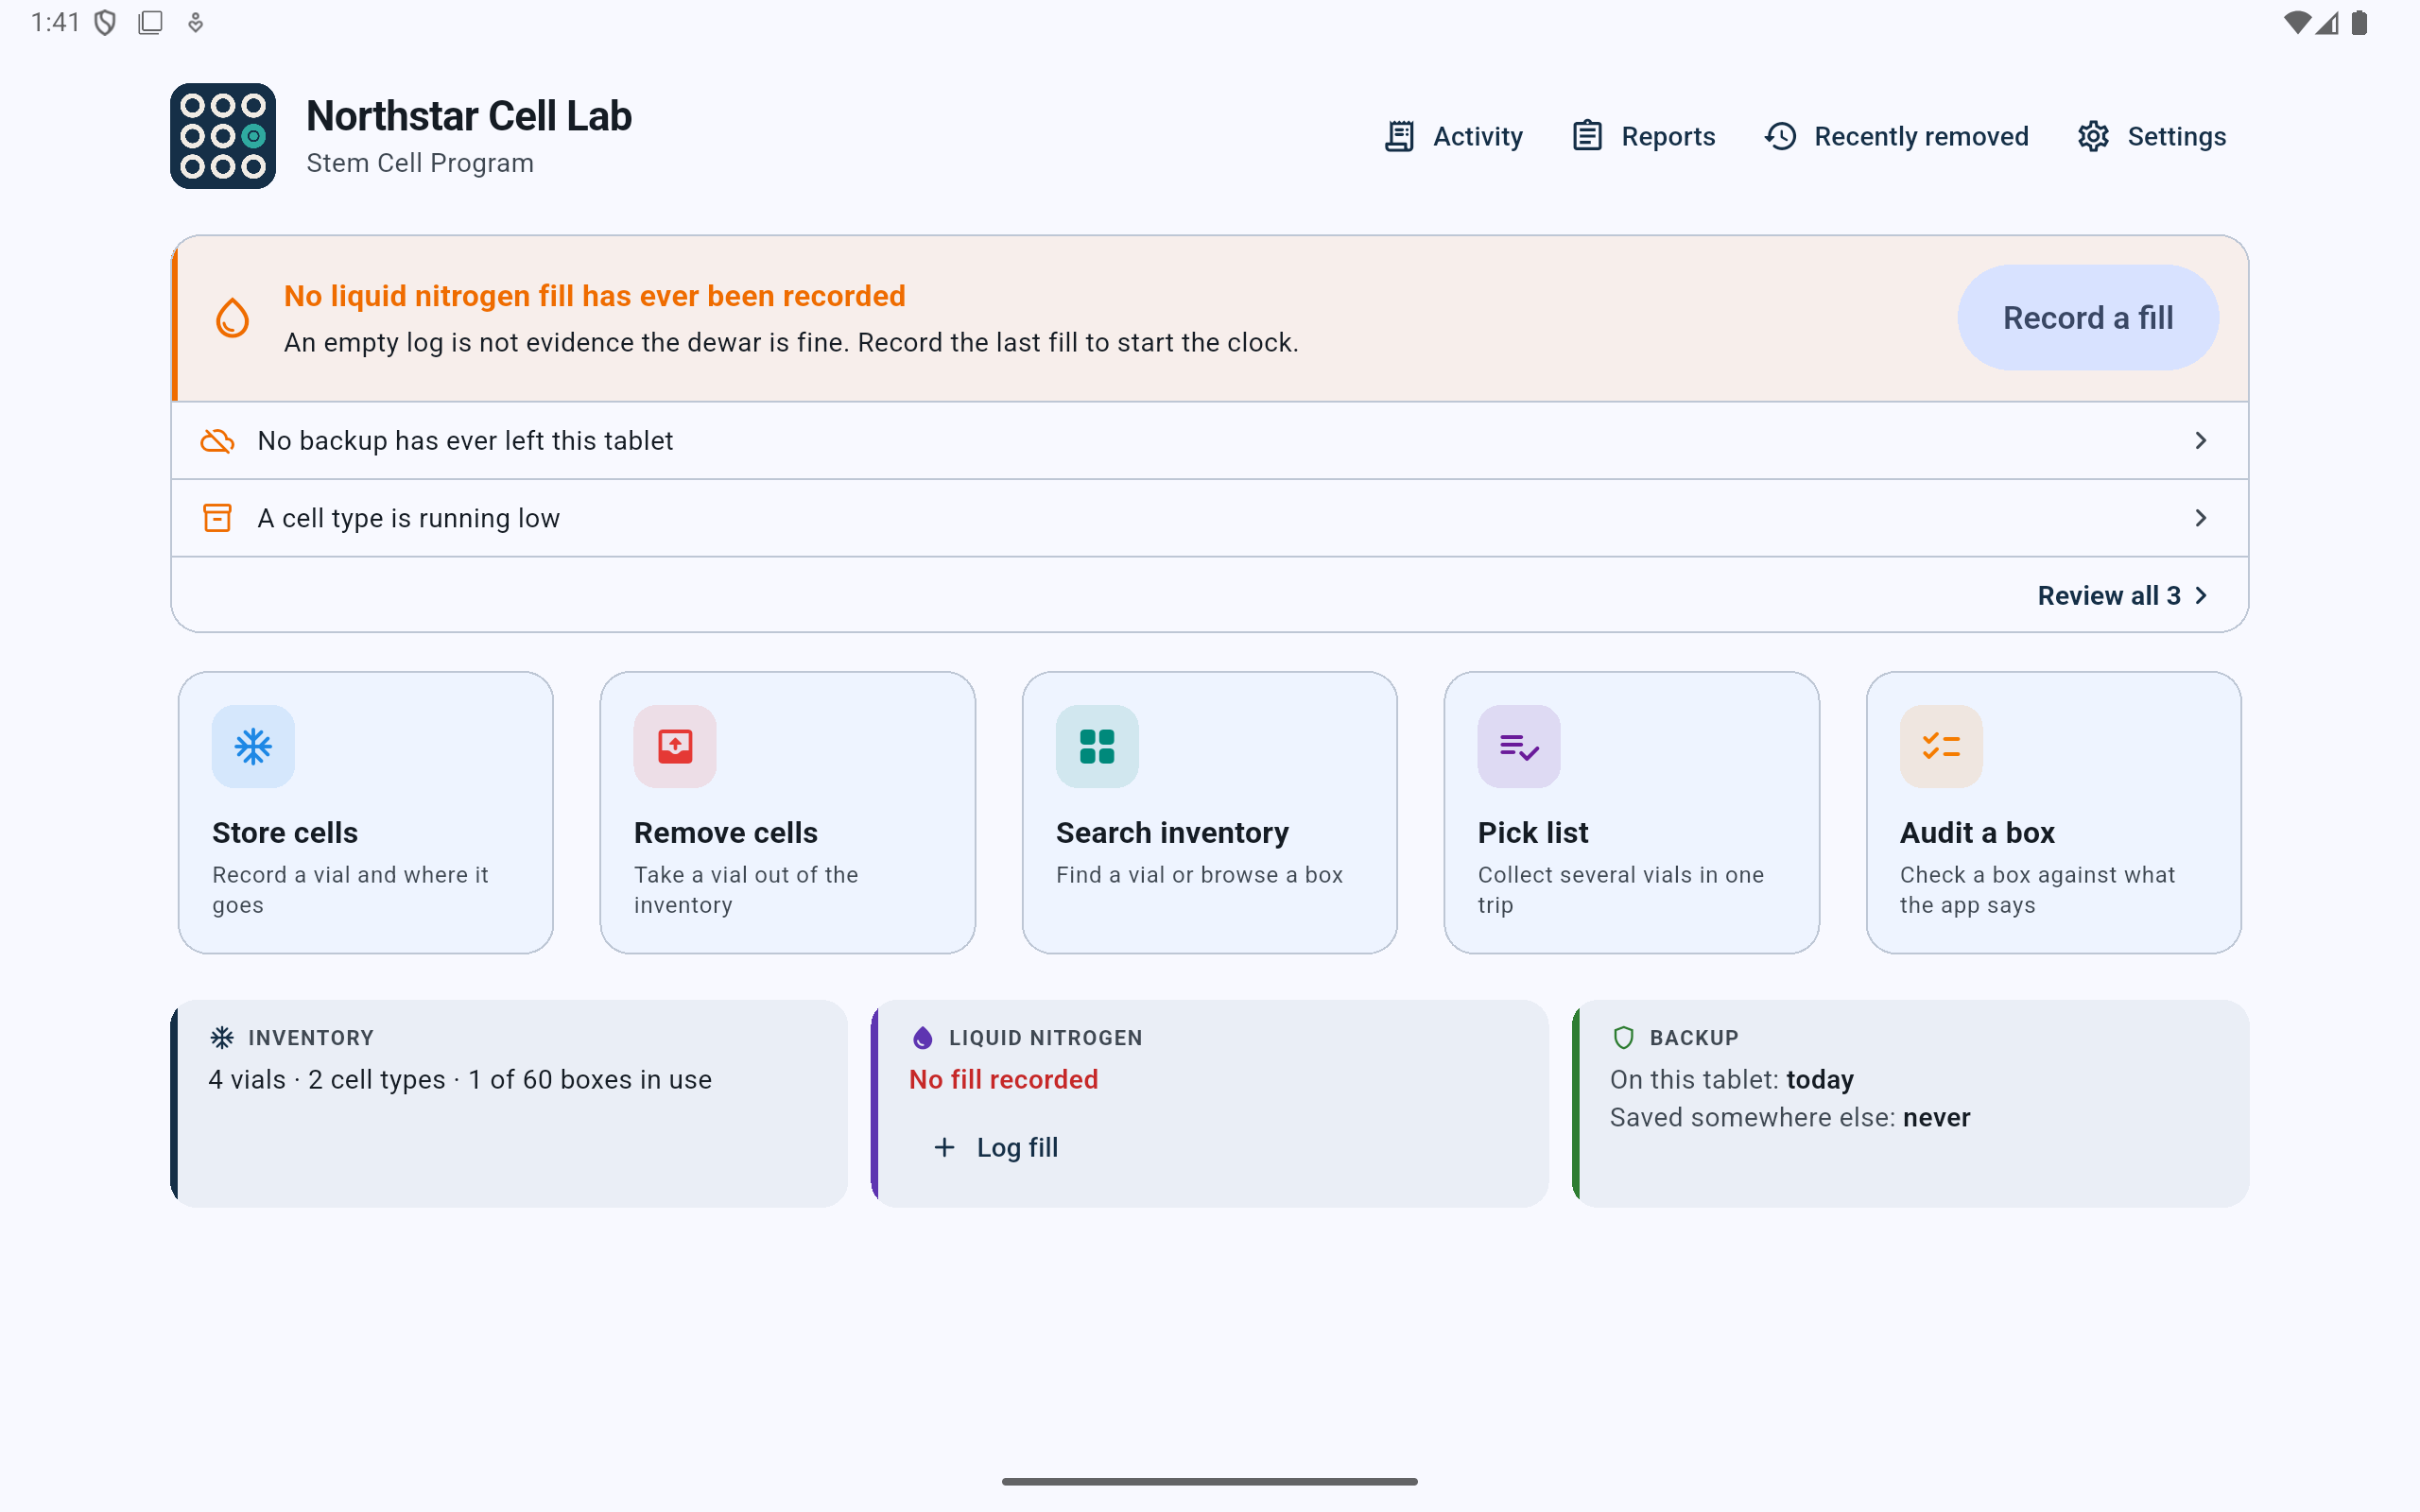
The original vial plus the three-vial batch are reflected in the dashboard total.
- The inventory summary now reports four vials and two cell types.
- Use Search inventory or browse the box if any placement needs verification.