Watch the walkthrough
Set up a lab without a spreadsheet
Captions are available in the player and start turned off so they do not cover the app. The written transcript is below the video.
Read the video transcript
Start by naming the lab and, if useful, adding a second line such as the department. These labels appear in the app and on generated reports.
Next, enter the physical count of canes, boxes, rows, and columns. Confirm the capacity line against the real dewar.
Add each person who will use the shared tablet. CryoIndex records selected names with storage, move, removal, fill, and audit activity; more people can be added later.
Add the cell lines already kept by the lab. Each receives a consistent colour, and another line can be created later when a vial is stored.
On Ready, verify the capacity, people, and cell lines, then choose Done.
Narration uses an AI-generated voice.
Choose before retyping records
Use the spreadsheet or backup path when either already exists.
A spreadsheet can detect storage requirements, users, and cell lines before importing reviewed rows. A CryoIndex backup restores the complete lab. Continue manually only when this is a new empty inventory or those sources are not being used.
Step 1 of 4
Enter what should identify the lab on every screen and report.
- Enter the lab or facility name. Leaving it blank uses CryoIndex.
- Optionally add a department, program, building, or other short second line.
- If the lab already has a CSV, choose I have a spreadsheet. If this is a replacement tablet, choose Restore a backup.
- For a new empty manual setup, select Next.
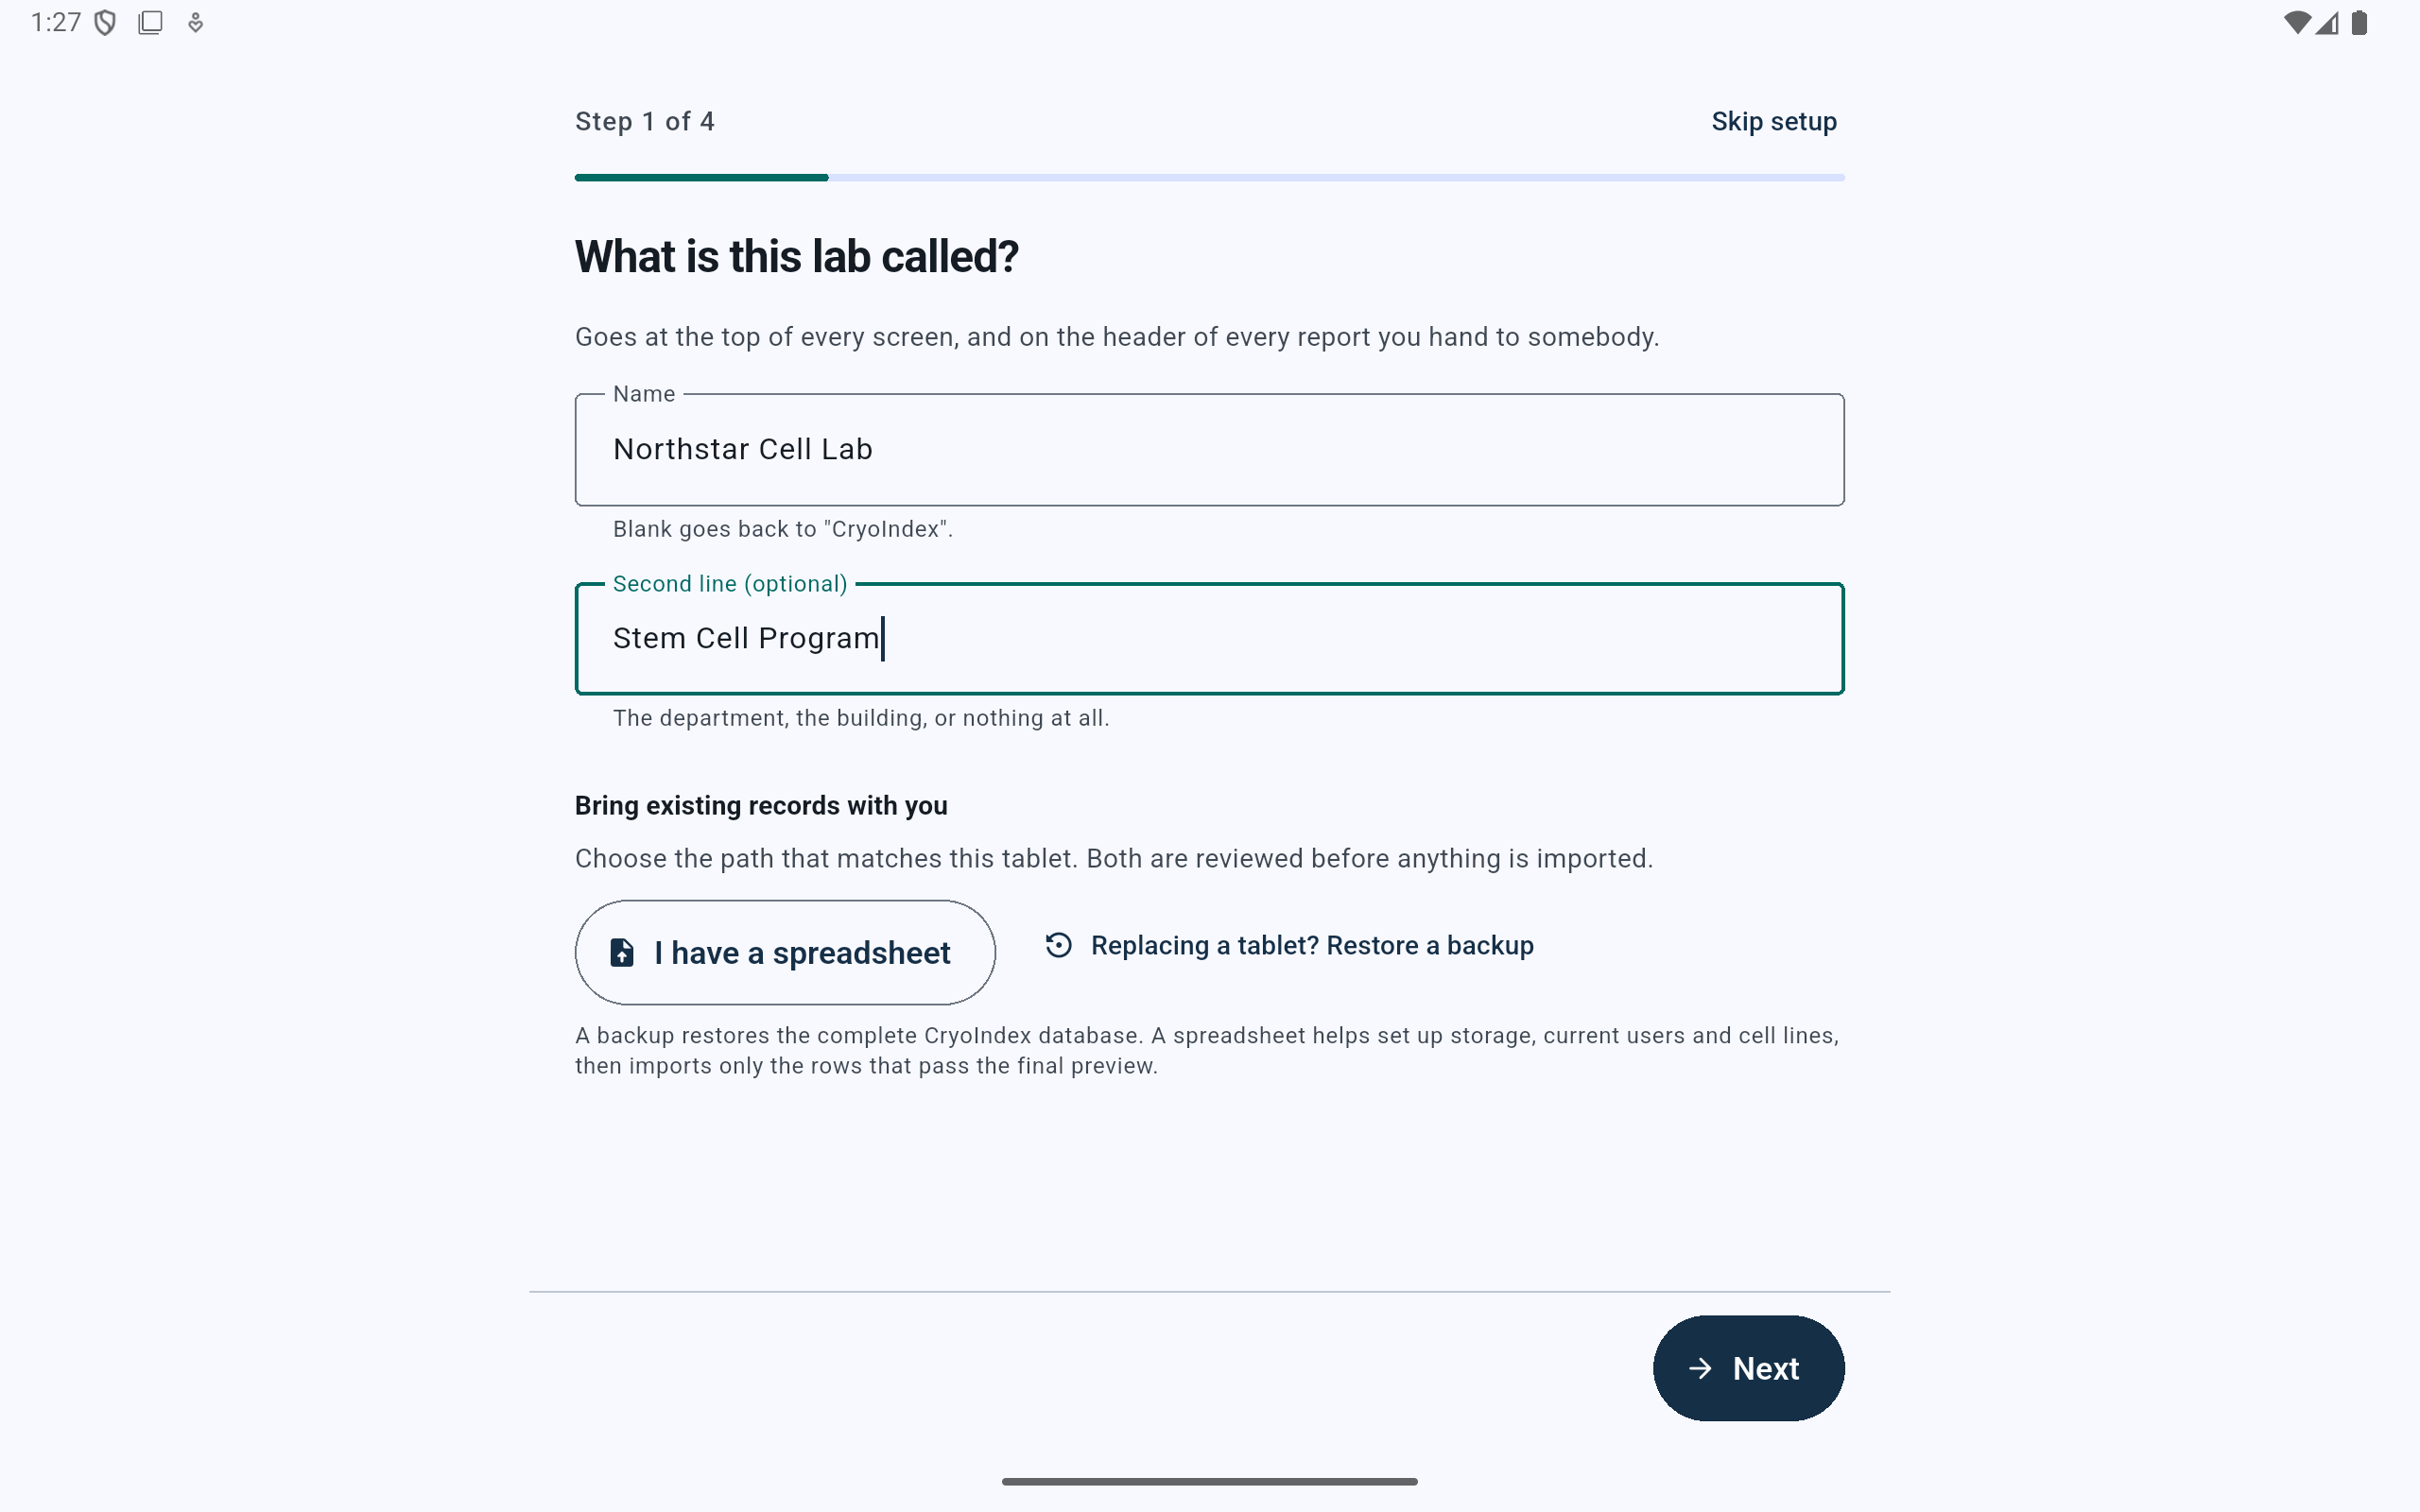
The import and replacement-tablet choices appear before the manual details so an existing lab does not have to retype what CryoIndex can review or restore.
- Enter the primary lab or facility name.
- Use the optional second line for a useful organizational label.
- Start spreadsheet-assisted setup when records already exist.
- Use Restore for a complete CryoIndex replacement-tablet recovery.
- Continue manually only after choosing the correct path.
Step 2 of 4
Count the physical storage arrangement—not an intended future layout.
- Set the number of canes physically used by the dewar.
- Set the number of box positions on each cane.
- Set the physical row and column count of one box.
- Choose whether rows use letters or numbers and whether columns use letters or numbers. Confirm the first and last coordinate in the summary.
- Compare the displayed box and position totals with the physical system before selecting Next.
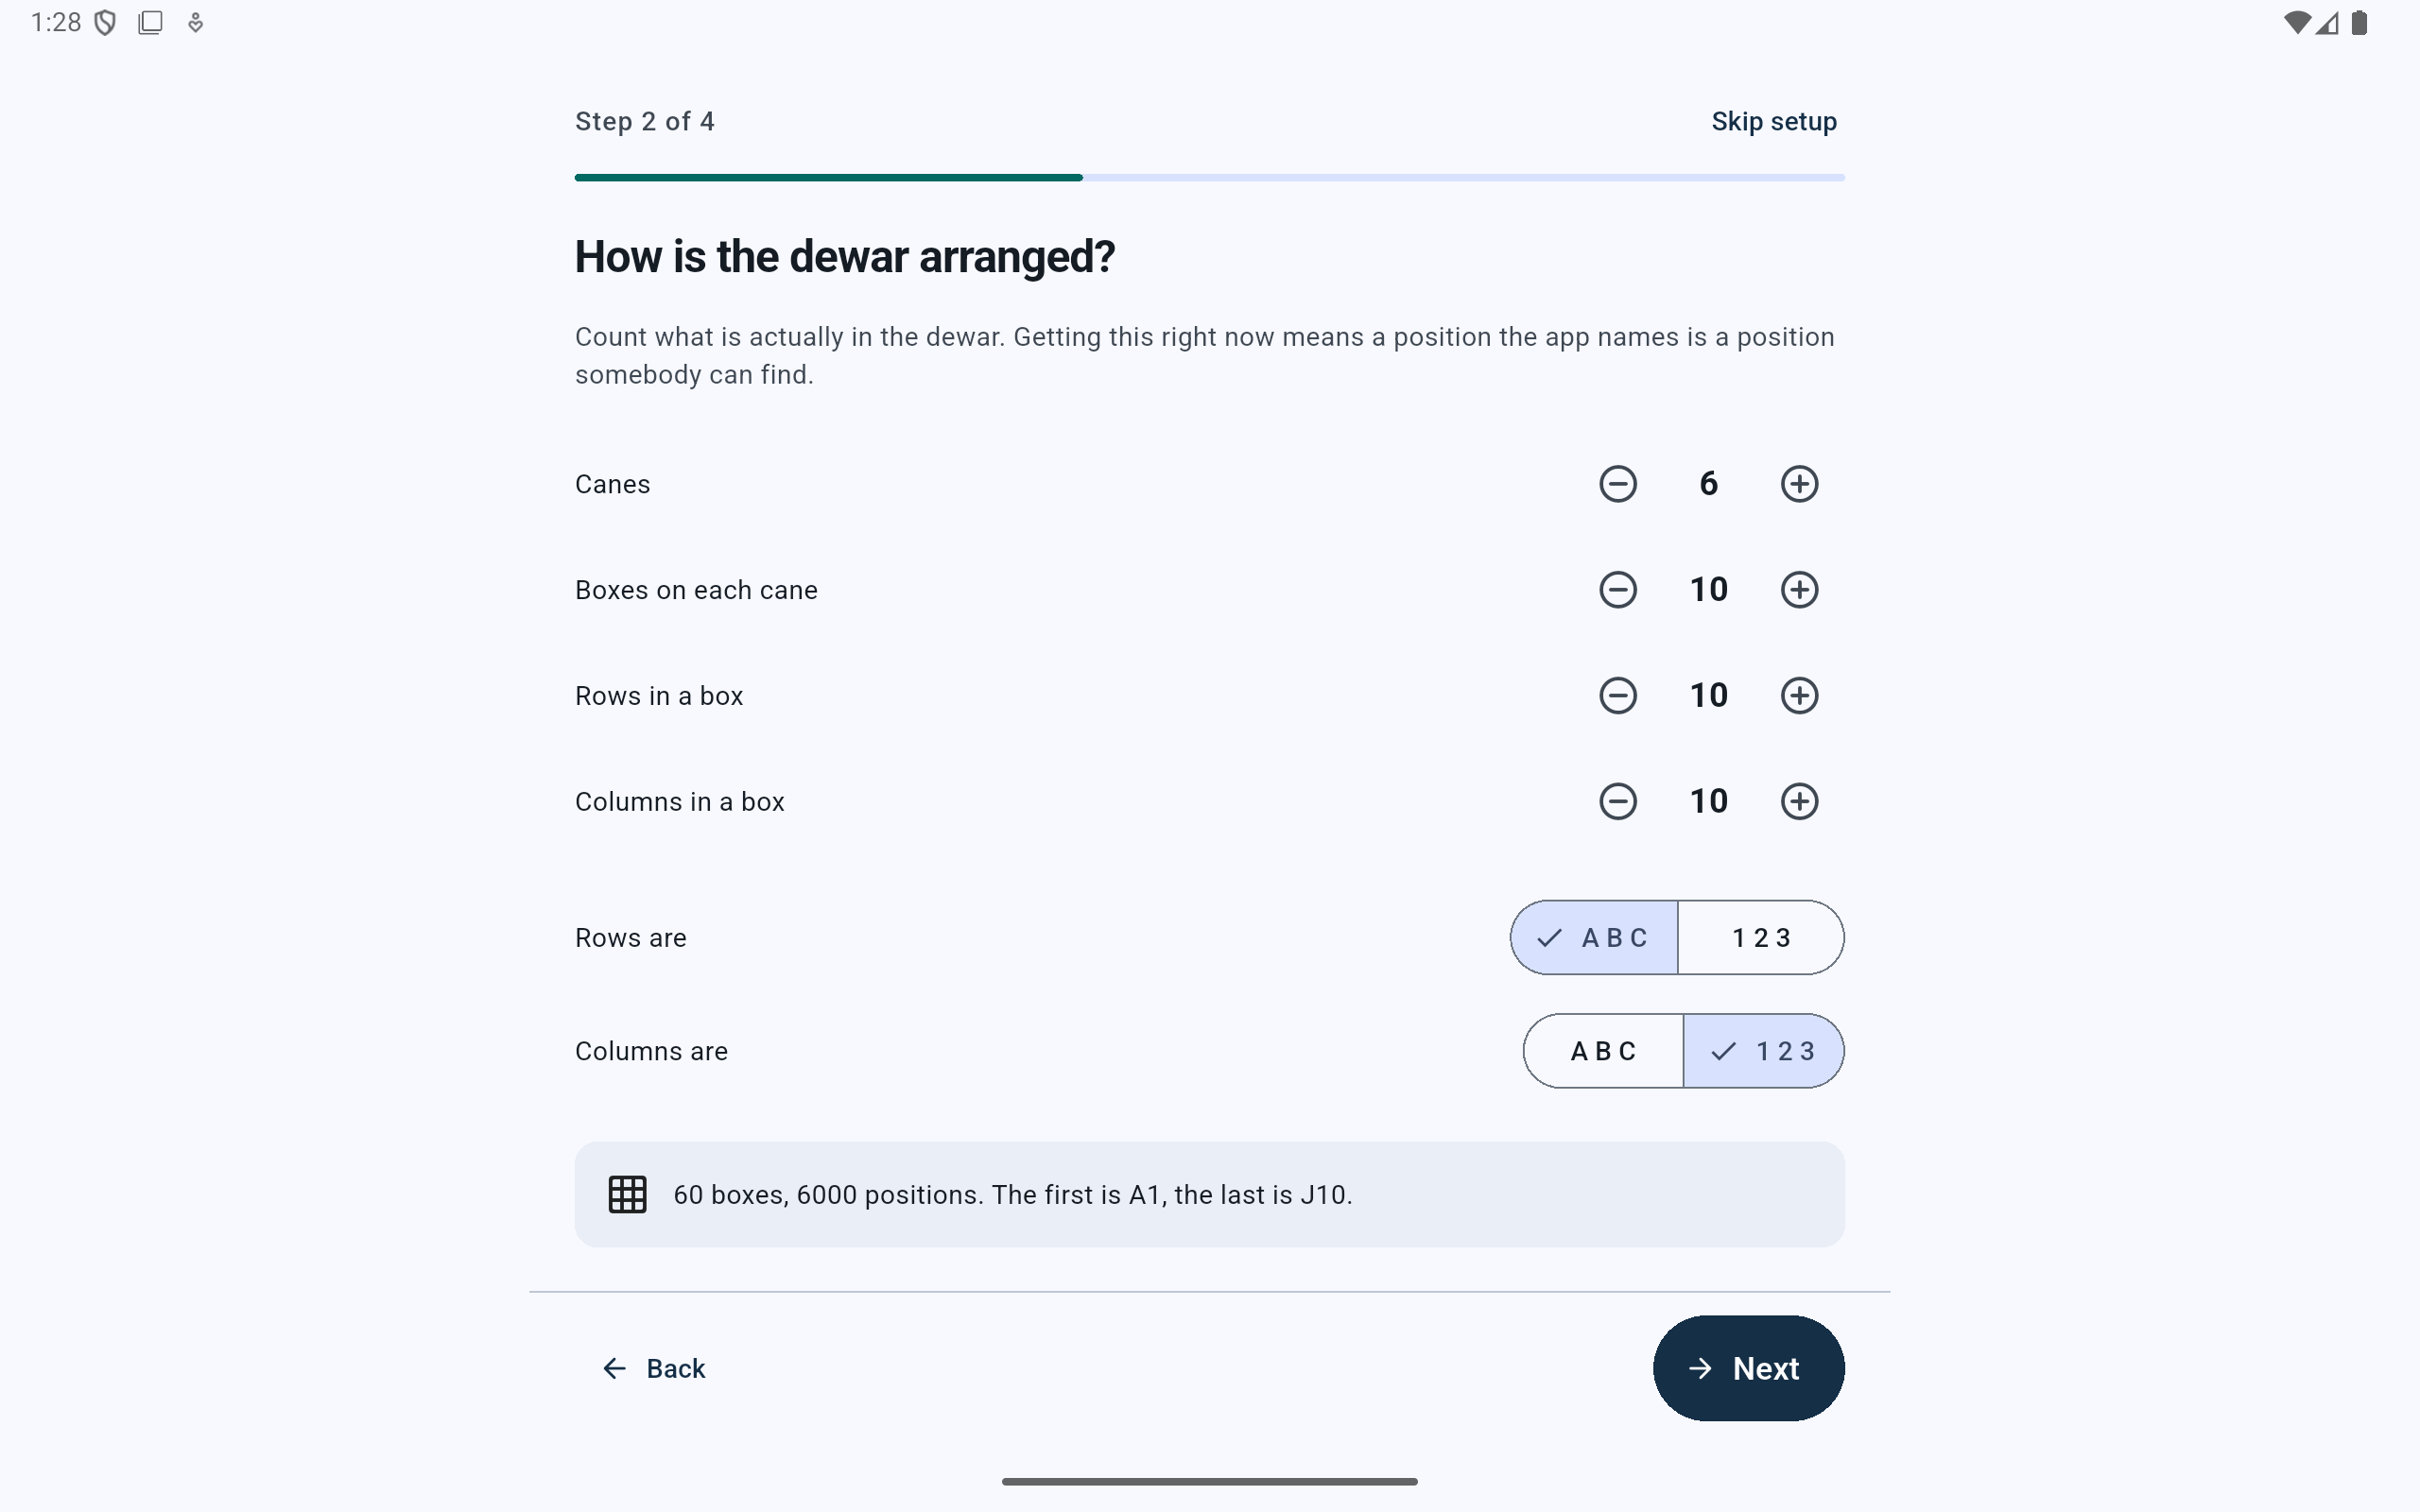
The example describes six canes with ten 10×10 boxes each. The summary confirms that positions run from A1 through J10.
- Count canes and boxes per cane from the physical dewar.
- Count the grid rows and columns on the actual box.
- Match the laboratory's printed coordinate convention.
- Read the calculated capacity and boundary coordinates.
Do not inflate capacity to make an import fit. If a spreadsheet describes more locations than the physical dewar contains, investigate the spreadsheet or use spreadsheet-assisted setup, which shows its detected minimum separately from the capacity the lab confirms.
Step 3 of 4
Add the people who will record work at the dewar.
- Type one person's name and select Add.
- Repeat for the people currently expected to store, move, remove, fill, audit, or correct records.
- Remove a staged name with its × if it was entered incorrectly.
- Select Next. Additional people can be added later while recording work or from Settings.
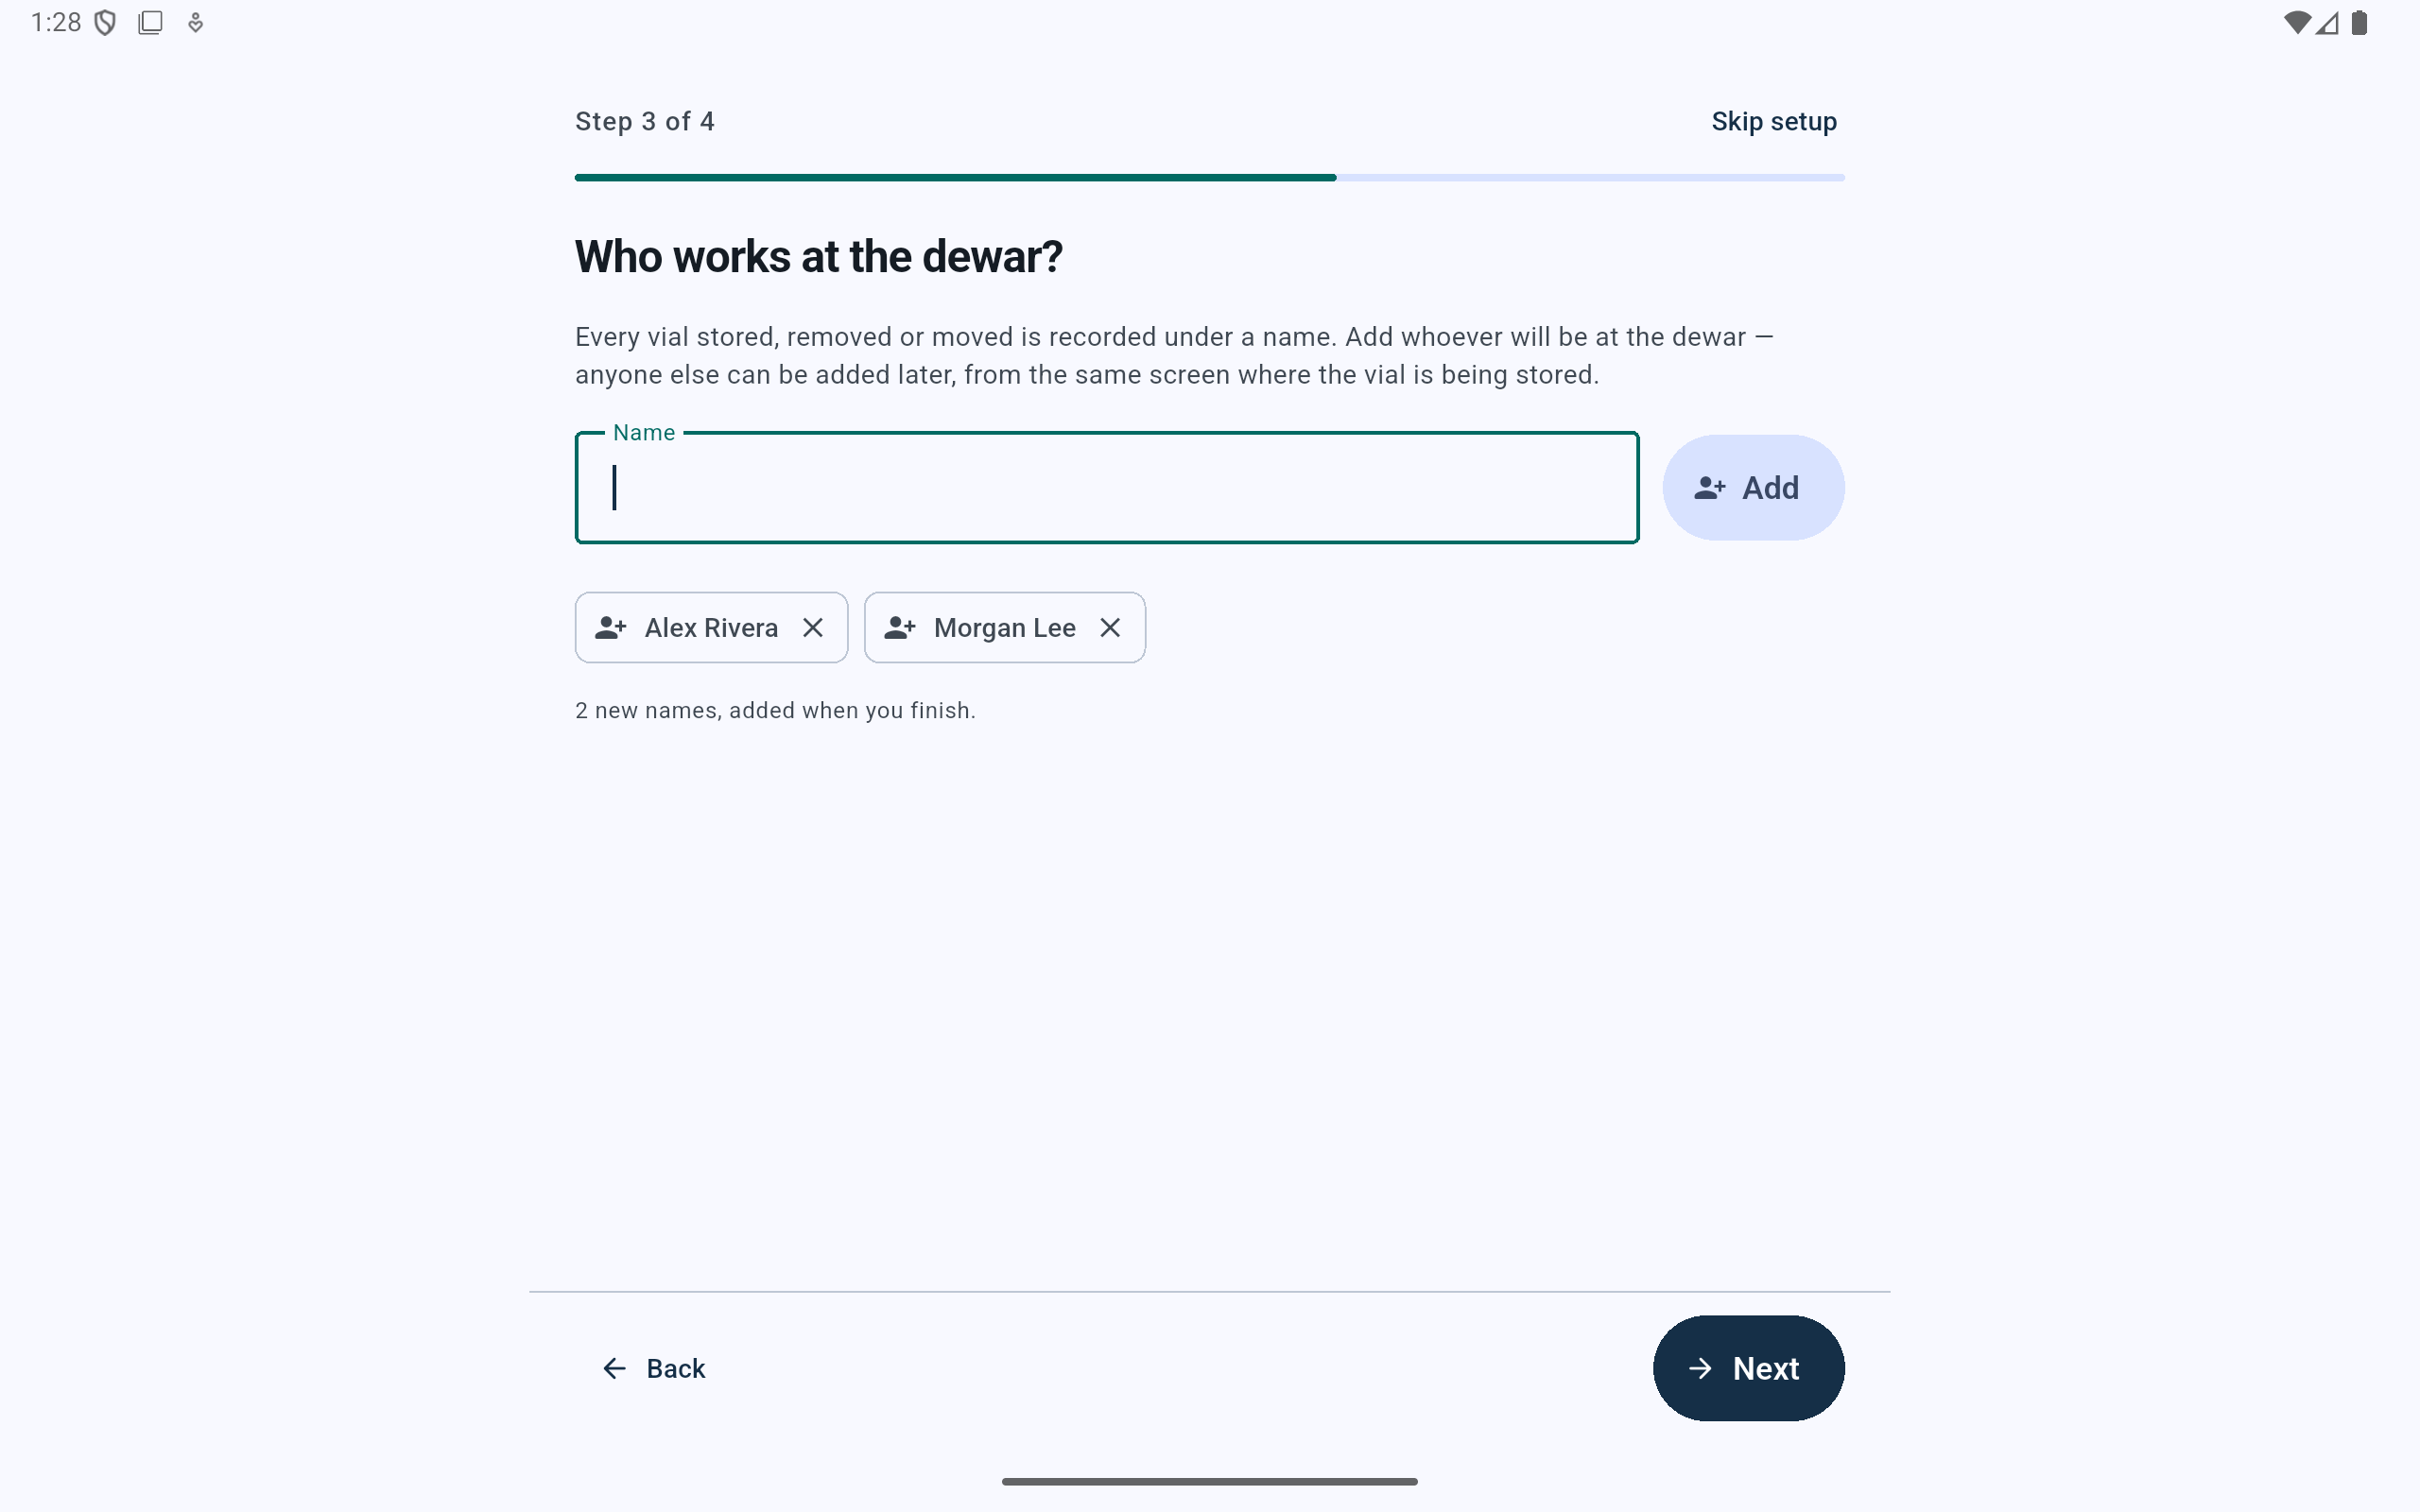
Names are attribution choices, not device accounts. CryoIndex does not require each person to sign in.
- Enter one current user at a time.
- Review every staged name before continuing.
- The count confirms how many names will be created at Finish.
Step 4 of 4
Add only the cell lines the lab already keeps.
- Select Add a cell line.
- Enter the line's name and review the assigned color.
- Repeat for existing lines. A new line can be created later when its first vial is stored.
- Review the staged chips, then select Next.
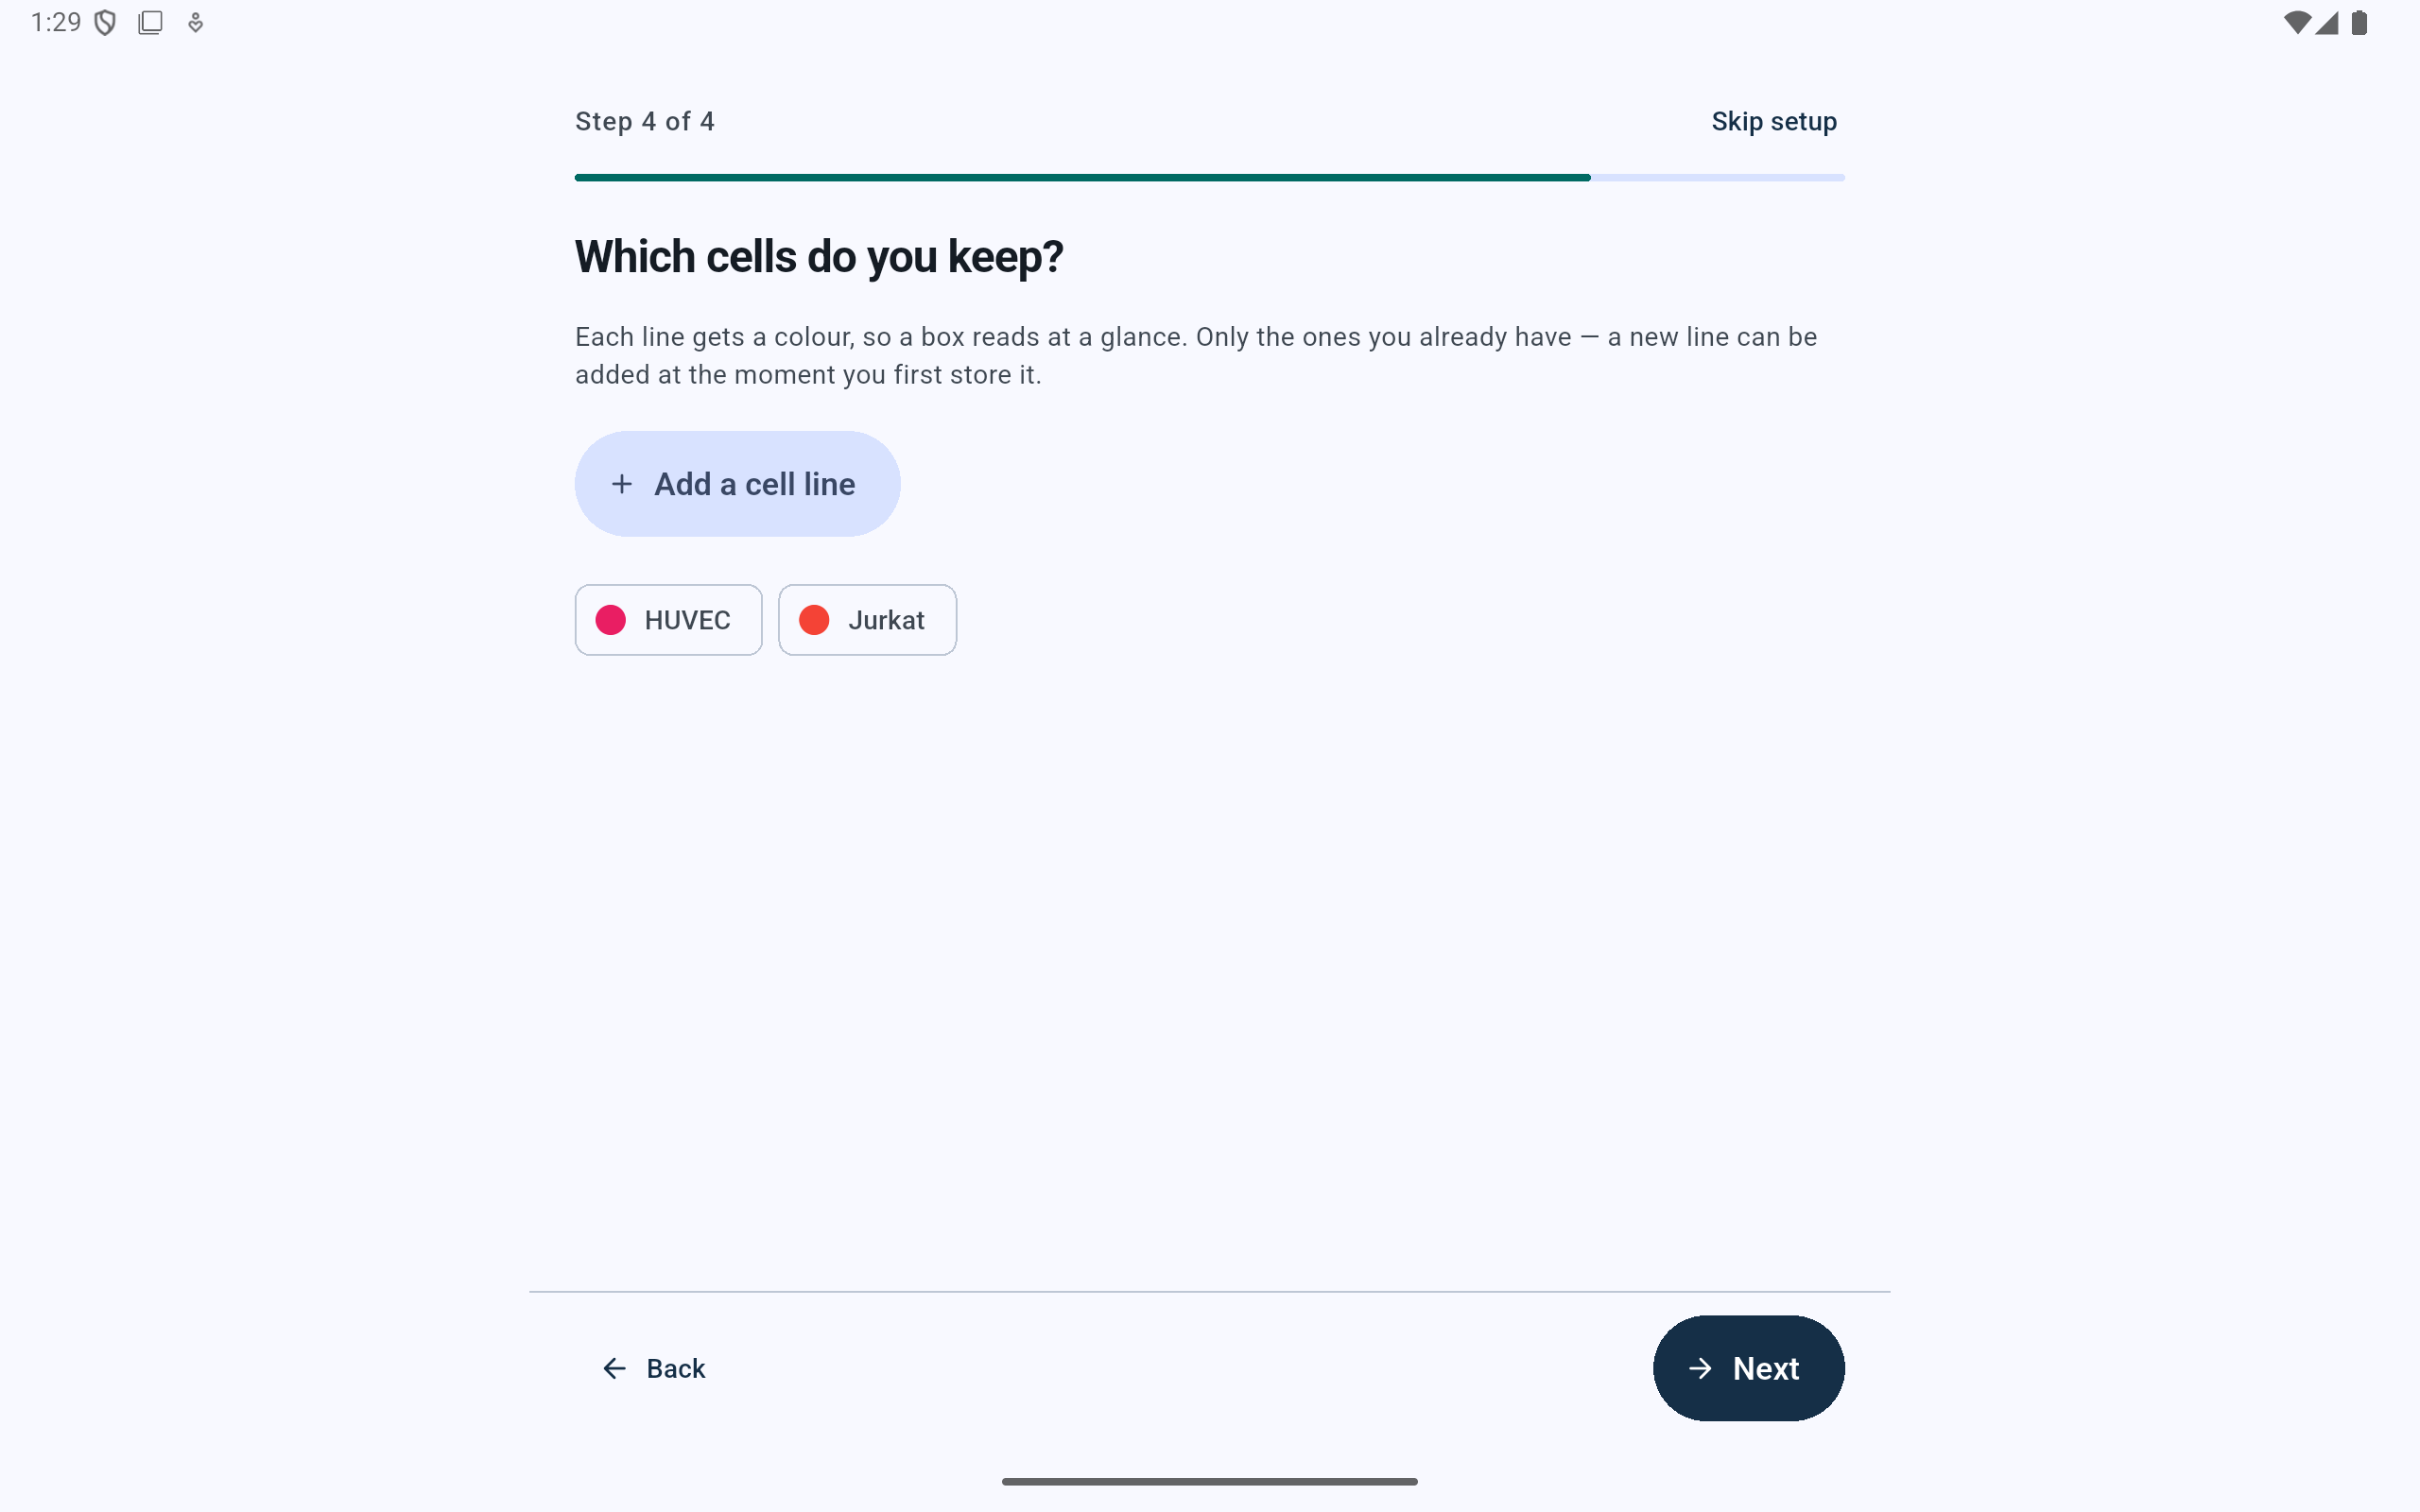
Colors make occupied box positions readable at a glance. They can be changed later without changing the vial records.
- Add another existing line when needed.
- Review the names and distinct assigned colors.
- Continue without trying to predict every future cell line.
Ready summary
Compare the totals before creating the lab.
The Ready screen summarizes storage capacity, people, and cell lines. Use Back to correct anything uncertain. Store the first vial finishes setup and opens the storage form; Done finishes setup and opens the dashboard.
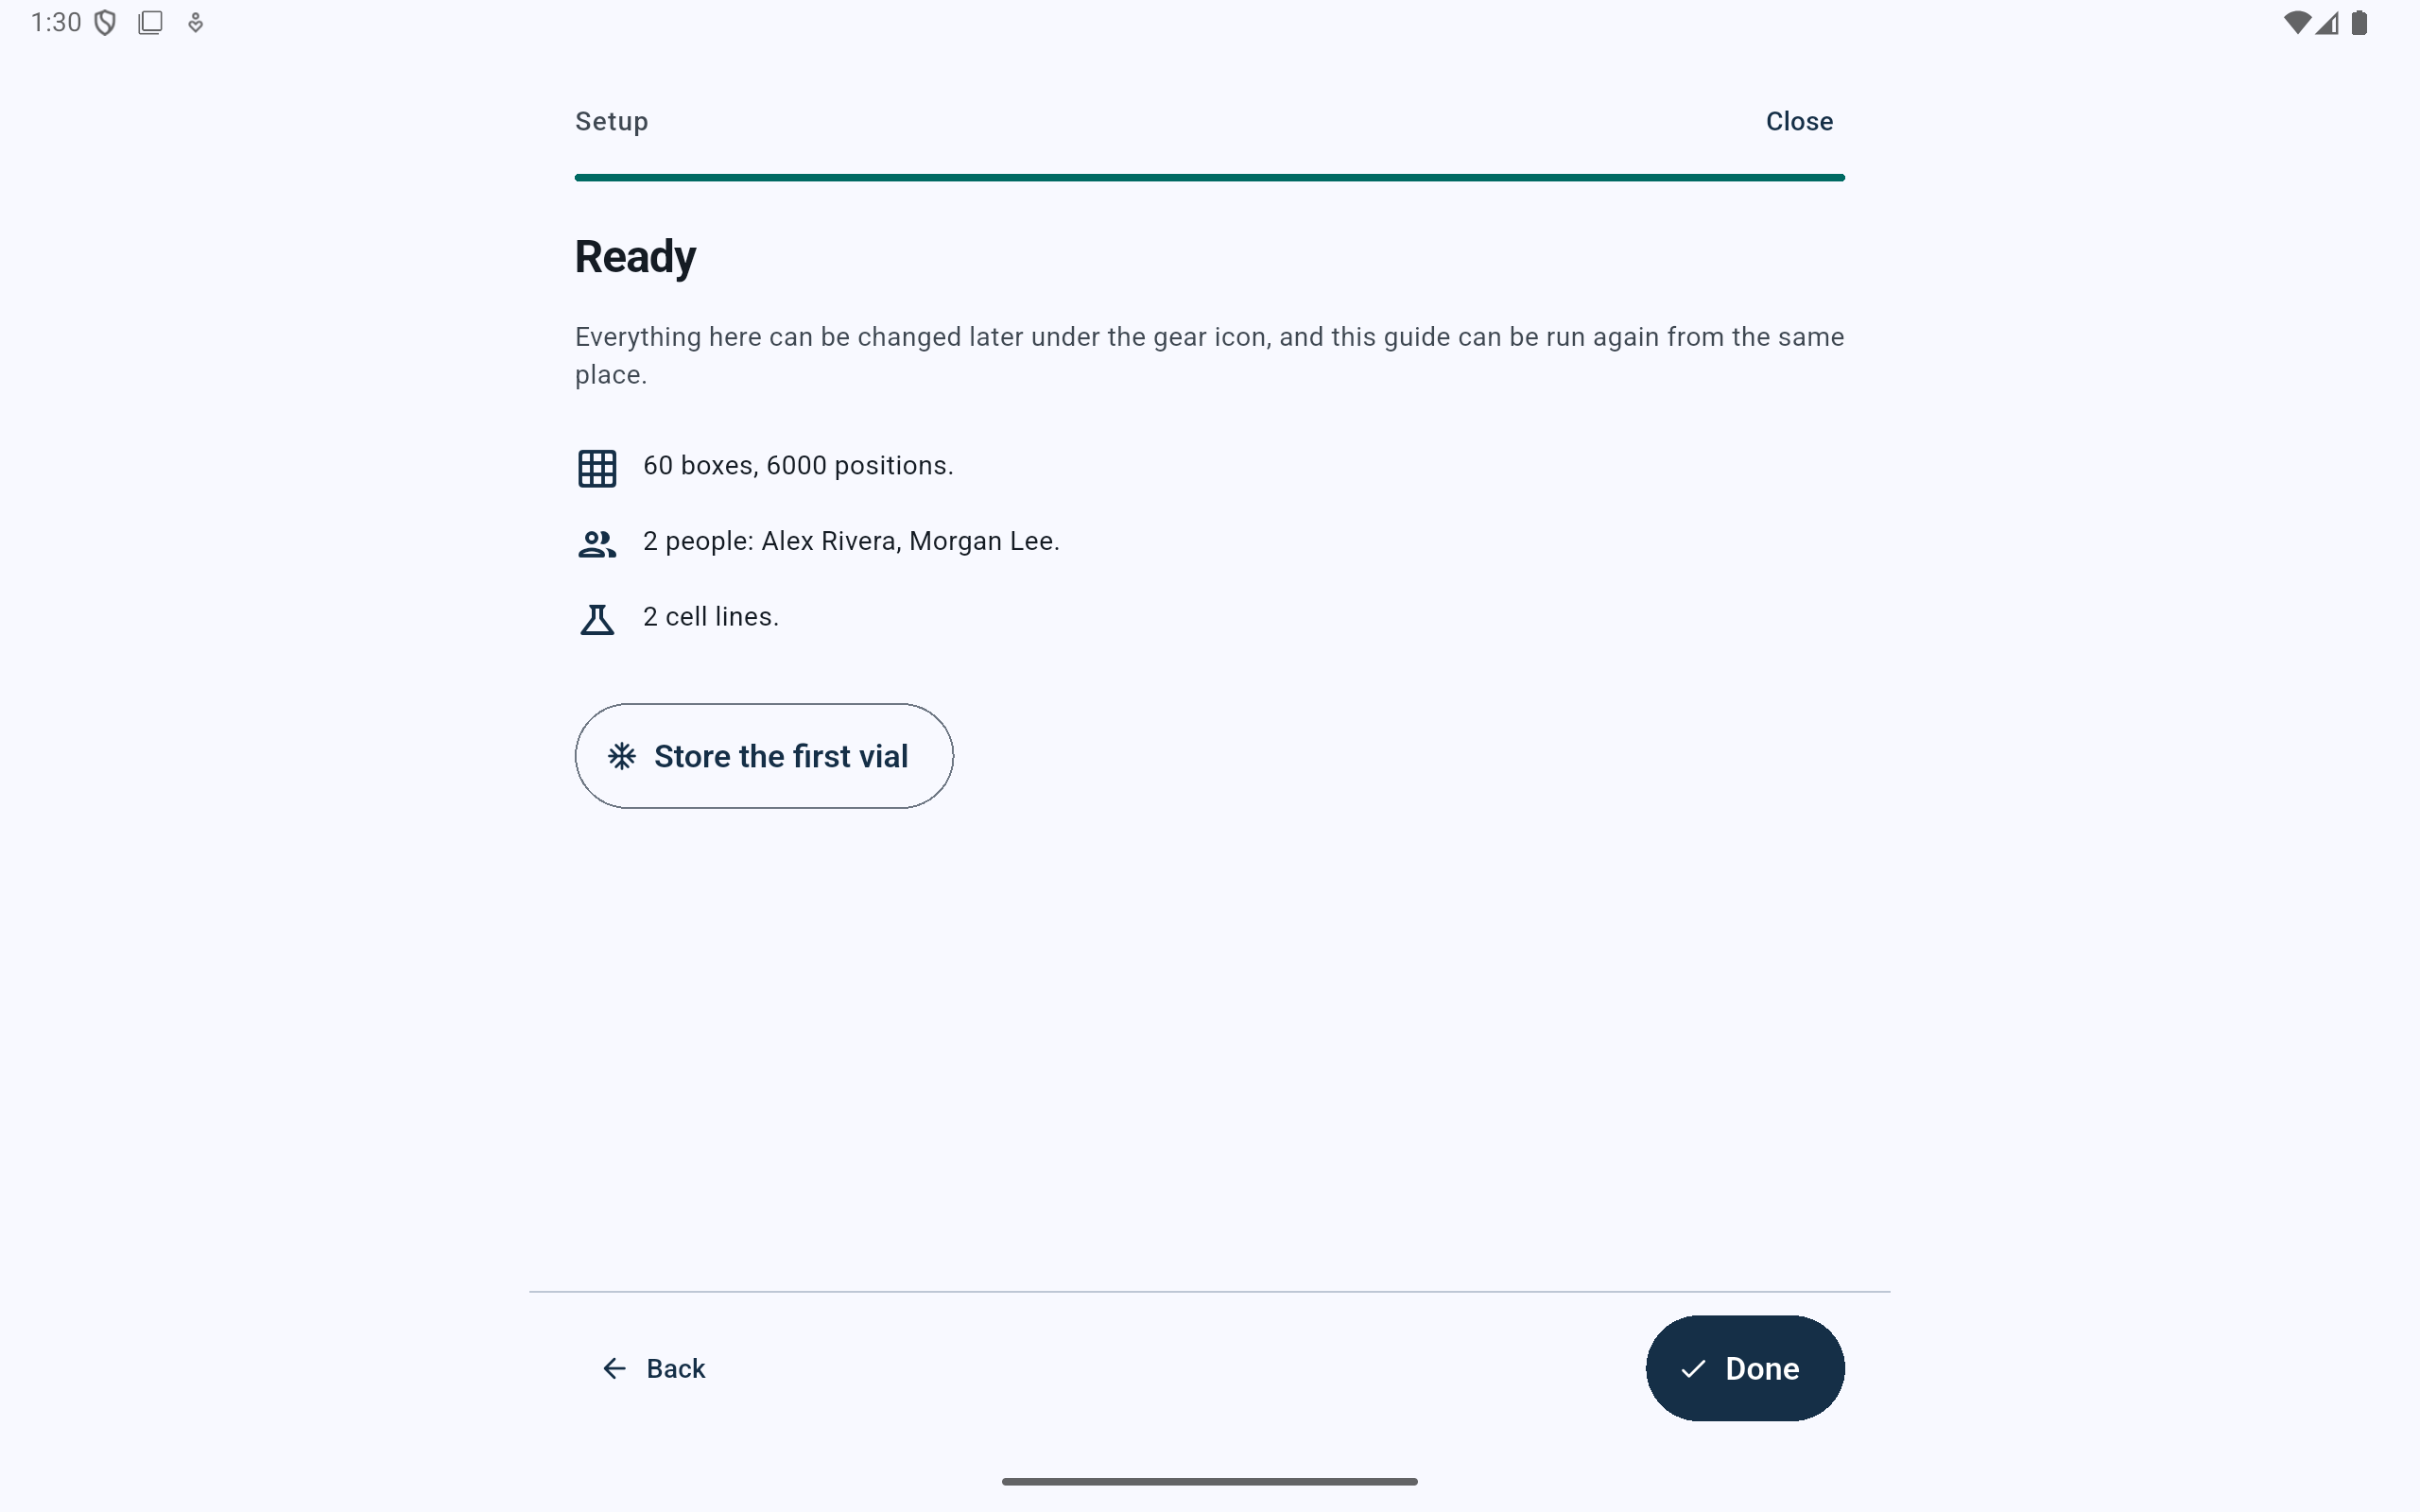
The summary is the last combined check. The lab name and staged people are written when setup finishes; the layout and each cell line were saved as those earlier steps were completed.
- Compare all three totals with the preceding steps.
- Start the first real vial immediately when its details and physical position are ready.
- Return to correct an uncertain setting.
- Finish to open the empty lab dashboard.
After manual setup
Resolve the honest empty-lab warnings; do not manufacture reassuring dates.
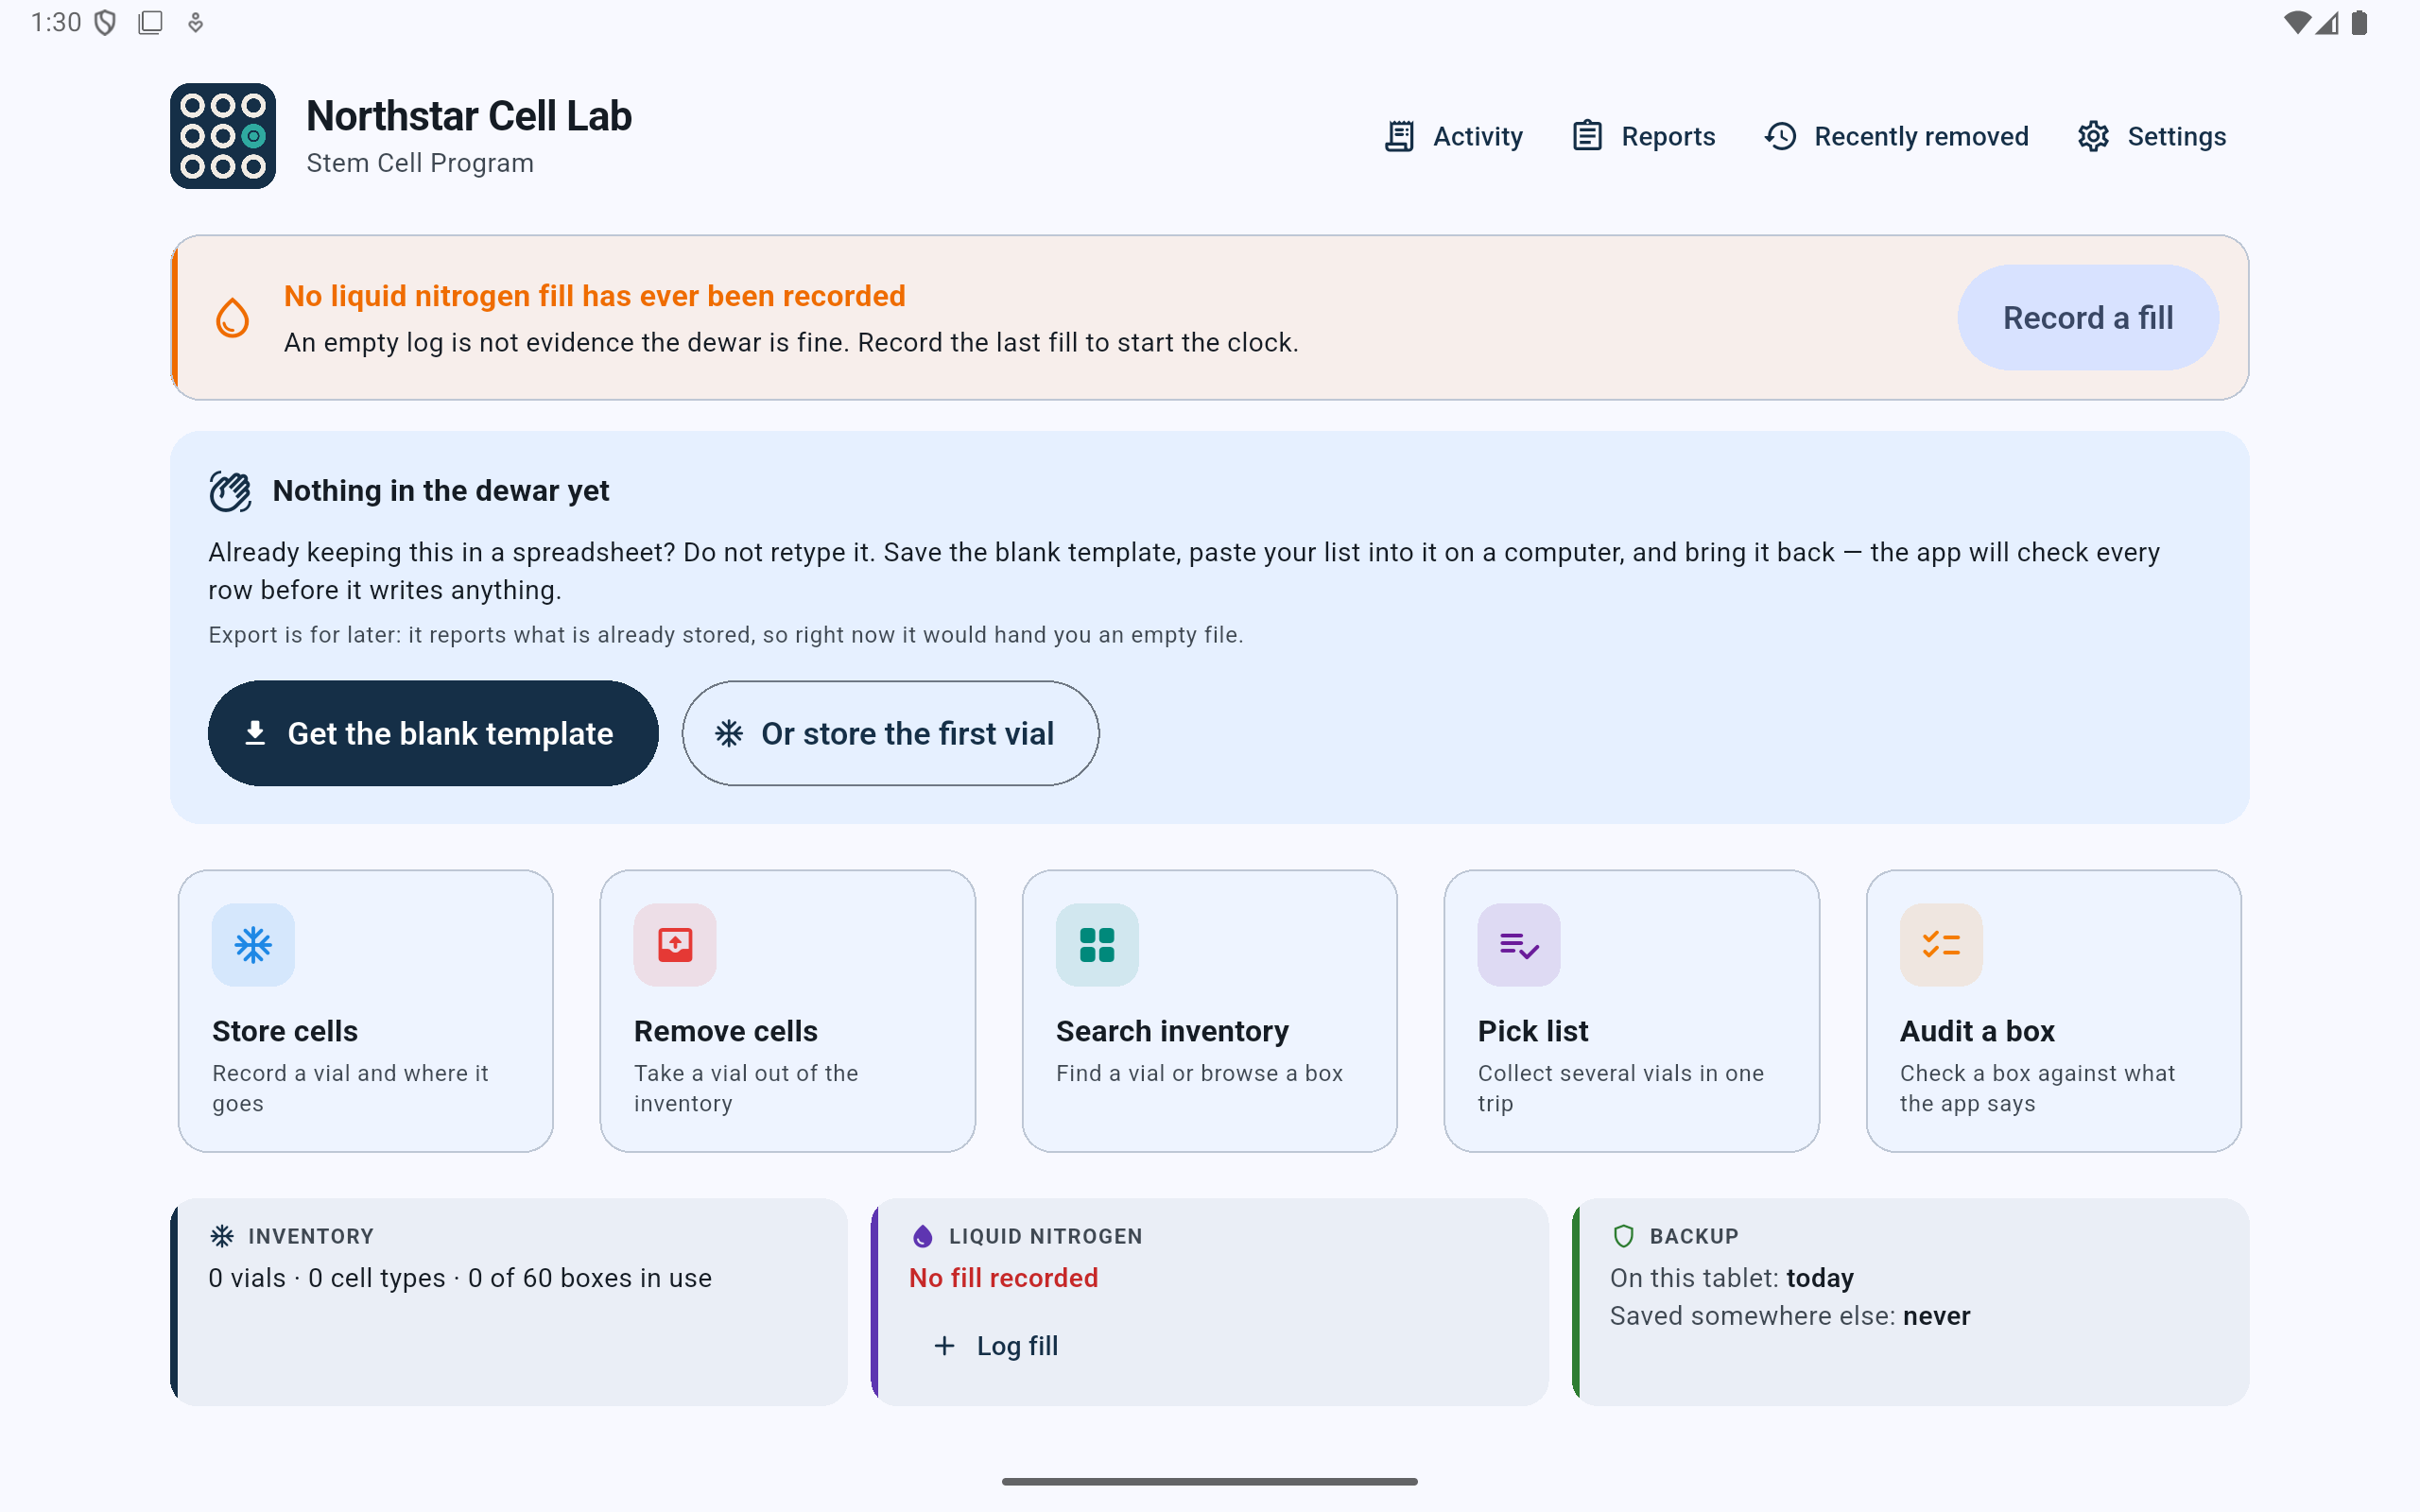
A fresh manual setup starts with no vial records, no fill history, and no external backup. The dashboard says that plainly.
- Record the last liquid-nitrogen fill only when the lab knows when it happened.
- The spreadsheet path remains available until the lab begins entering inventory.
- Store the first vial only when the physical vial and position are ready.
- The inventory strip confirms that setup did not invent vial or cell-type usage.
- Create an external backup after meaningful records exist; the automatic copy shown here remains on this tablet.
Setup can be run again. Lab identity, people, cell lines, fill schedule, and storage settings remain available under Settings. Changes to an inventory already in use should be reviewed more cautiously than this empty-lab setup.