Before opening storage
Build and review the entire list at the bench.
The app groups the selected vials in physical order so a box or lid does not need to be reopened for repeated searches.
Choose the work
Select the exact vials the experiment needs.
- Open Pick list from the dashboard.
- Search by barcode or donor code, or narrow the list by cell line and passage.
- Check each exact vial. Confirm its cell line, passage, and full location in the selection row.
- Include an unbarcoded vial when needed; it is clearly labelled No barcode.
- Review the count on Collect vials before continuing.
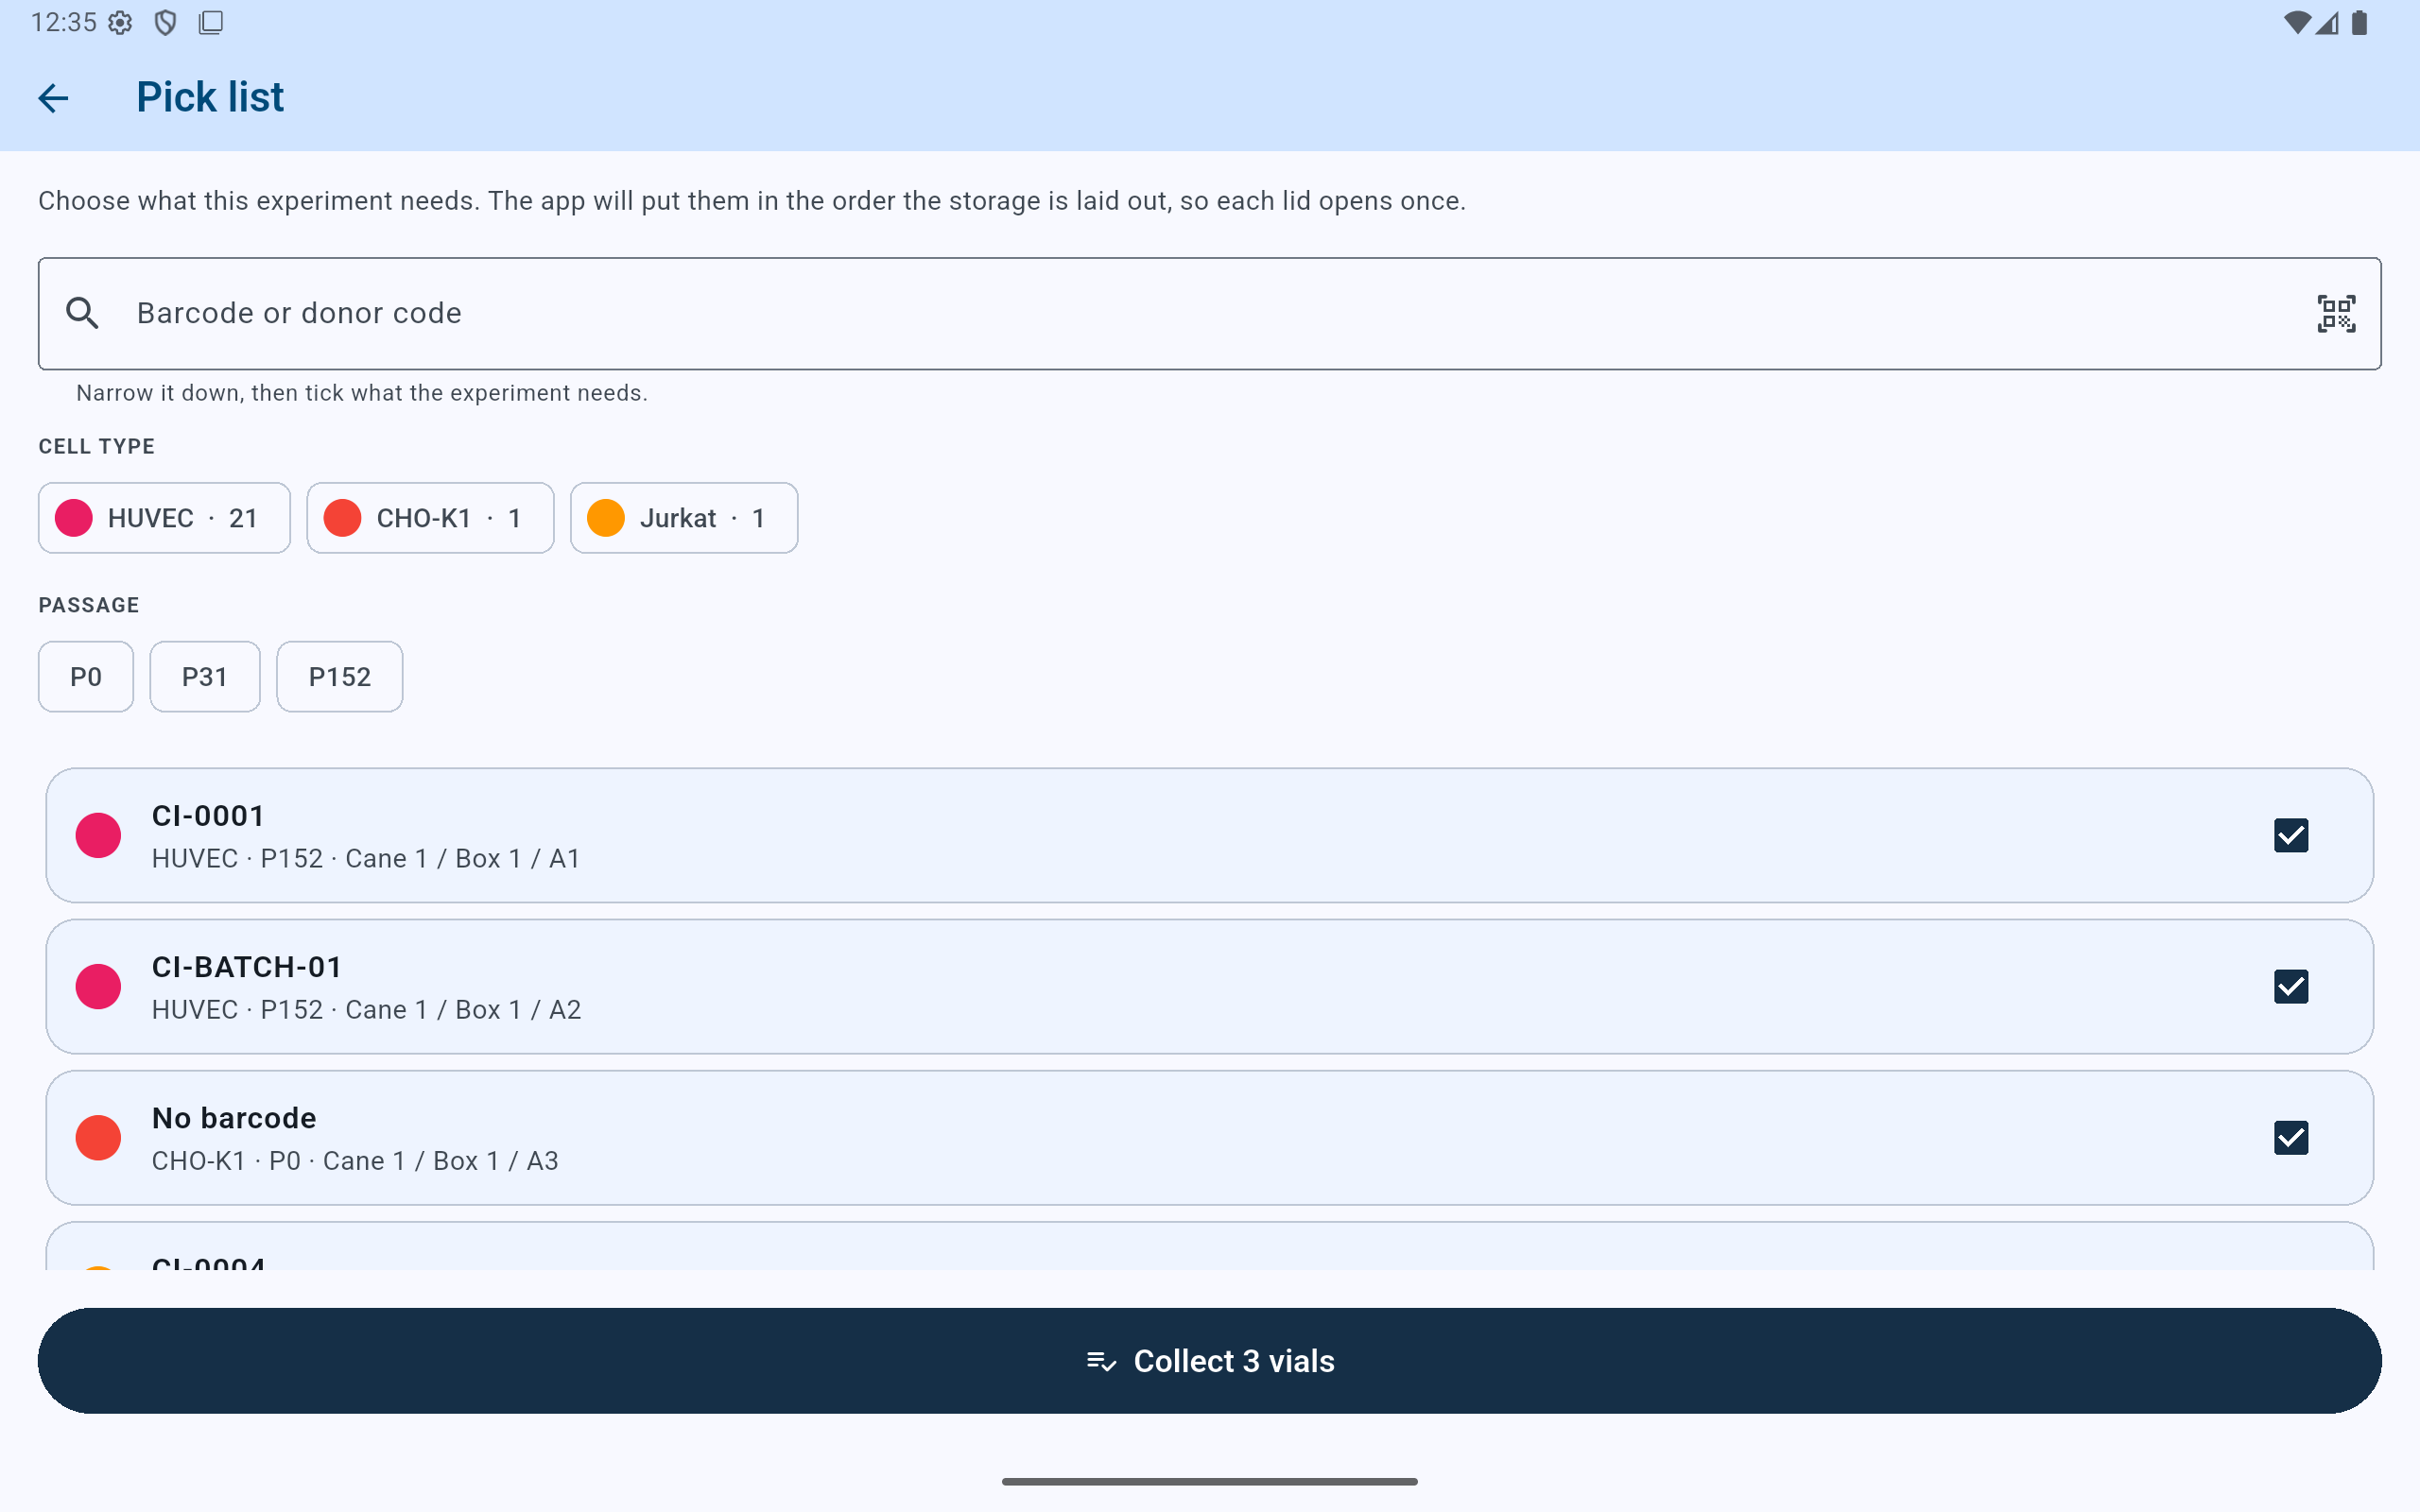
Selection happens before approaching storage; the walk begins only after the list and count are confirmed.
- Search or filter until the intended vials can be identified without ambiguity.
- Check the exact vial rows, including location and passage.
- An unbarcoded vial may be included and remains visibly identified as such.
- Verify the total before selecting Collect.
Before the walk starts
Record who is collecting and, when appropriate, what happens to the vials.
- Choose the current user who will physically collect the vials.
- Optionally choose one disposition—such as Thawed for use or Transferred or shipped—when it truthfully applies to the selected set.
- If selected vials will have different outcomes, use separate pick lists or leave the shared disposition unset and record the correct outcomes through the applicable workflow.
- Select Start only after the collector is shown correctly.
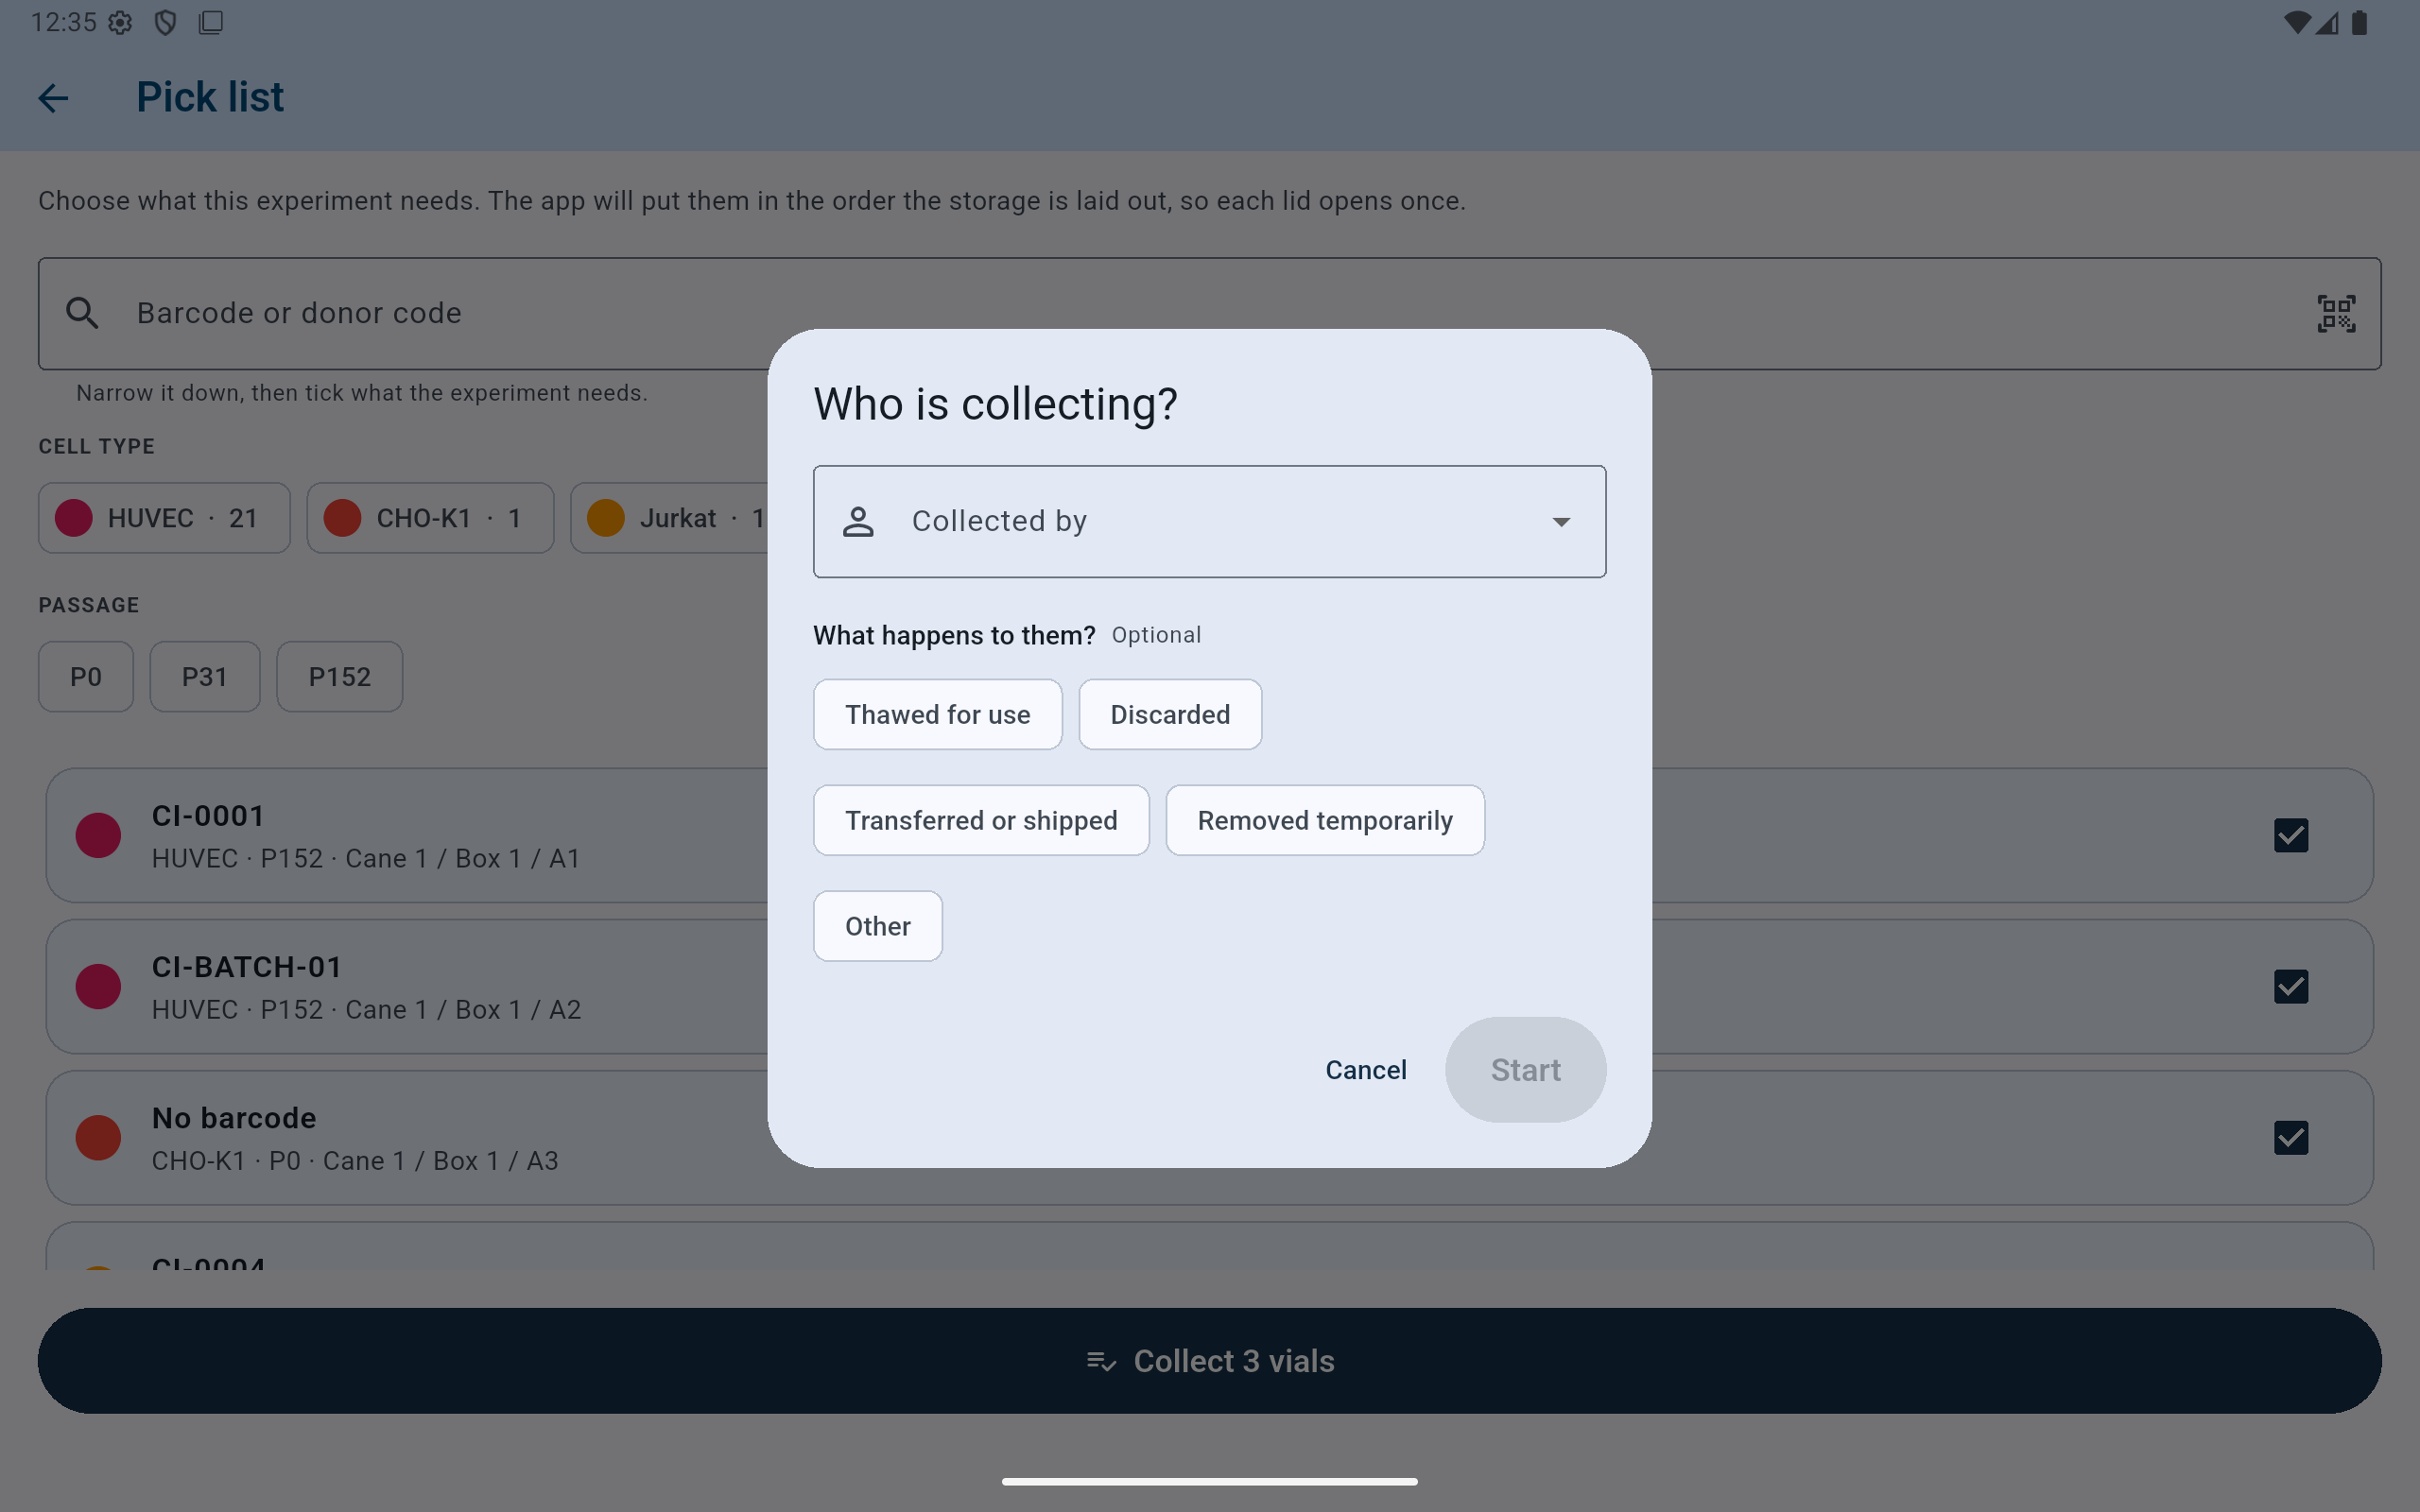
The collector is attributable; the disposition remains optional because the app should not guess why a vial left storage.
- Choose the person physically performing the retrieval.
- Choose a shared disposition only when it applies to the selected vials.
- The walk cannot start until a collector is selected.
At the dewar
Follow the presented order one vial at a time.
The current vial’s full address is the largest information on the screen. The remaining list stays visible below so the operator knows what is next without returning to the selection page.
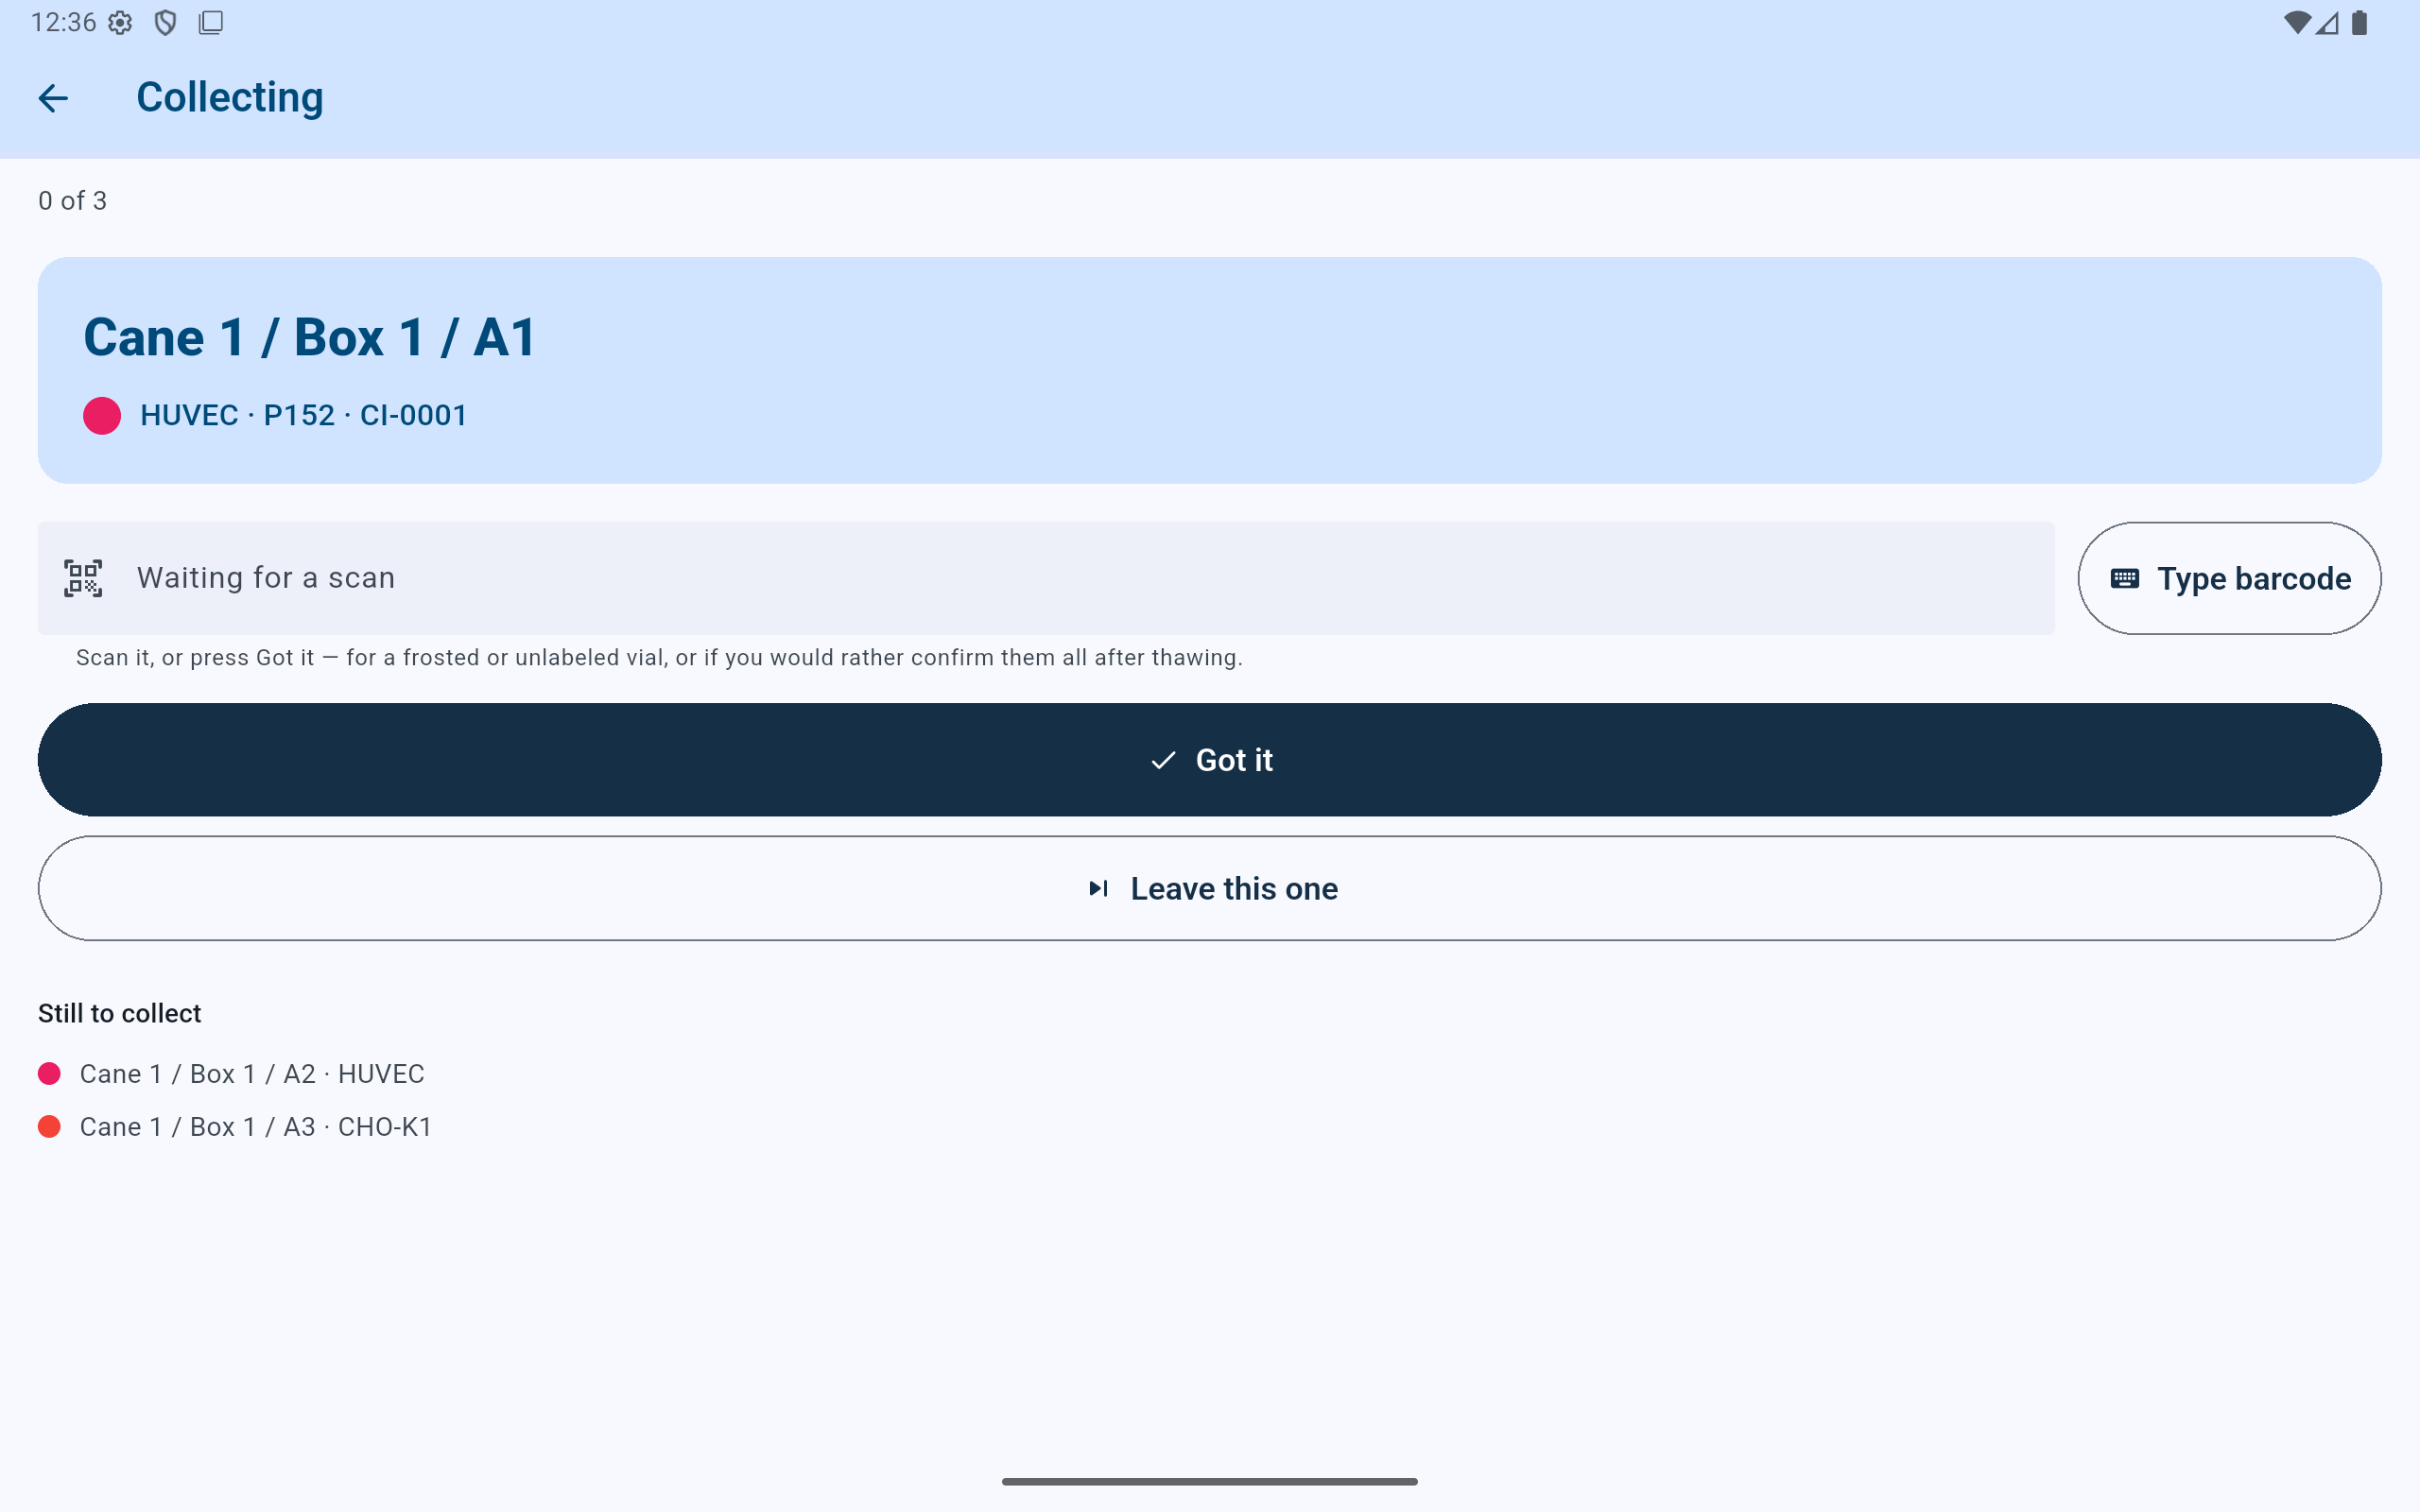
CryoIndex records each pull immediately rather than waiting for the entire list to finish.
- Track progress against the complete selected list.
- Read the full current address and vial identifier before lifting anything.
- Scan the vial as it comes out whenever it has a readable barcode.
- Use Leave this one when the vial should remain in storage.
- The next locations remain visible below the active item.
Each pull is committed when it happens. If the tablet or app closes halfway through, the vials already recorded as collected remain removed and the untouched vials remain in storage.
Identity check
Scan a barcoded vial as it leaves whenever possible.
- Scan with the attached hardware scanner. The screen listens without opening the software keyboard.
- If typing is necessary, select Type barcode, enter the entire identifier, and press Enter.
- A correct match records a confirmed removal under the selected collector.
- If CryoIndex says the barcode is wrong or absent from inventory, stop. Do not press Got it merely to bypass a mismatch.
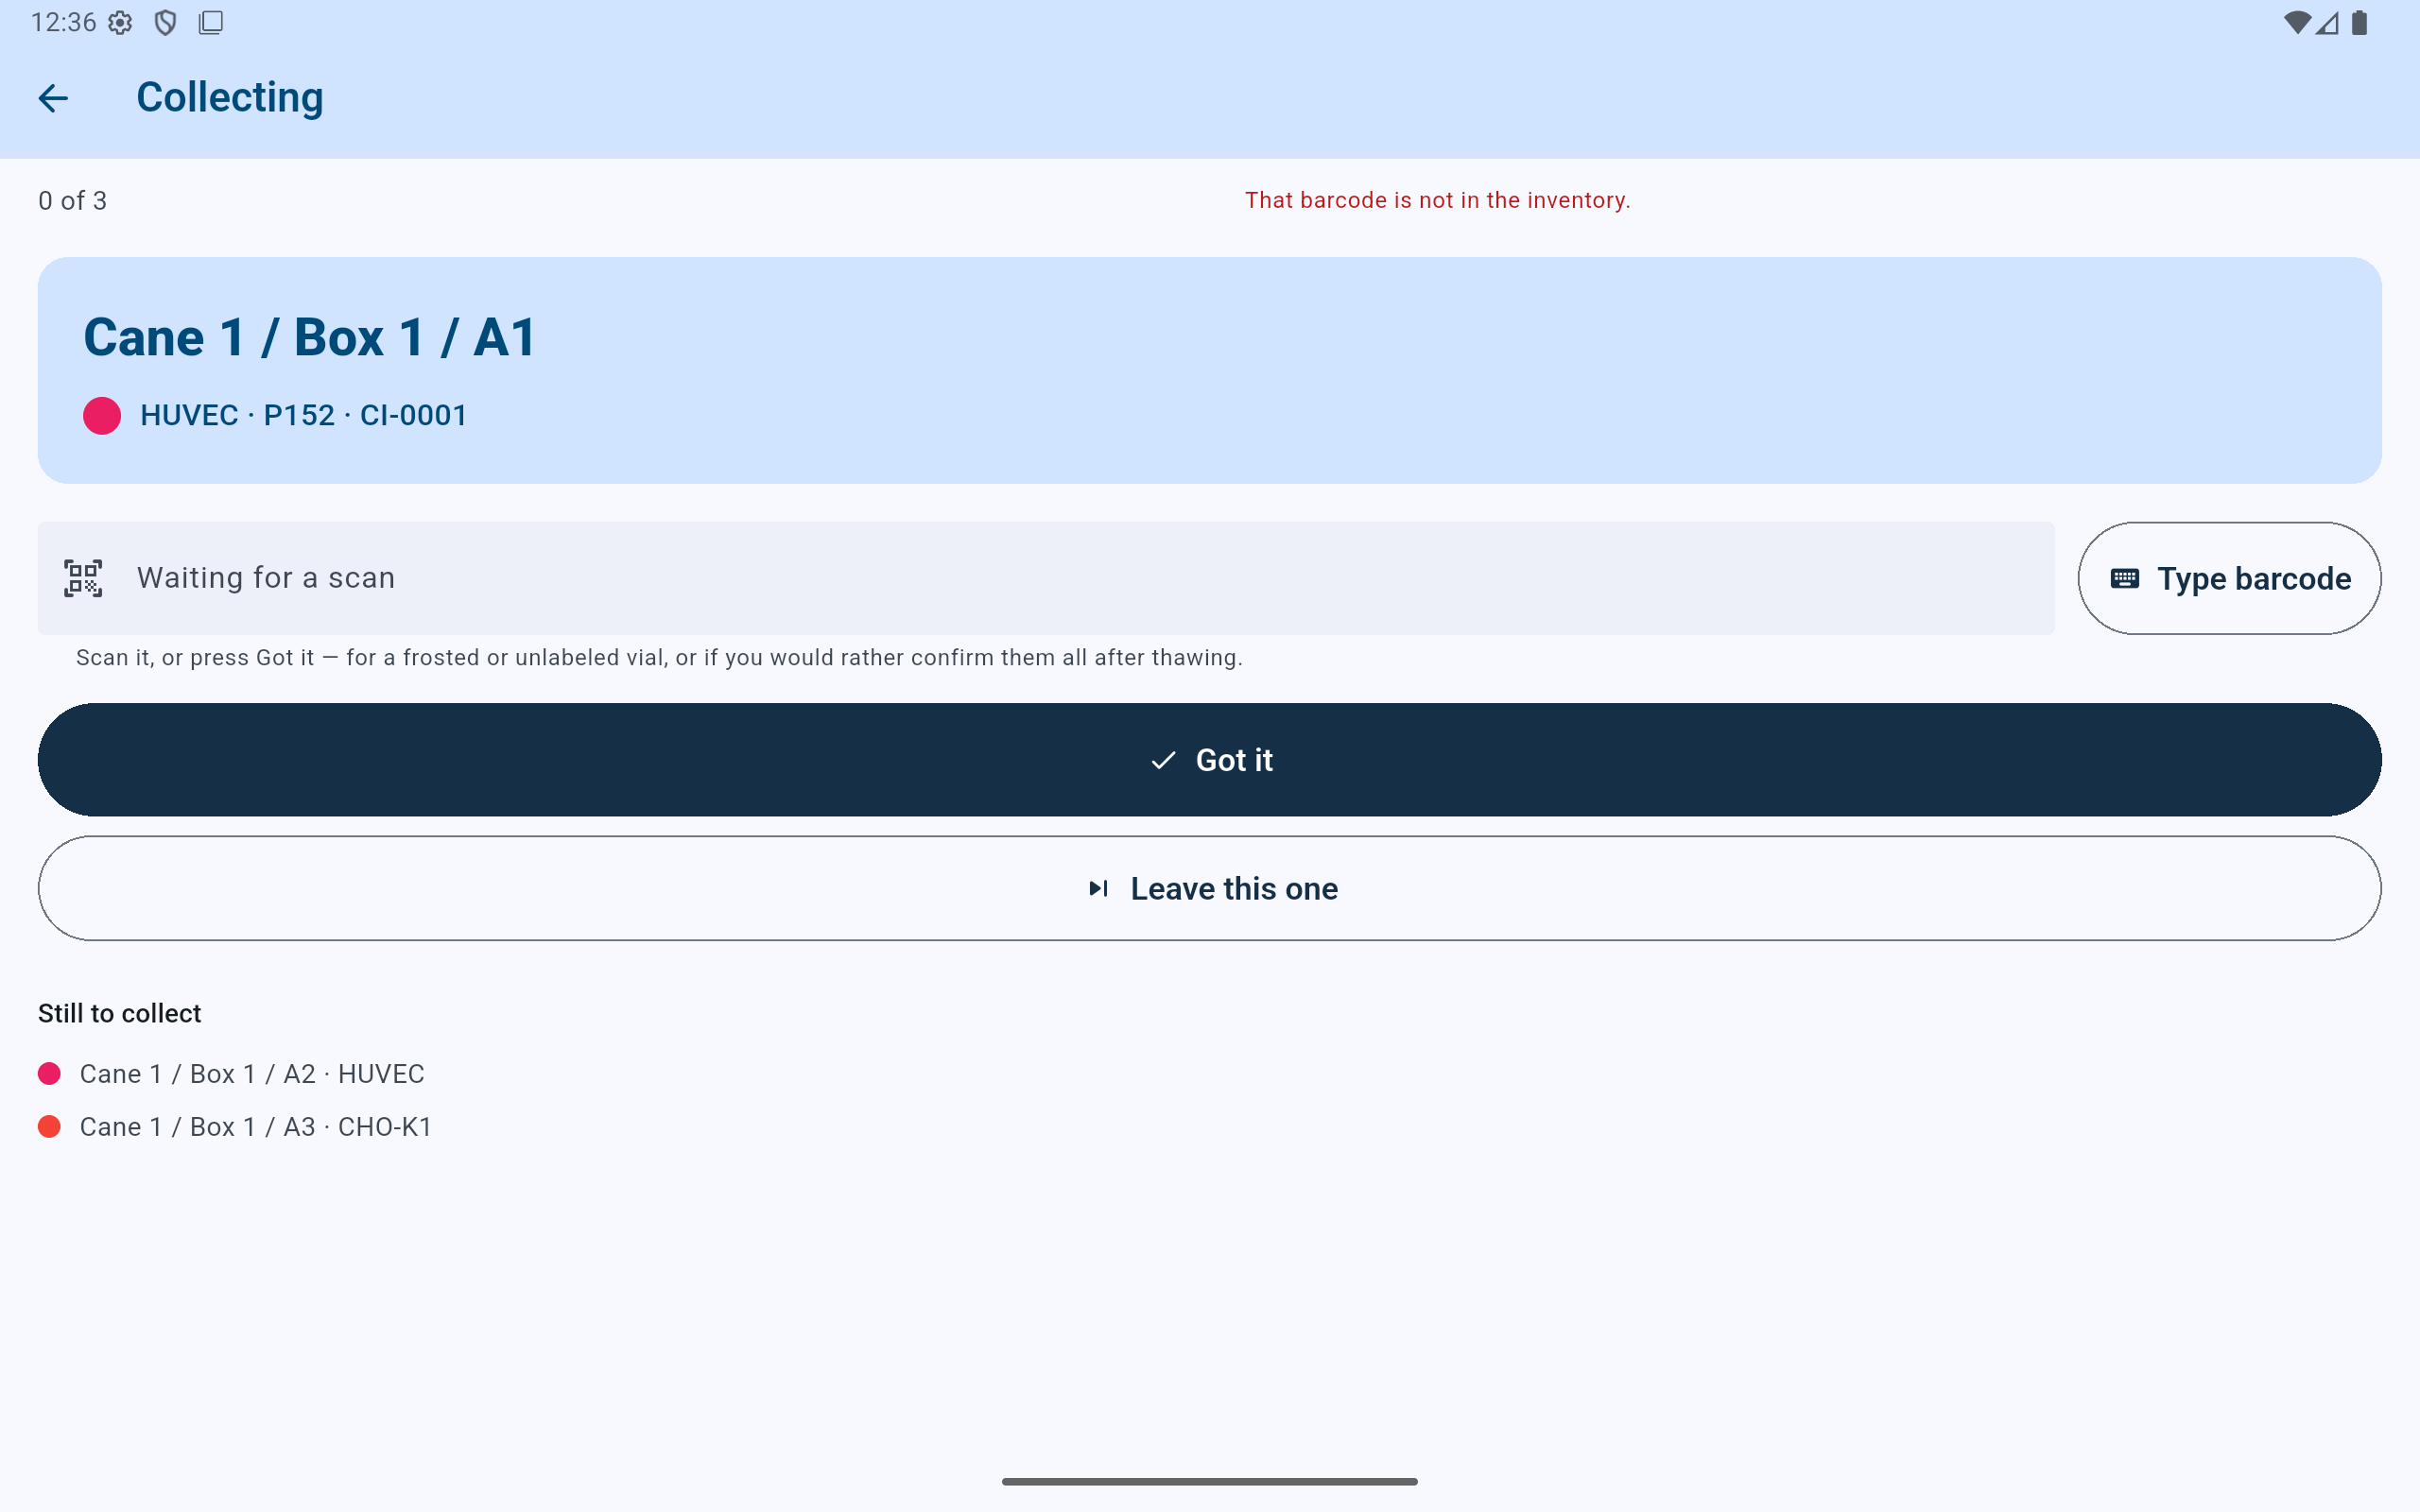
A mismatch is a reason to re-check the vial and position, not a prompt to force the next step.
- Read the refusal and return the wrong vial to approved cold handling.
- Confirm that the requested vial and address still match the physical position.
- Scan again only after identifying the cause of the mismatch.
Frosted, damaged, or unbarcoded labels
Use Got it deliberately—and understand the follow-up.
- For a barcoded vial that cannot be scanned, select Got it only after visually confirming the requested vial and position.
- That barcoded vial is recorded as removed but remains awaiting scan confirmation. The dashboard will continue to ask until someone confirms it.
- For a vial recorded with No barcode, select Got it. Since no barcode can ever be scanned, the removal is confirmed when it is recorded.
- Select Leave this one if the vial should stay physically in storage; it is skipped rather than removed.
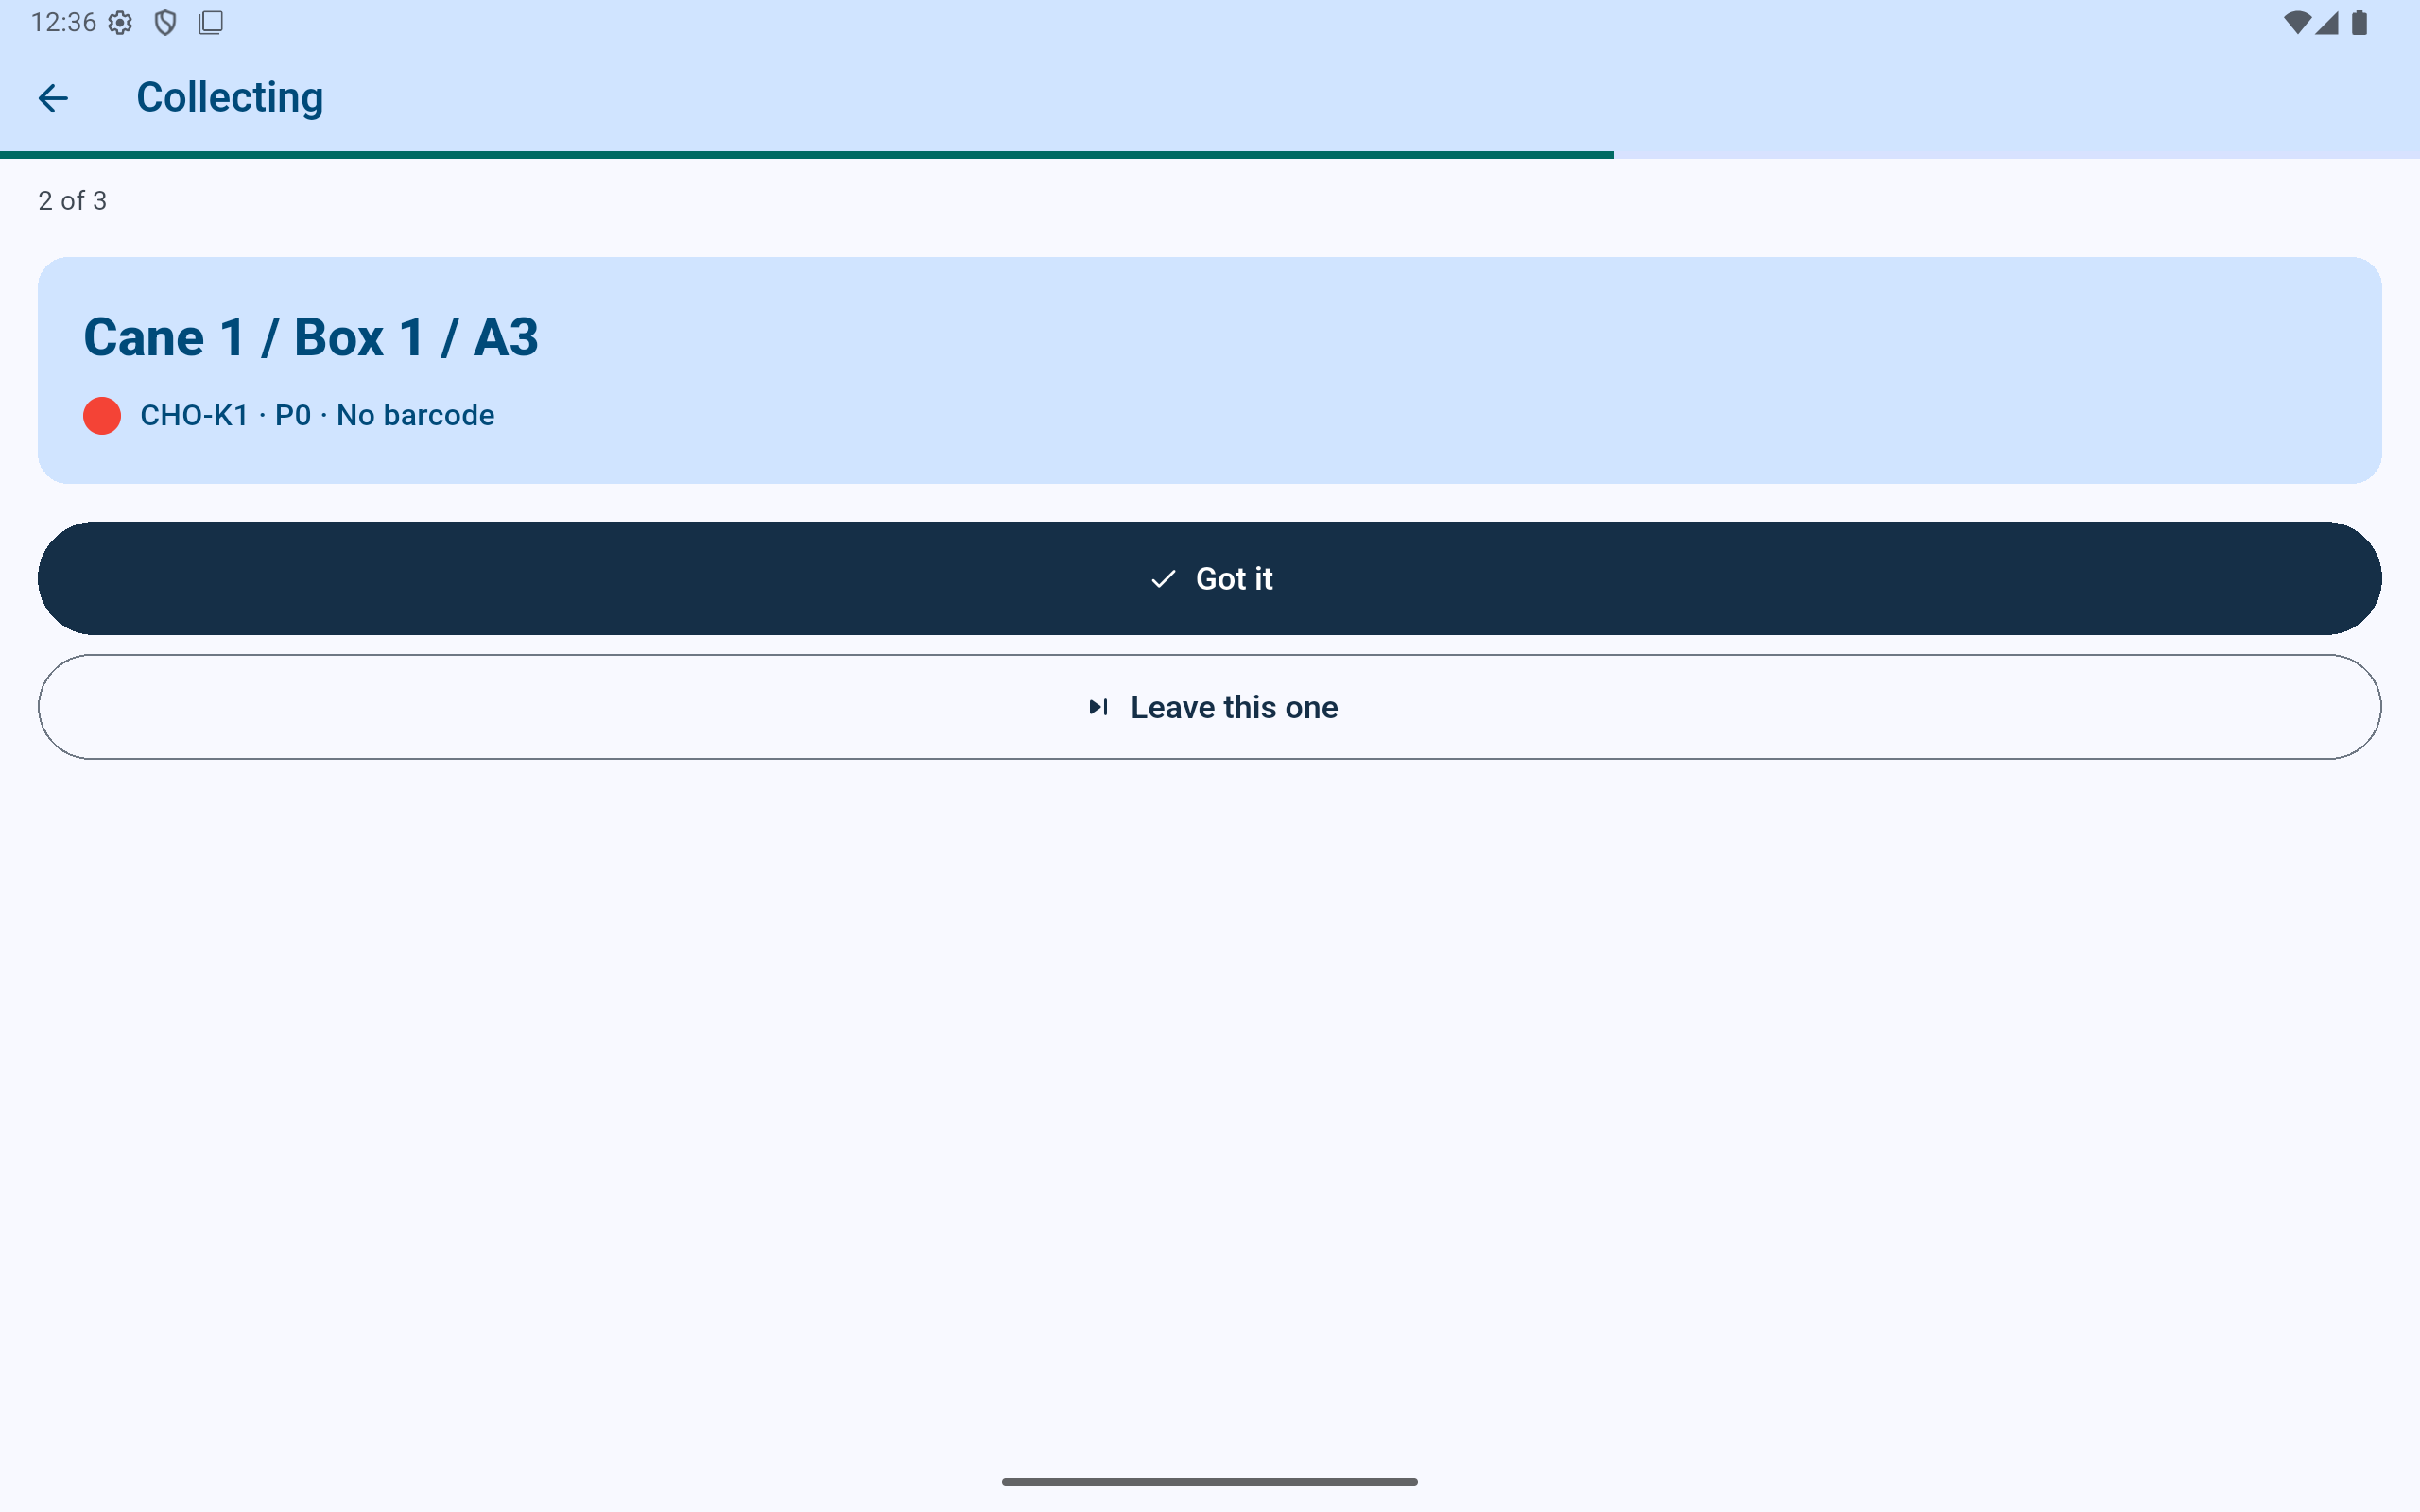
An intentionally unbarcoded record is not treated as a failed scan.
- The address and cell details identify the unbarcoded vial.
- Select Got it after physically confirming and collecting it.
- Select Leave this one to keep it in storage.
After the last item
Read what still needs confirmation.
The completion screen distinguishes scanned removals, unbarcoded removals, vials deliberately left in storage, and barcoded removals still awaiting confirmation. Do not treat the vial count alone as the whole result.
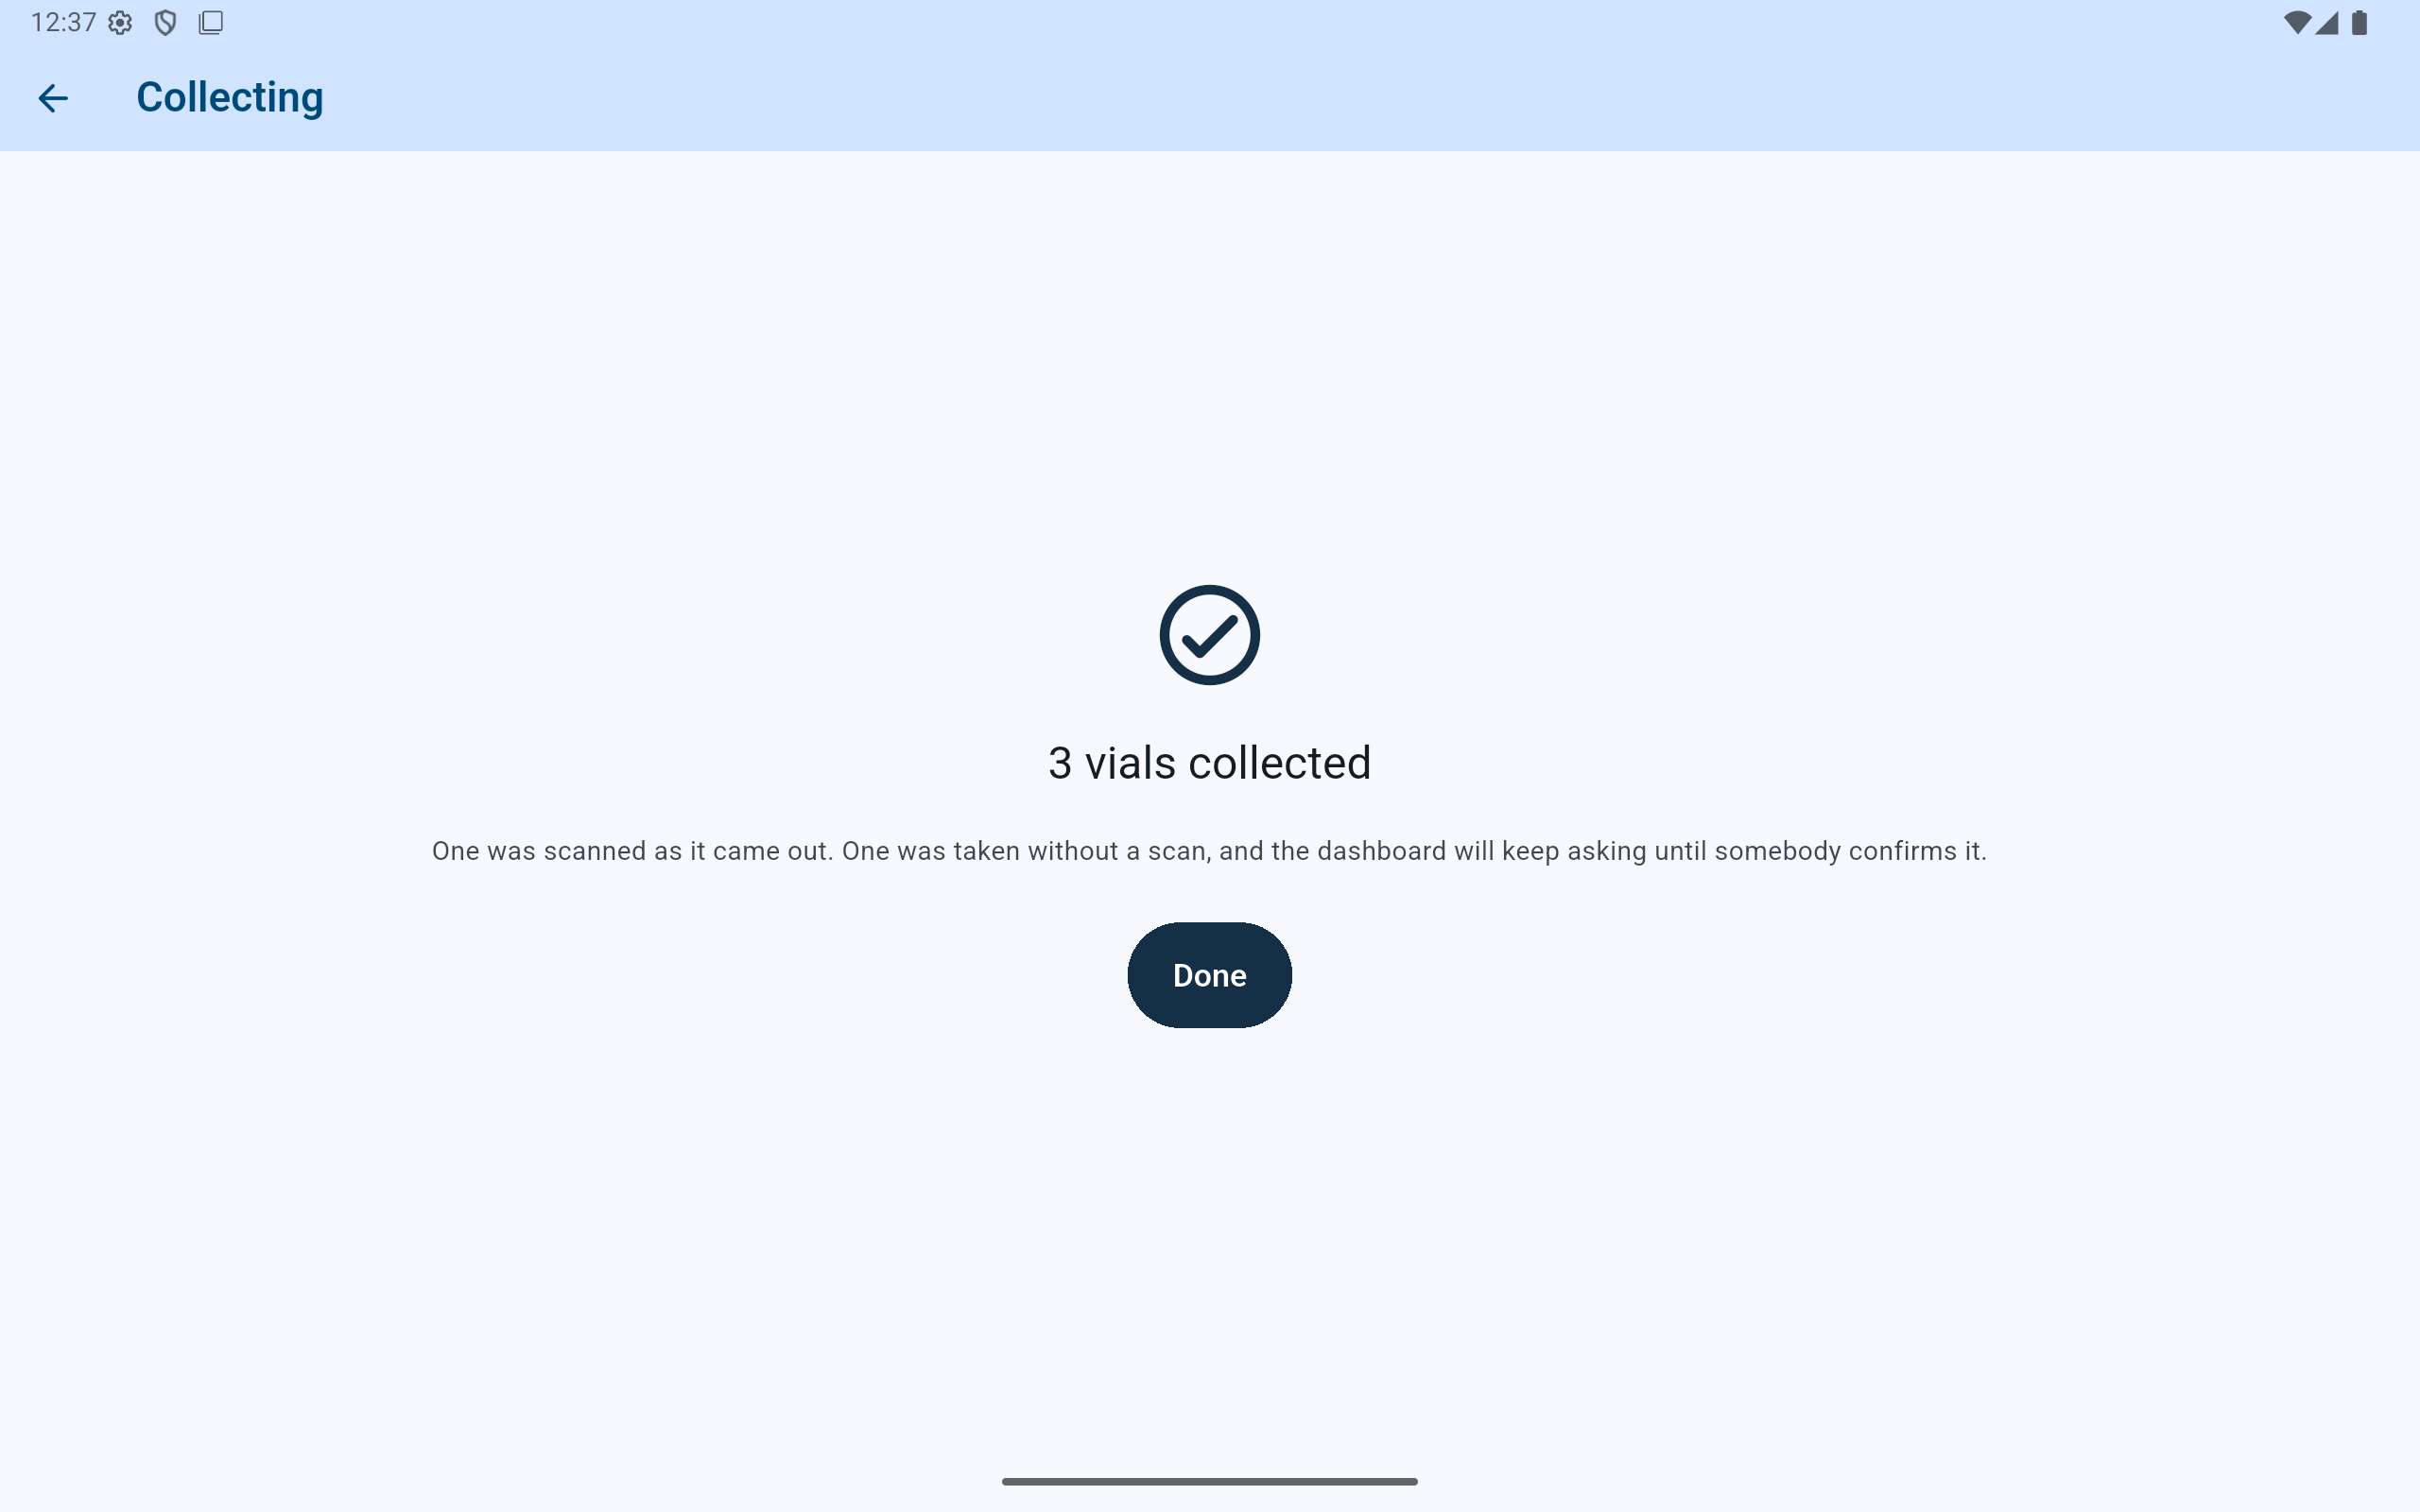
The example completed three pulls, but one barcoded removal still requires later confirmation.
- Confirm the number physically collected.
- Read the standing of scanned and unconfirmed removals.
- After selecting Done, resolve any outstanding scan confirmation from the dashboard.