Do not erase first
Keep the old tablet available until verification is complete.
Do not uninstall CryoIndex, clear its app data, factory-reset the device, or hand it off while it remains the lab's only known-good inventory. The external backup and old tablet are independent recovery paths during the move.
Old tablet
Create a new external copy after the last recorded change.
- Pause inventory changes during the transfer window.
- Open Settings → Data → Back up or restore.
- Select Save a copy and place the
.cix-backupsomewhere outside the tablet. - Open the destination and confirm the expected filename, recent date, and nonzero file size.
- Record the dashboard counts and several representative vial identifiers for later comparison.
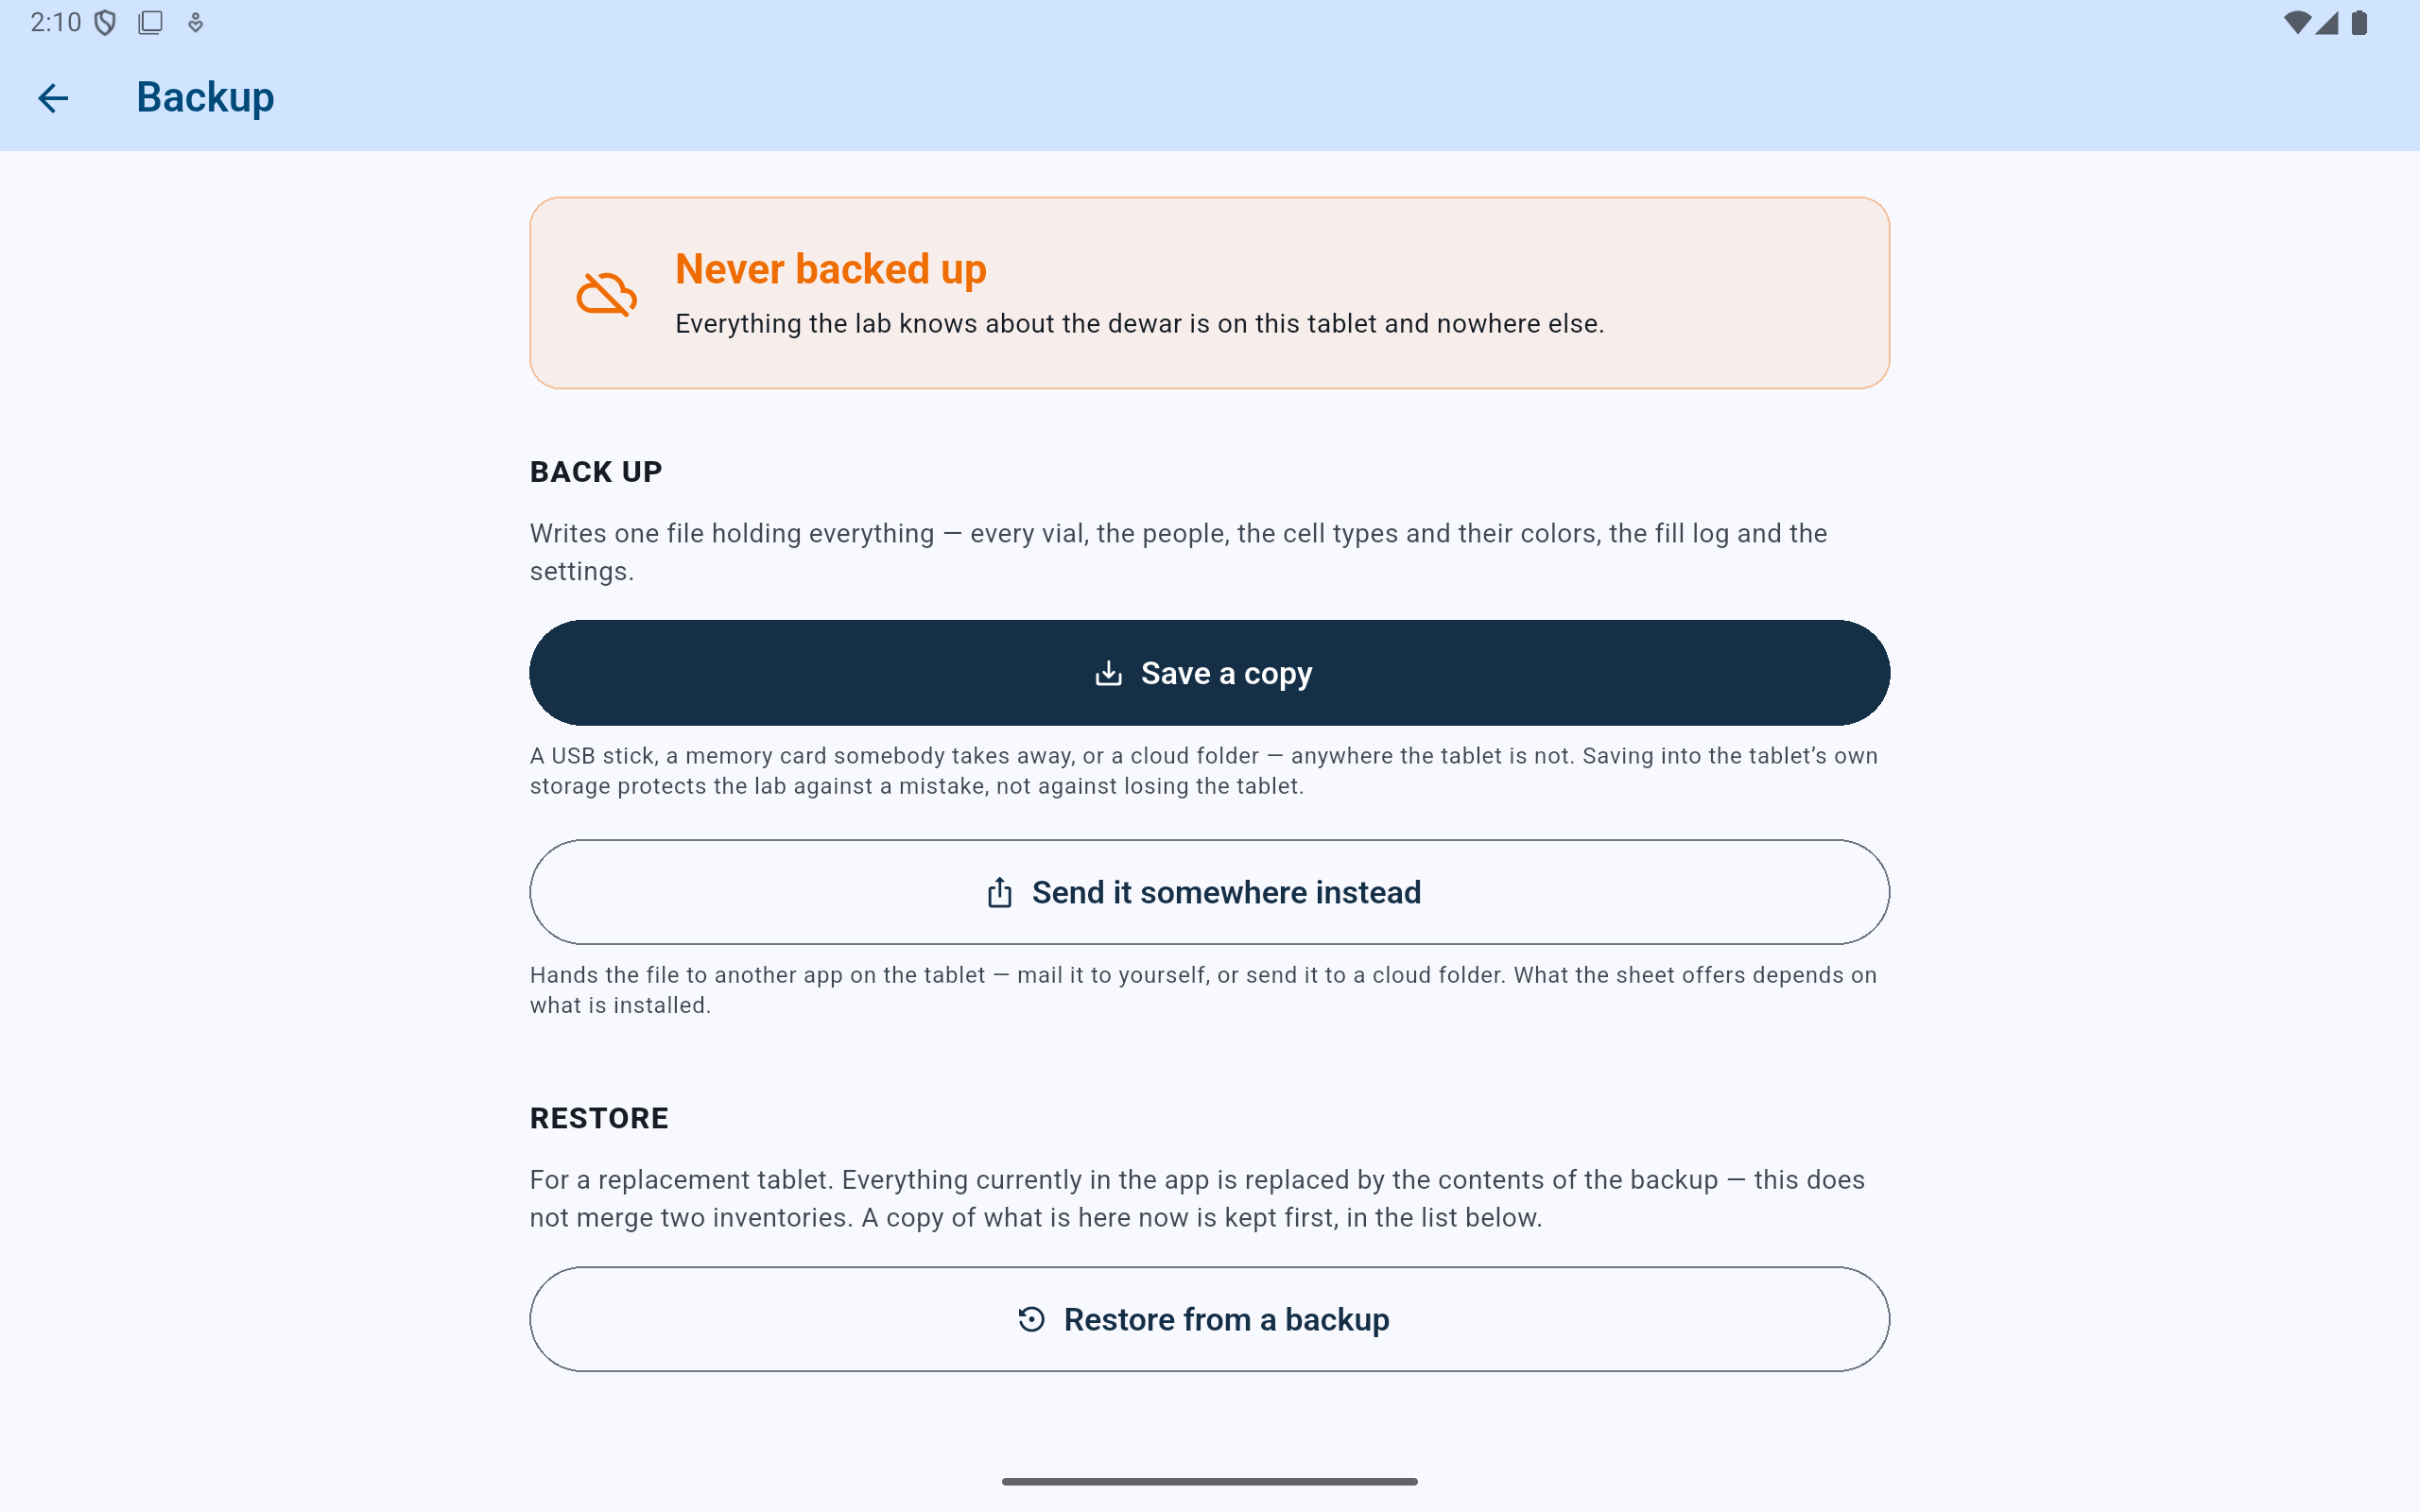
A replacement requires a verified file outside the old tablet; an automatic copy left on the old device cannot make the trip.
- Create one file containing the complete lab.
- Choose a destination outside the old tablet.
- Do not rely on the restore controls until the external file is verified.
Replacement tablet
Install the newest available CryoIndex build first.
Sign in to the Google Play account the lab uses for app installation and updates, install CryoIndex, and apply every available update. Configure the tablet's screen lock, approved storage access, scanner connection, and on-screen-keyboard setting before routine work resumes.
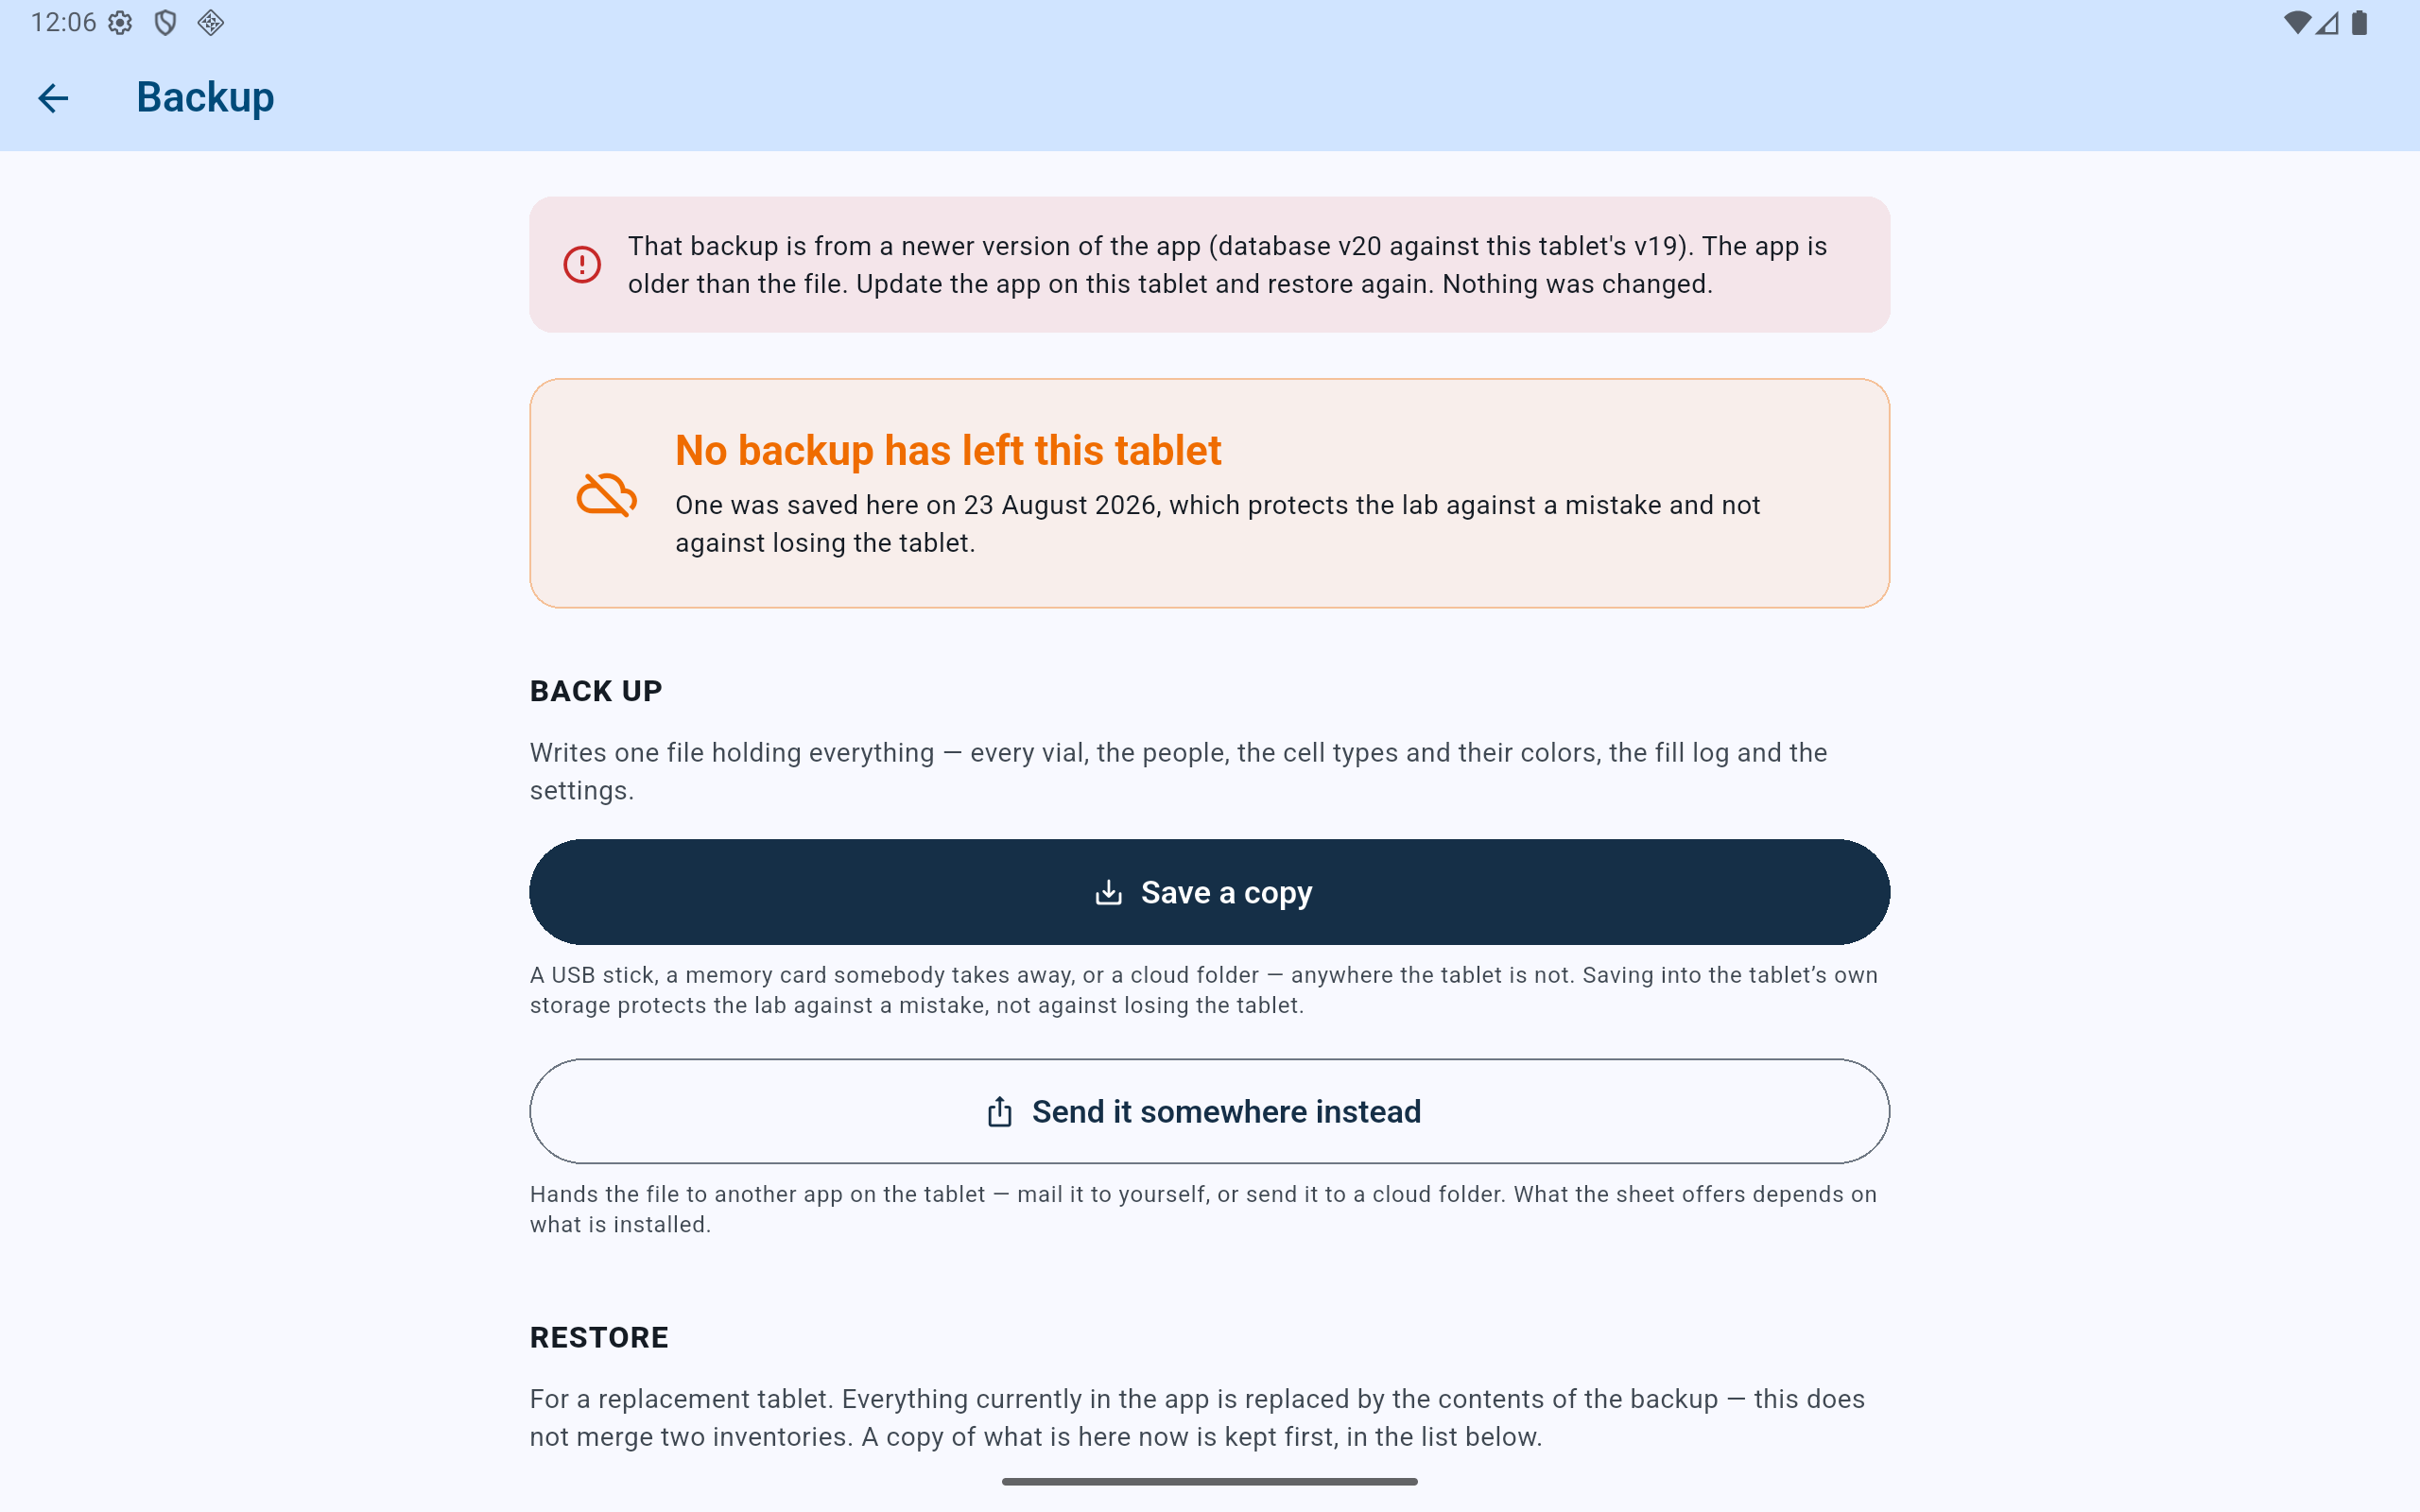
An older build must refuse a backup format it cannot interpret. Update the replacement app rather than editing the backup file.
- A version refusal leaves the destination unchanged.
- Install the latest build, then choose the same preserved file again.
Restore the whole lab
Match the summary before authorizing replacement.
Open Settings → Data → Back up or restore → Restore from a backup and select the verified file. Confirm its date plus vial, cell-type, people, and fill-record counts. Restore replaces everything currently in the destination app; it does not combine tablets.
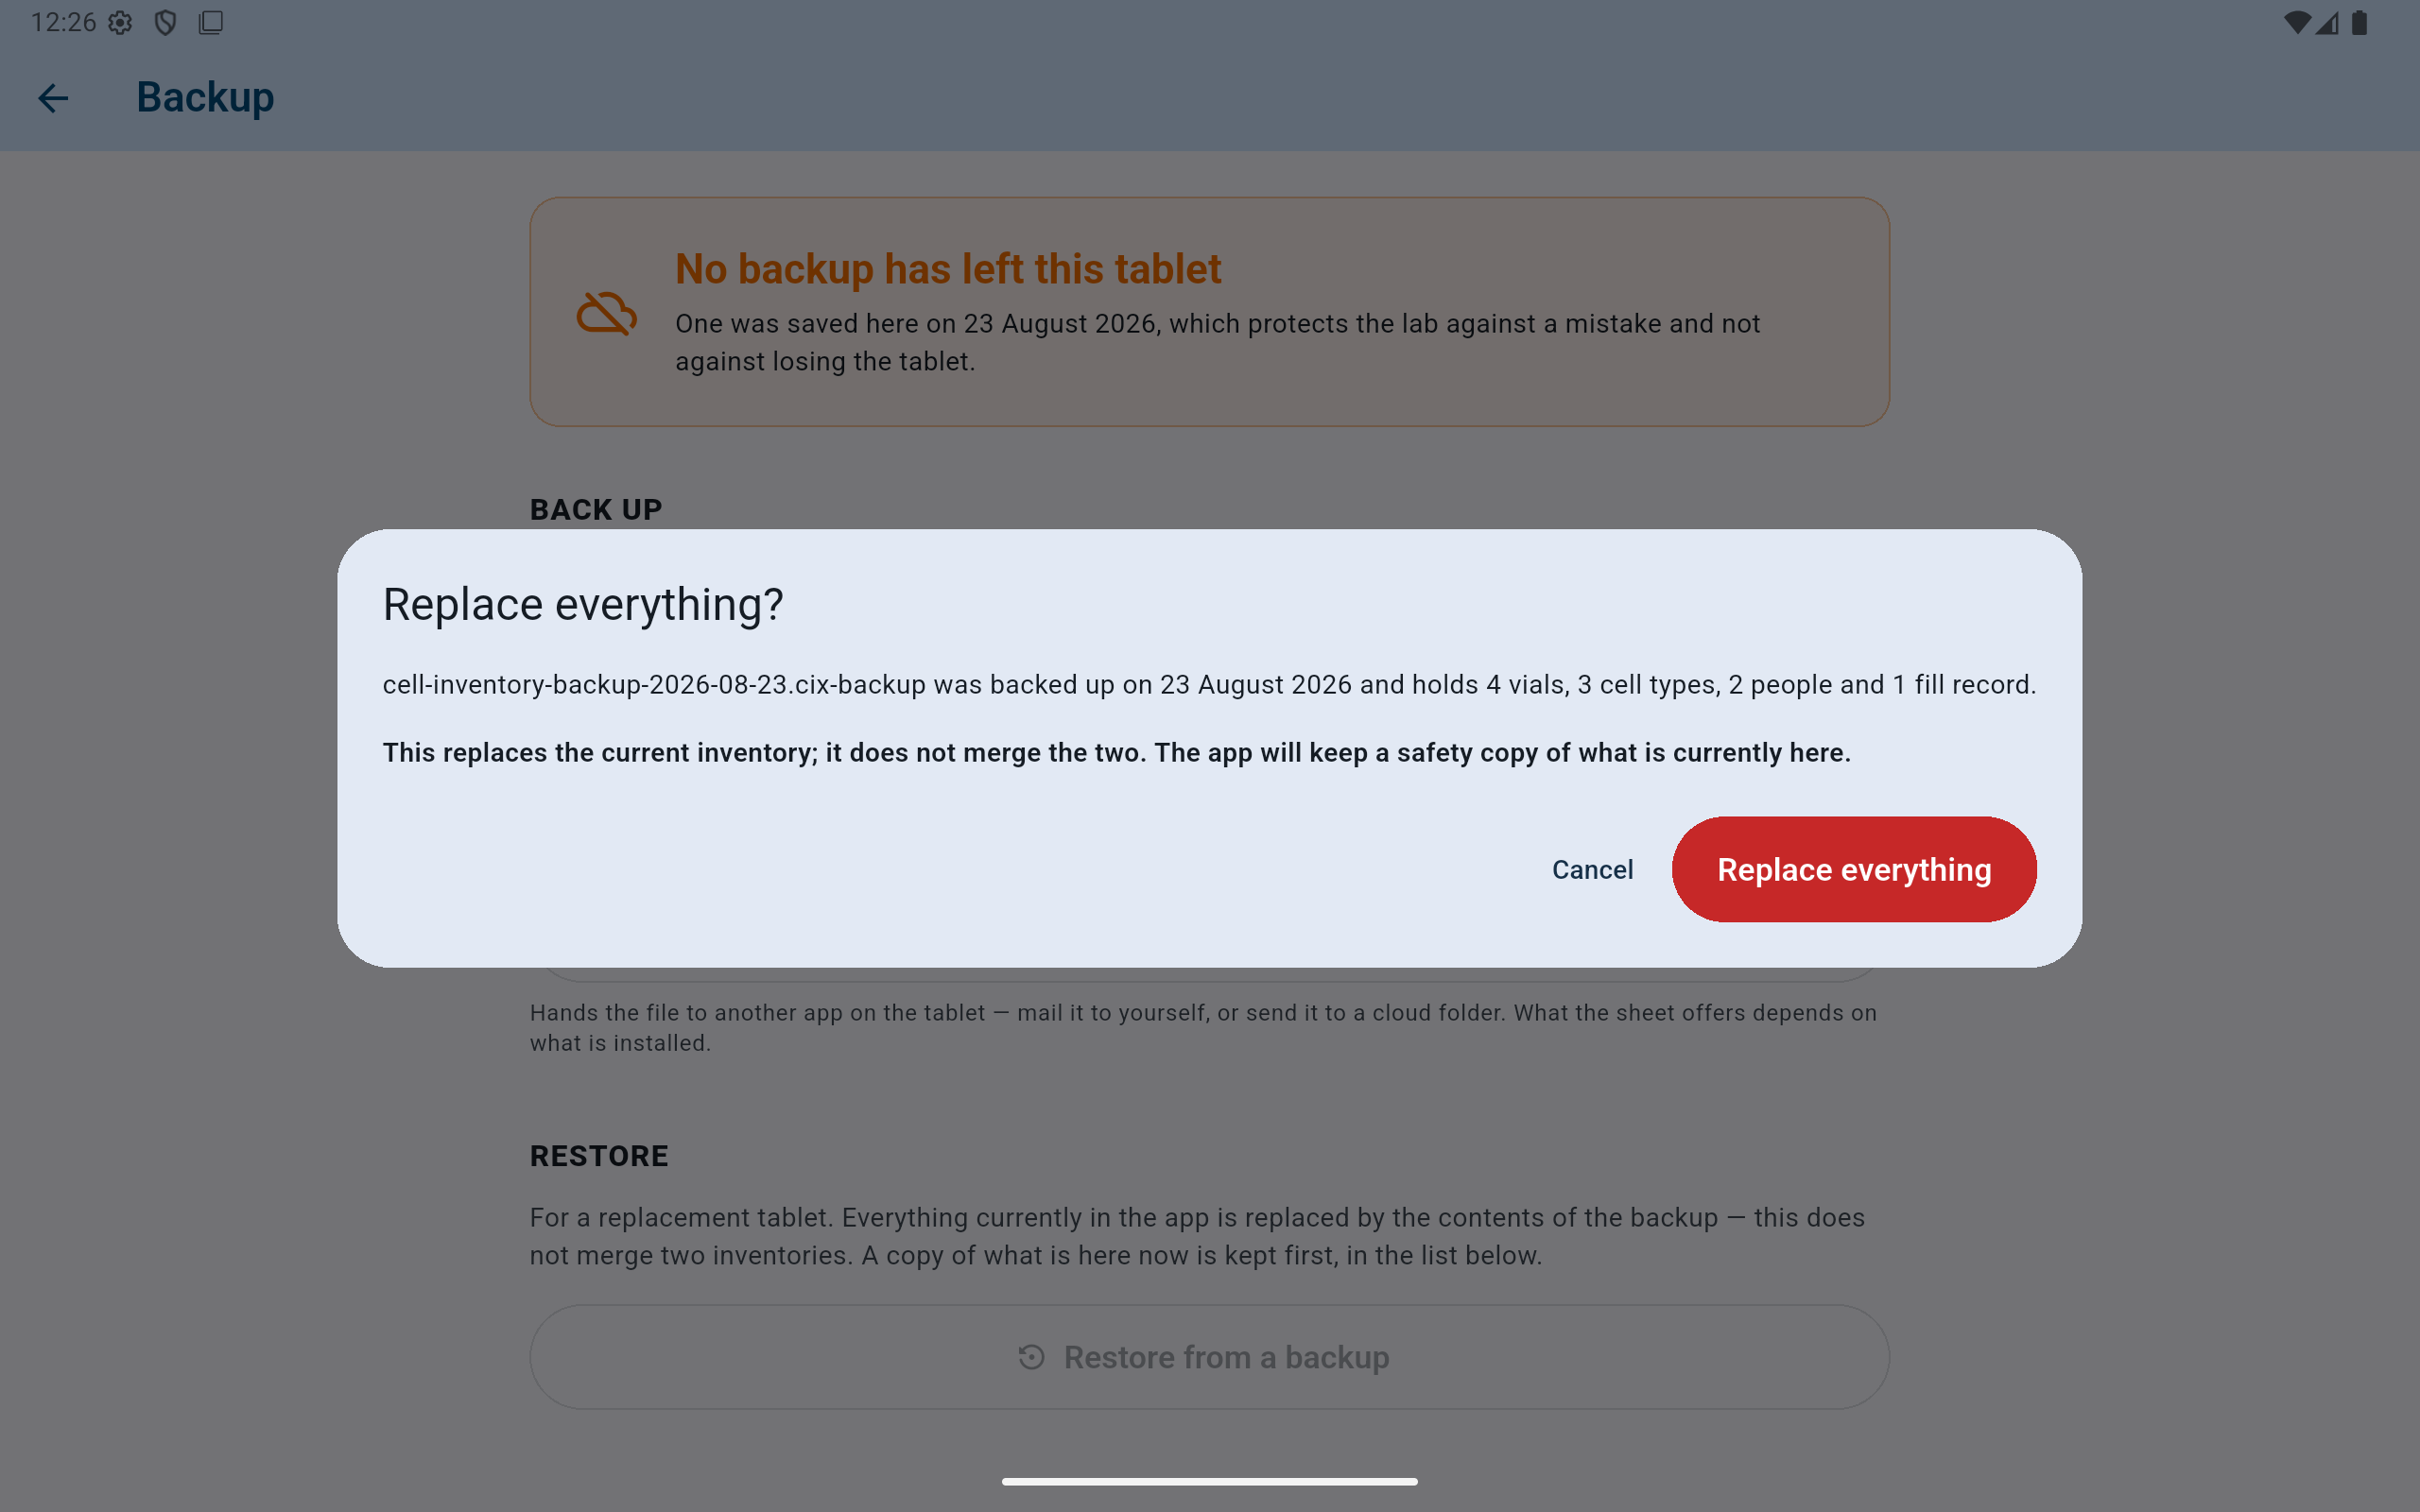
Cancel for any unexpected filename, date, or count. The old tablet and original backup should still be untouched.
- Identify the backup by filename and date.
- Compare every displayed count with the old tablet.
- Authorize replacement only after the summary matches.
Acceptance check
Do not judge success by the dashboard alone.
- Verify lab name, second line, logo, People, Cell types, Vial fields, Storage, Alerts, and Admin PIN behavior.
- Compare dashboard counts and liquid-nitrogen status.
- Search several known vials across different boxes and compare exact addresses and metadata.
- Review recent Activity, outstanding items, removal history, and fill records.
- Run the connected barcode scanner check on the replacement tablet.
- Create and verify a fresh external backup from the replacement.
Only after the lab accepts these checks should the old tablet be wiped or repurposed. Follow the institution's process for removing research data from retired hardware.